
Rogue Spirit graphics summary
Hello everyone!
My name is Daniel Stańczak and I would like to present to you a summary of the graphics in our project Rogue Spirit. I’ve been working in game dev for eight years. In our studio, I work as 3D & LA Artist. You can check my portfolio on Artstation
Almost three years after founding the KIDS WITH STICKS studio, we are at the end of the production of Rogue Spirit. From the beginning of production, our main graphic references were the films of the Ghibli studio. In retrospect, I think that the desire to recreate such a complex and difficult style in 3D, was a big challenge, especially for such a small and inexperienced team. However, we tried to stick as close as possible to the assumptions we drew from watching Ghibli films. I encourage you to take a moment to see the final look of our project, to read a summary of how we created assets, what was helpful for us in the creation process, and what we struggled with while creating the artwork for Rogue Spirit!
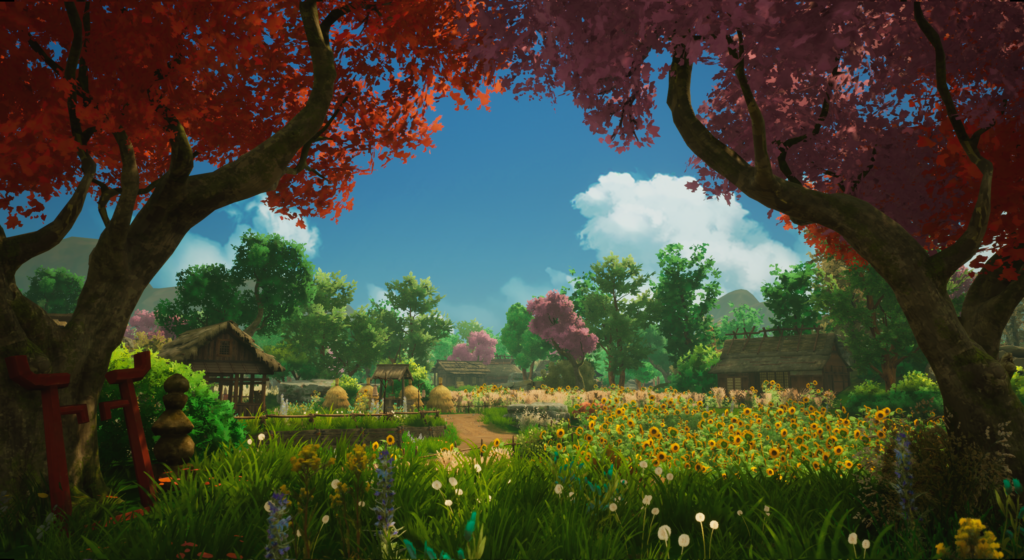
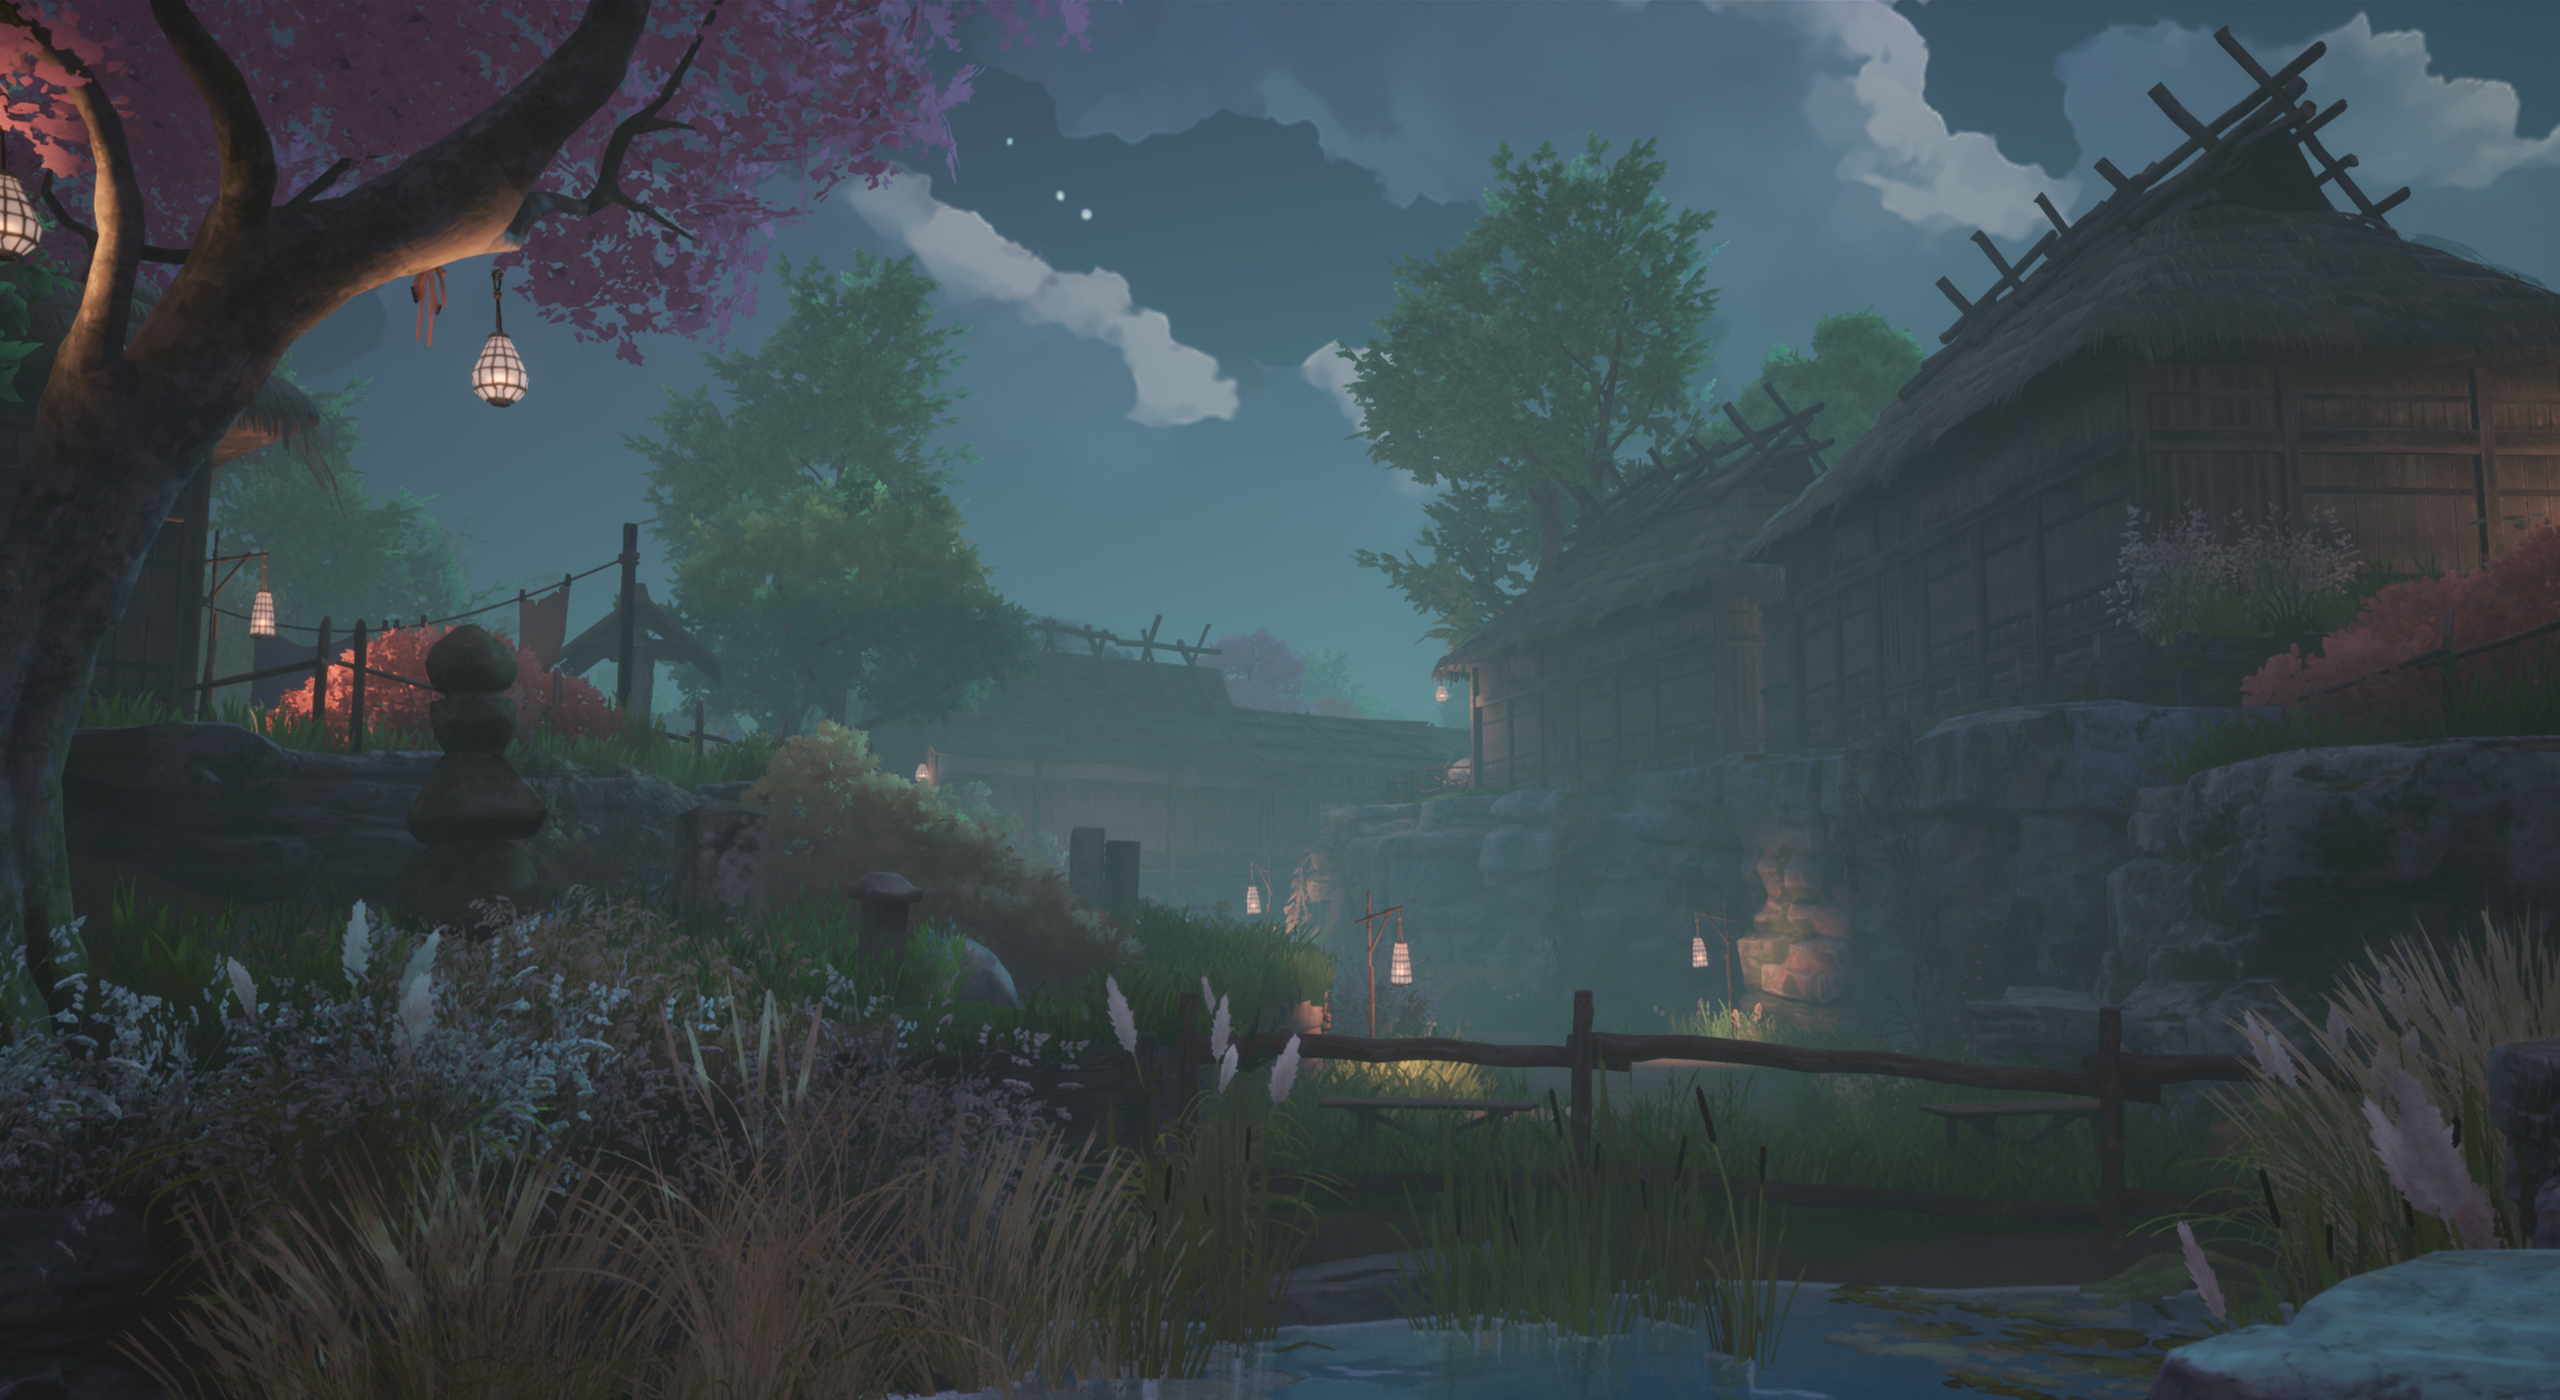
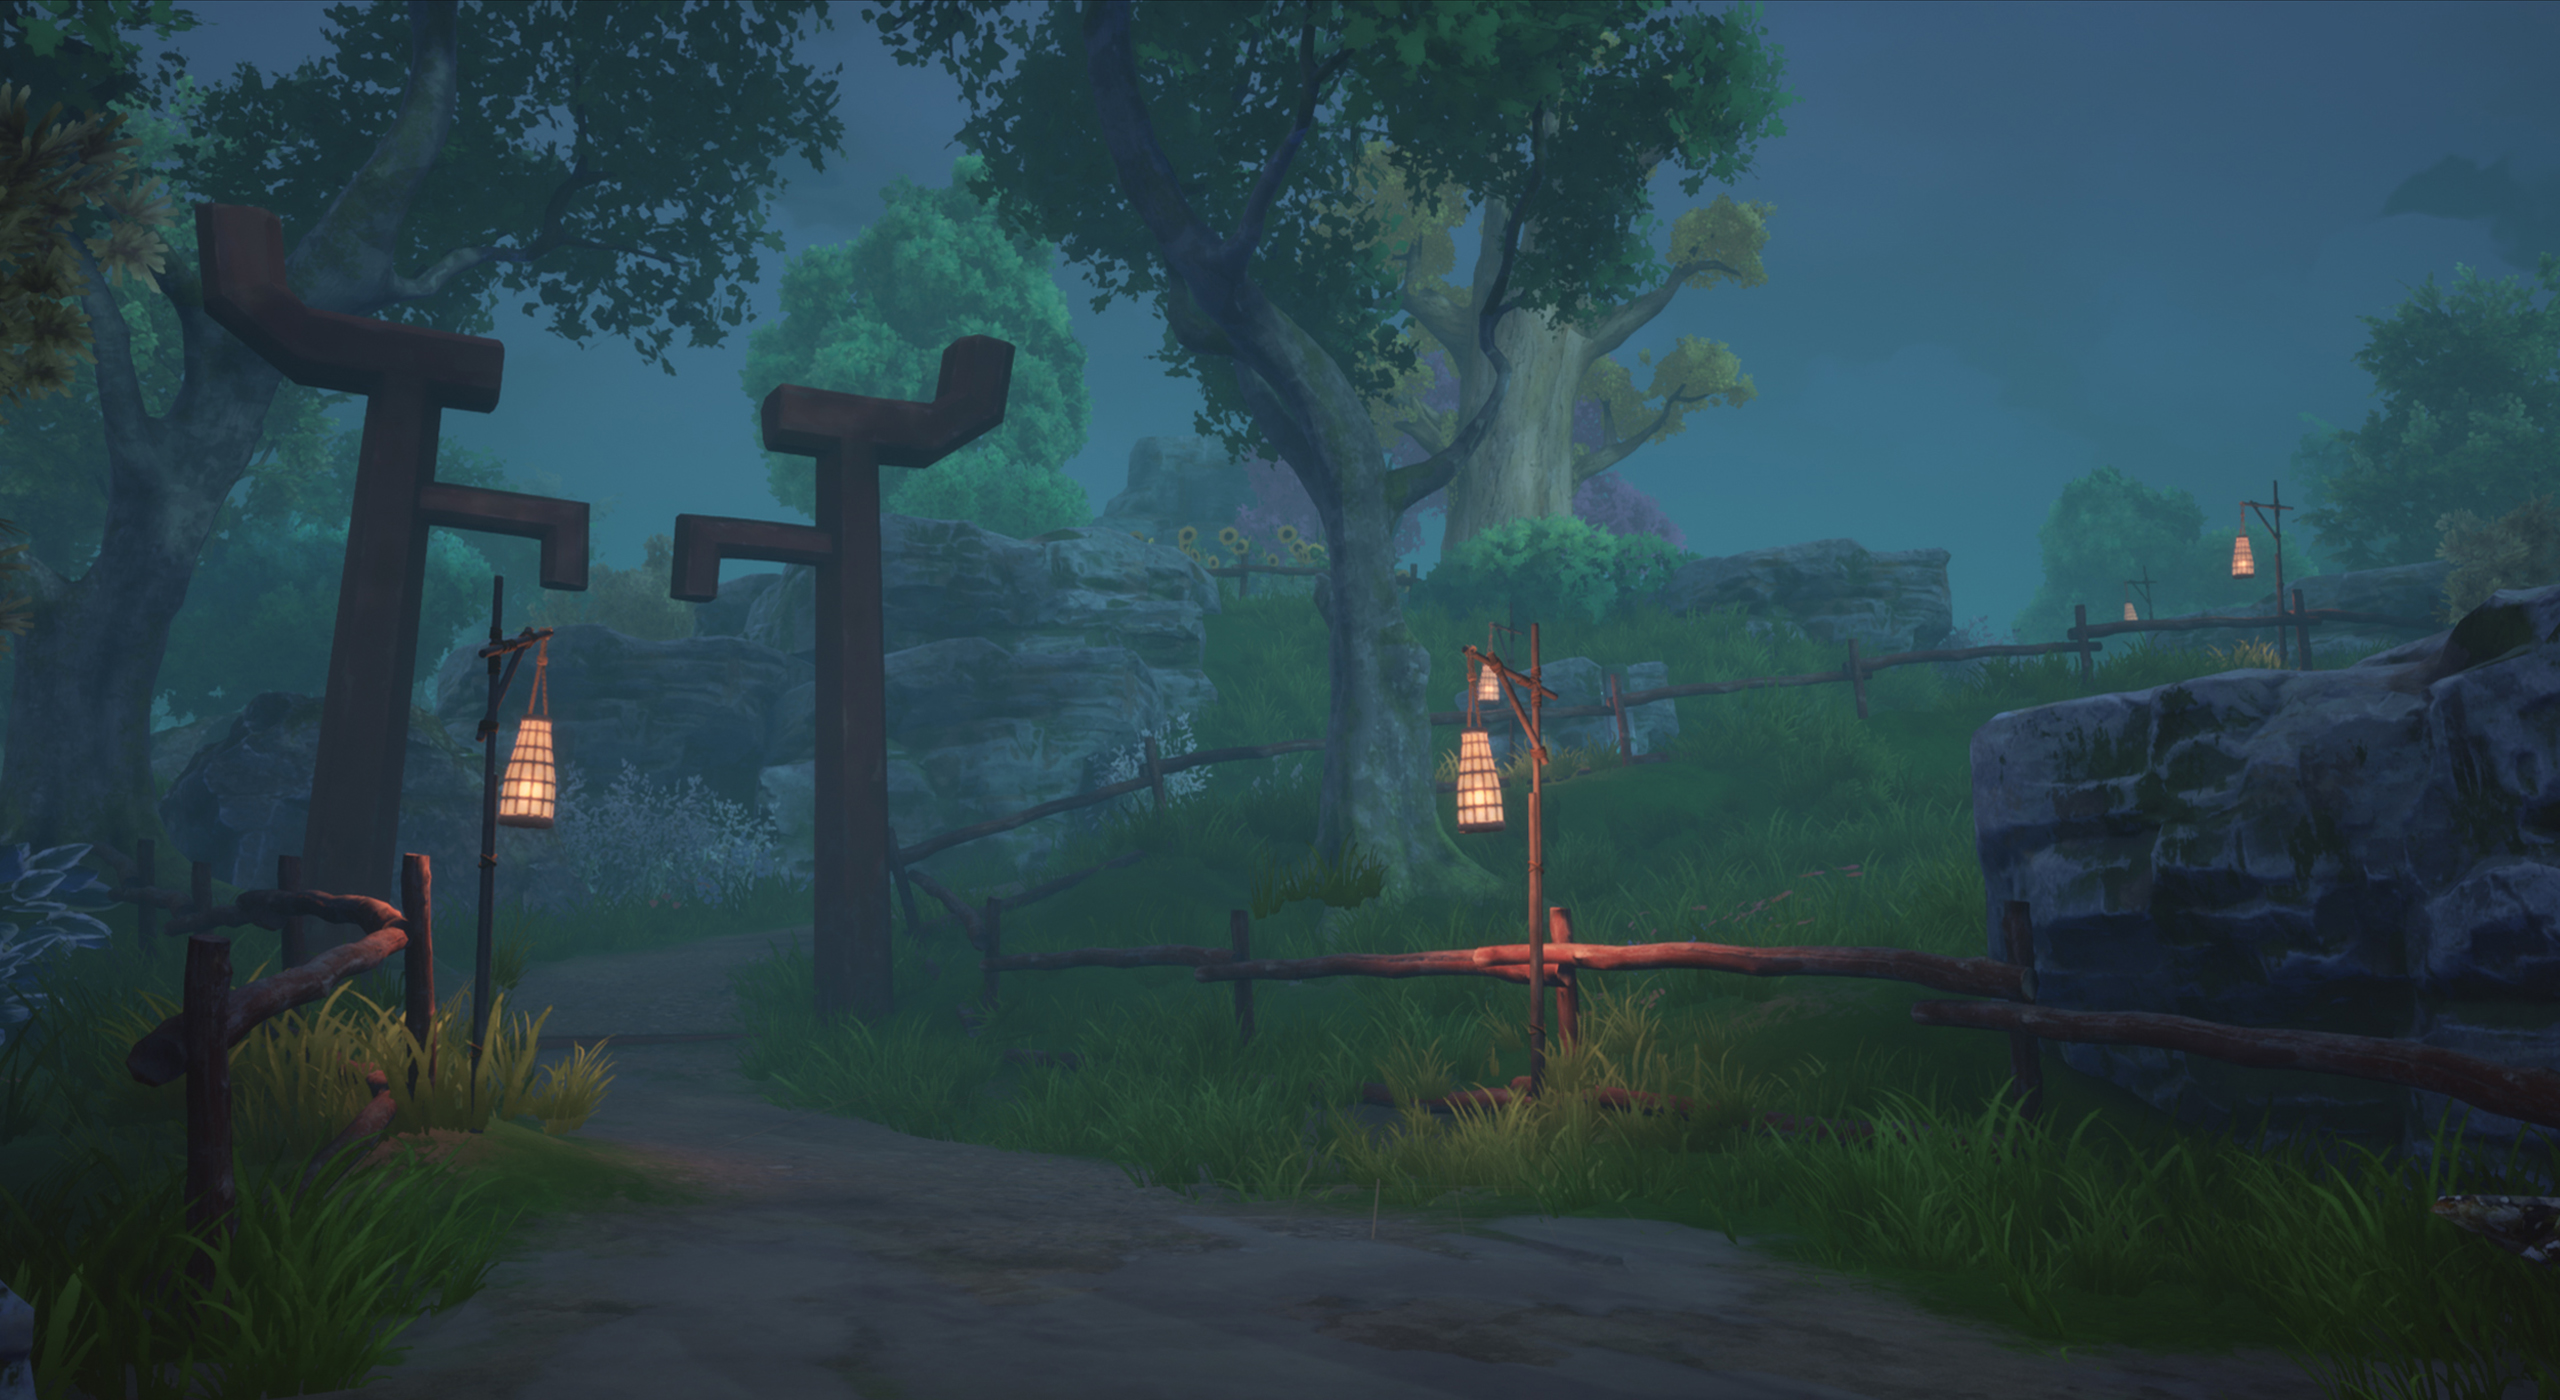
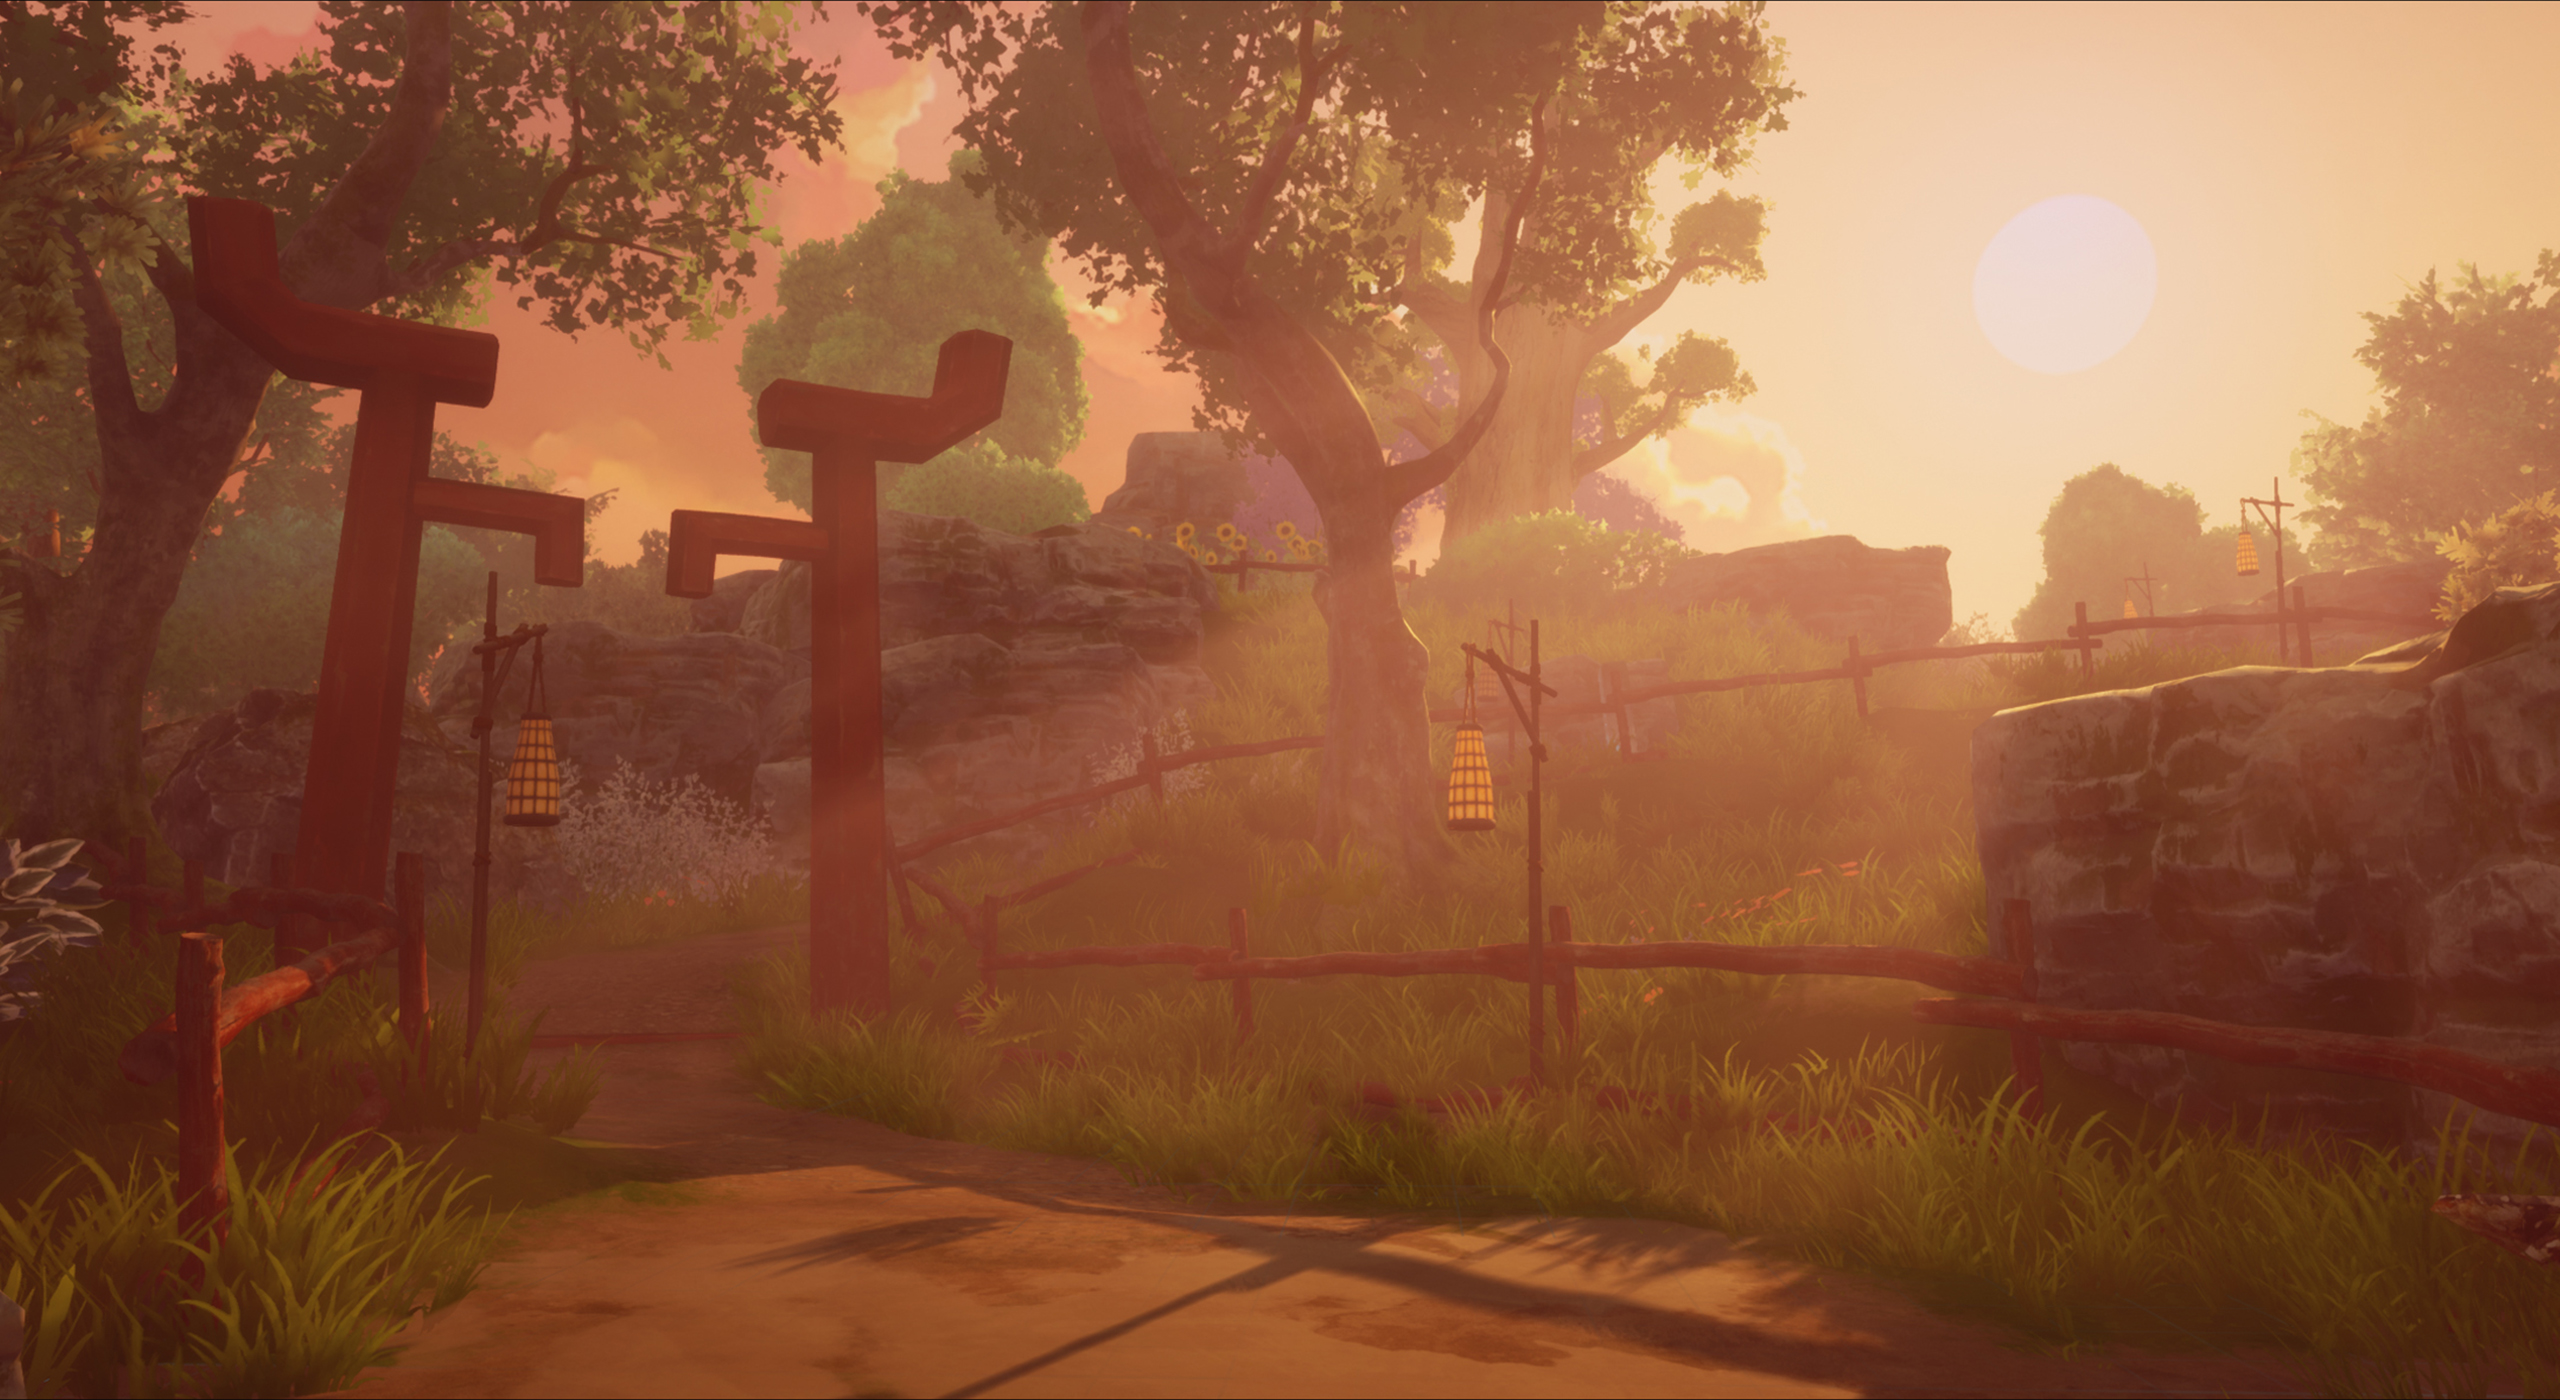
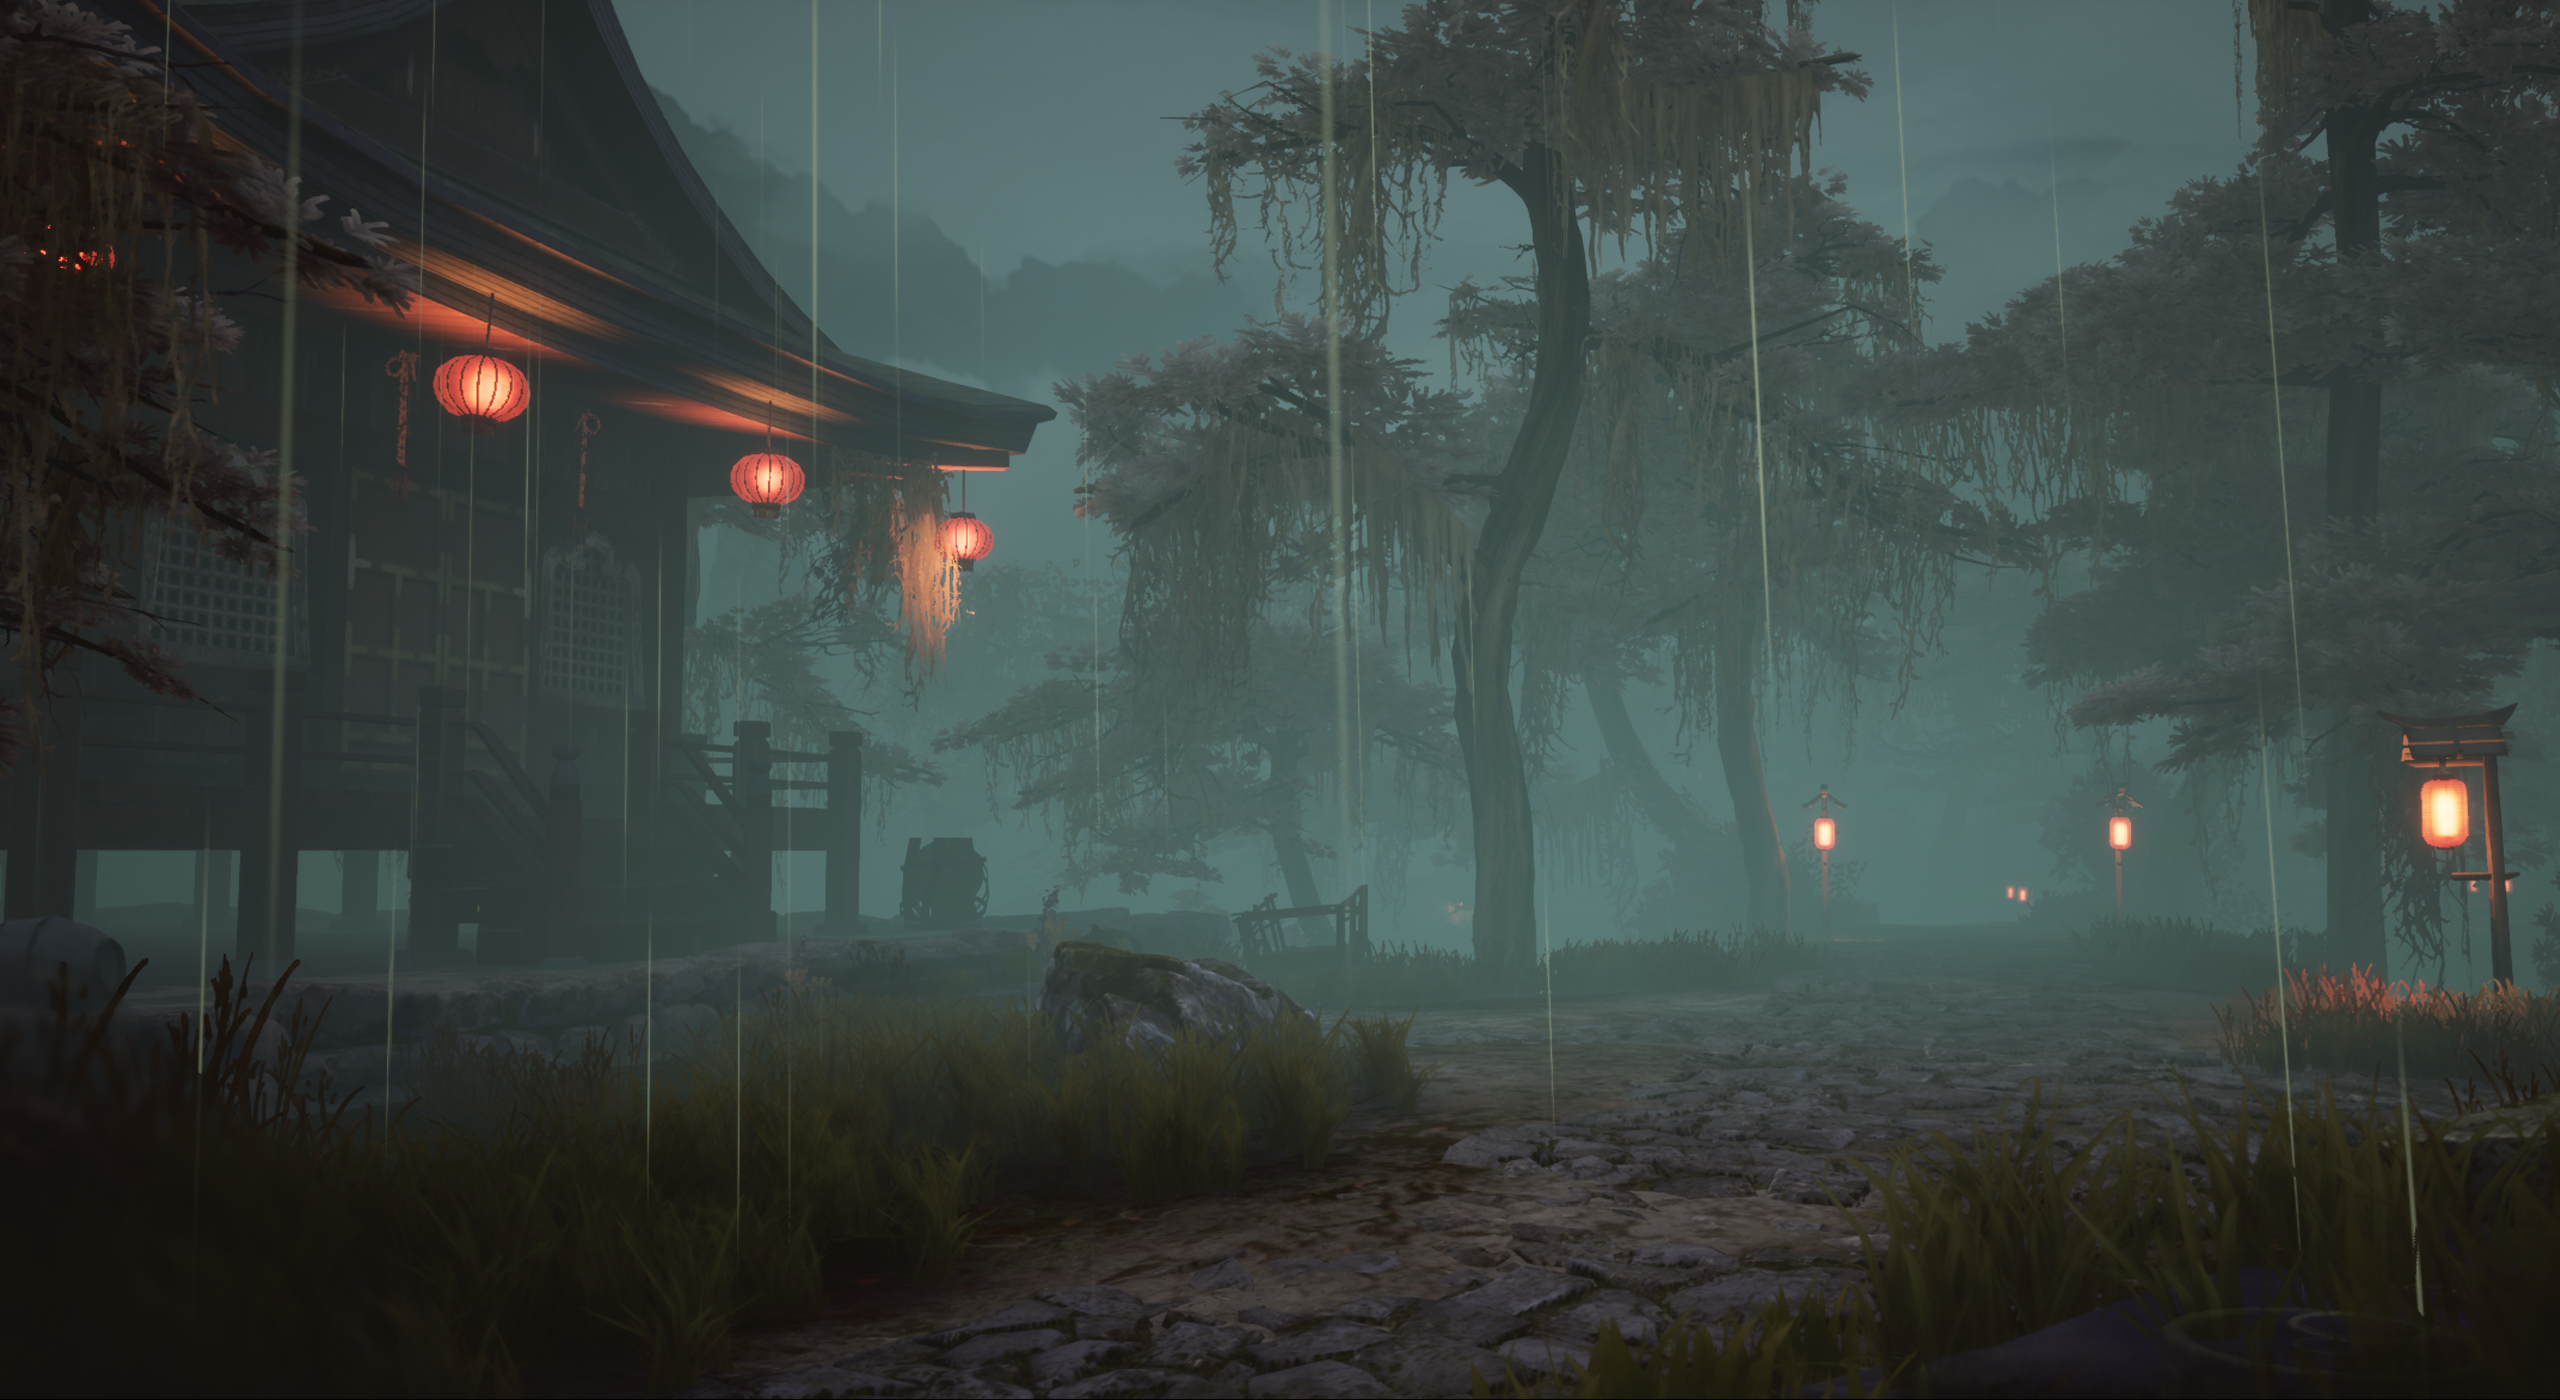
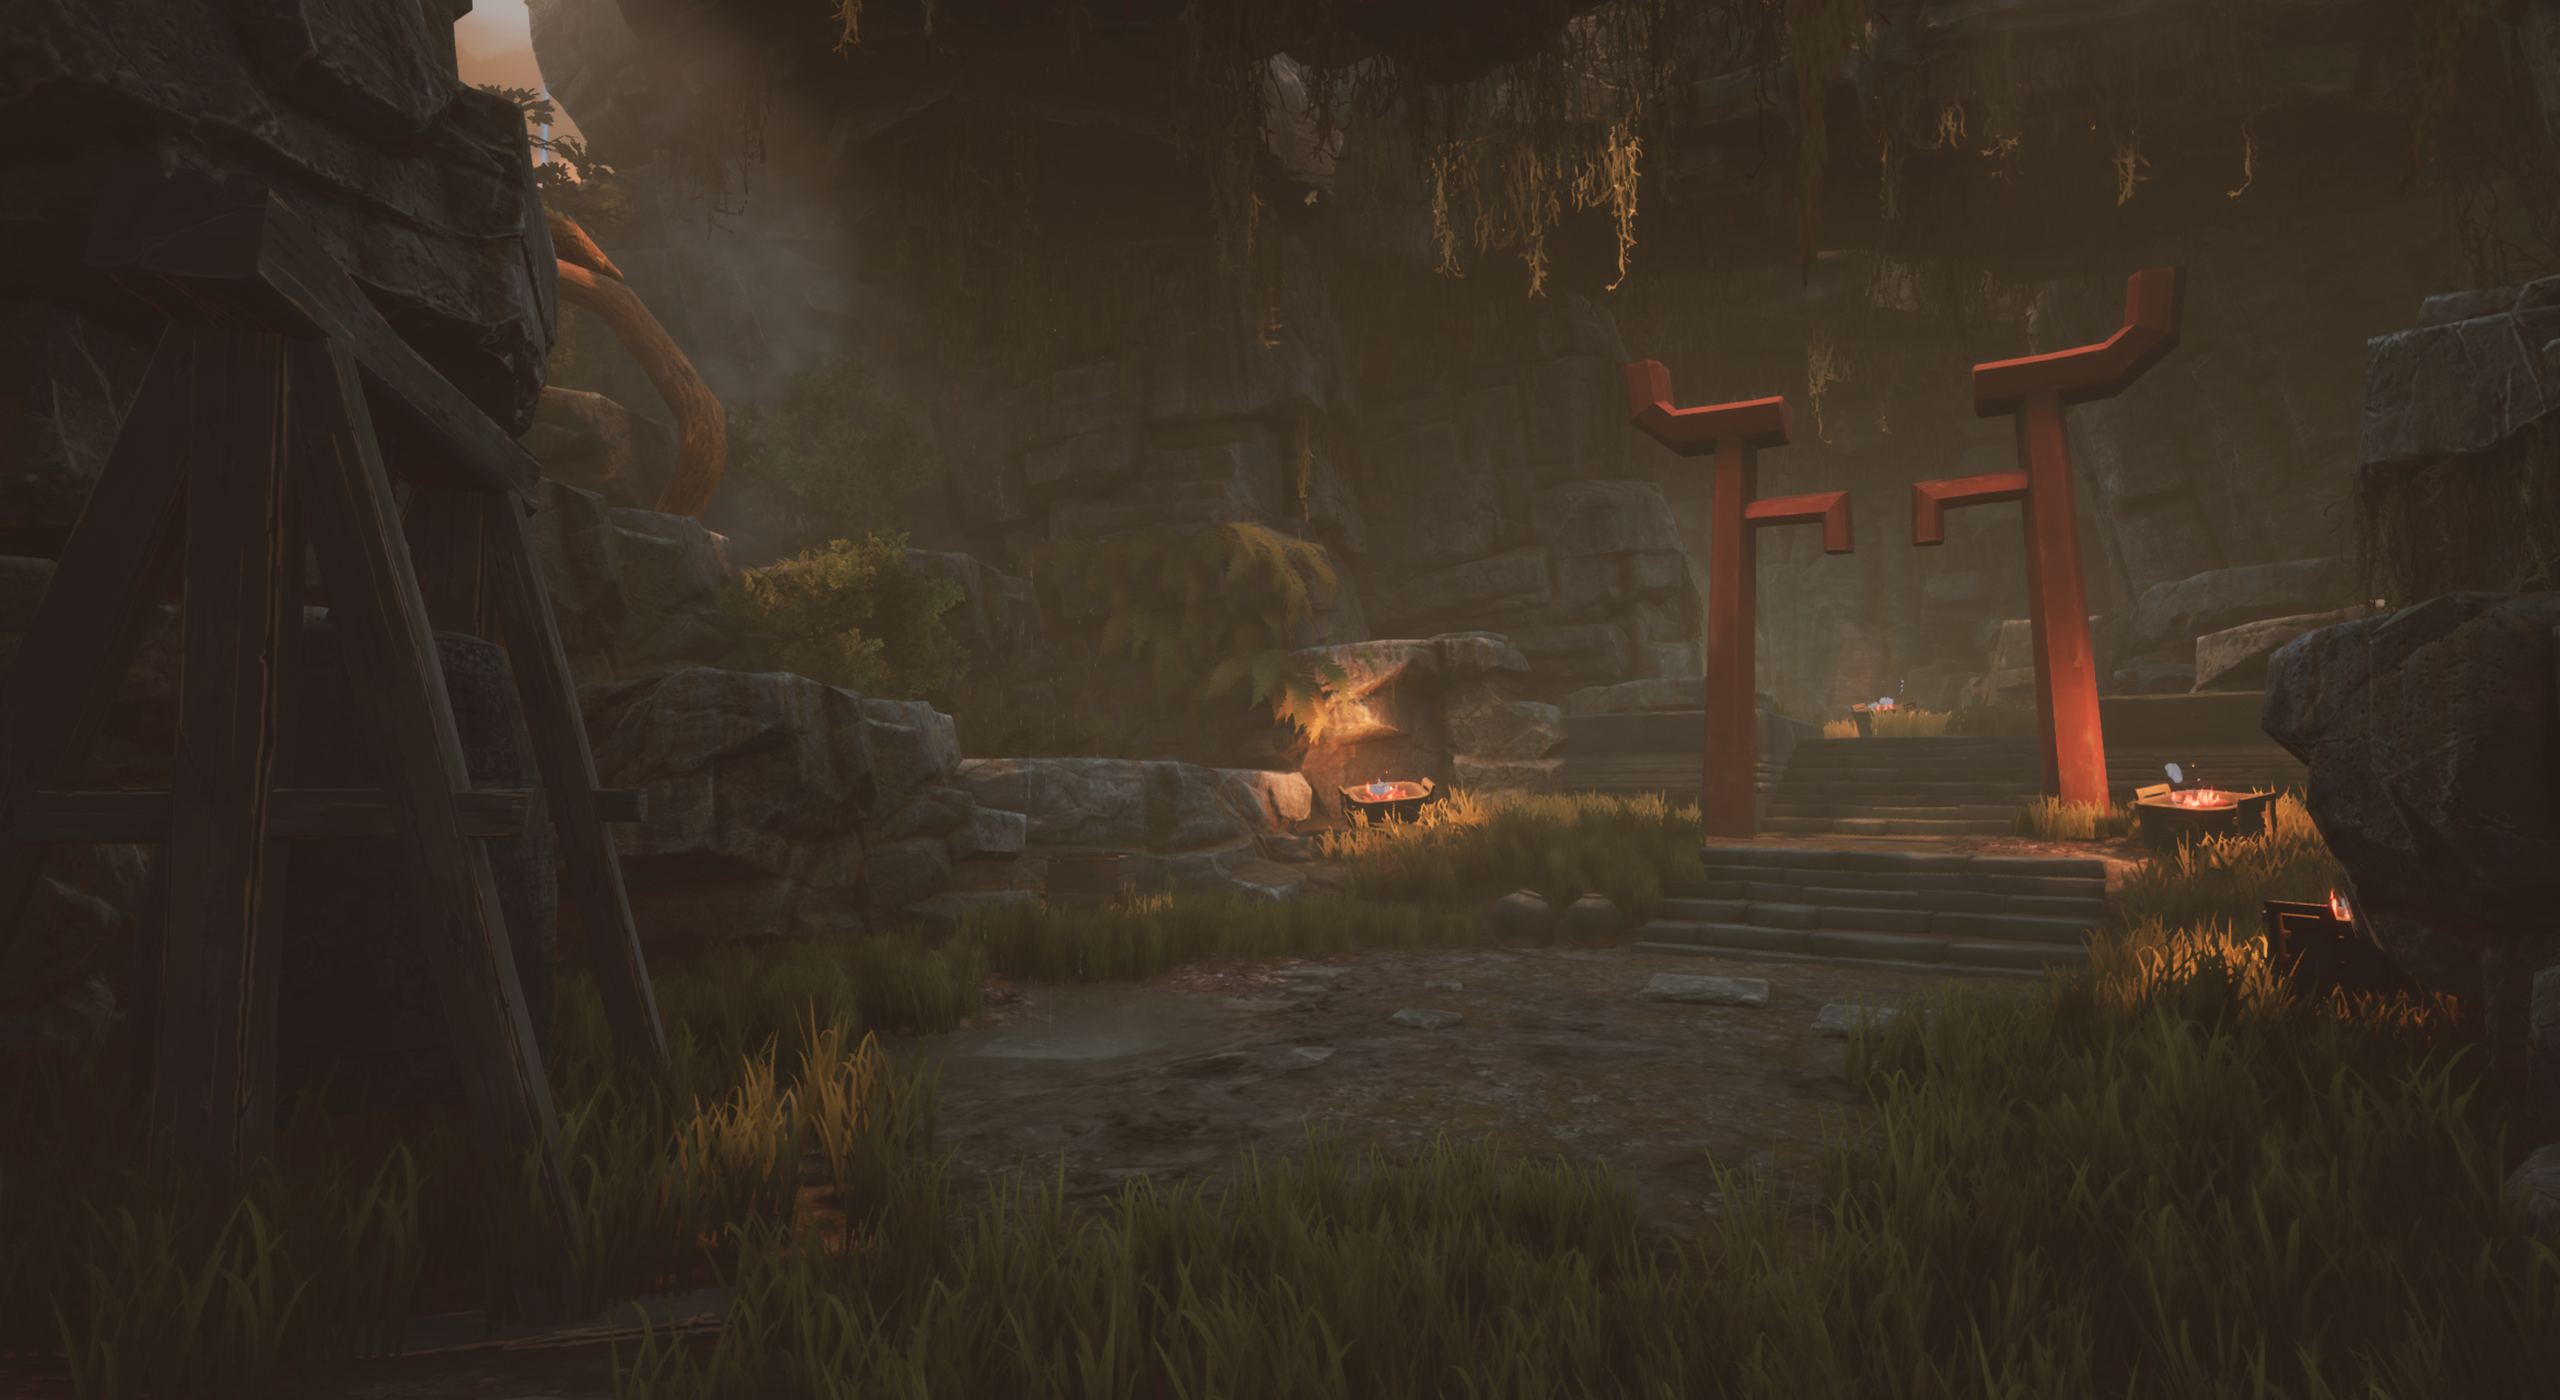
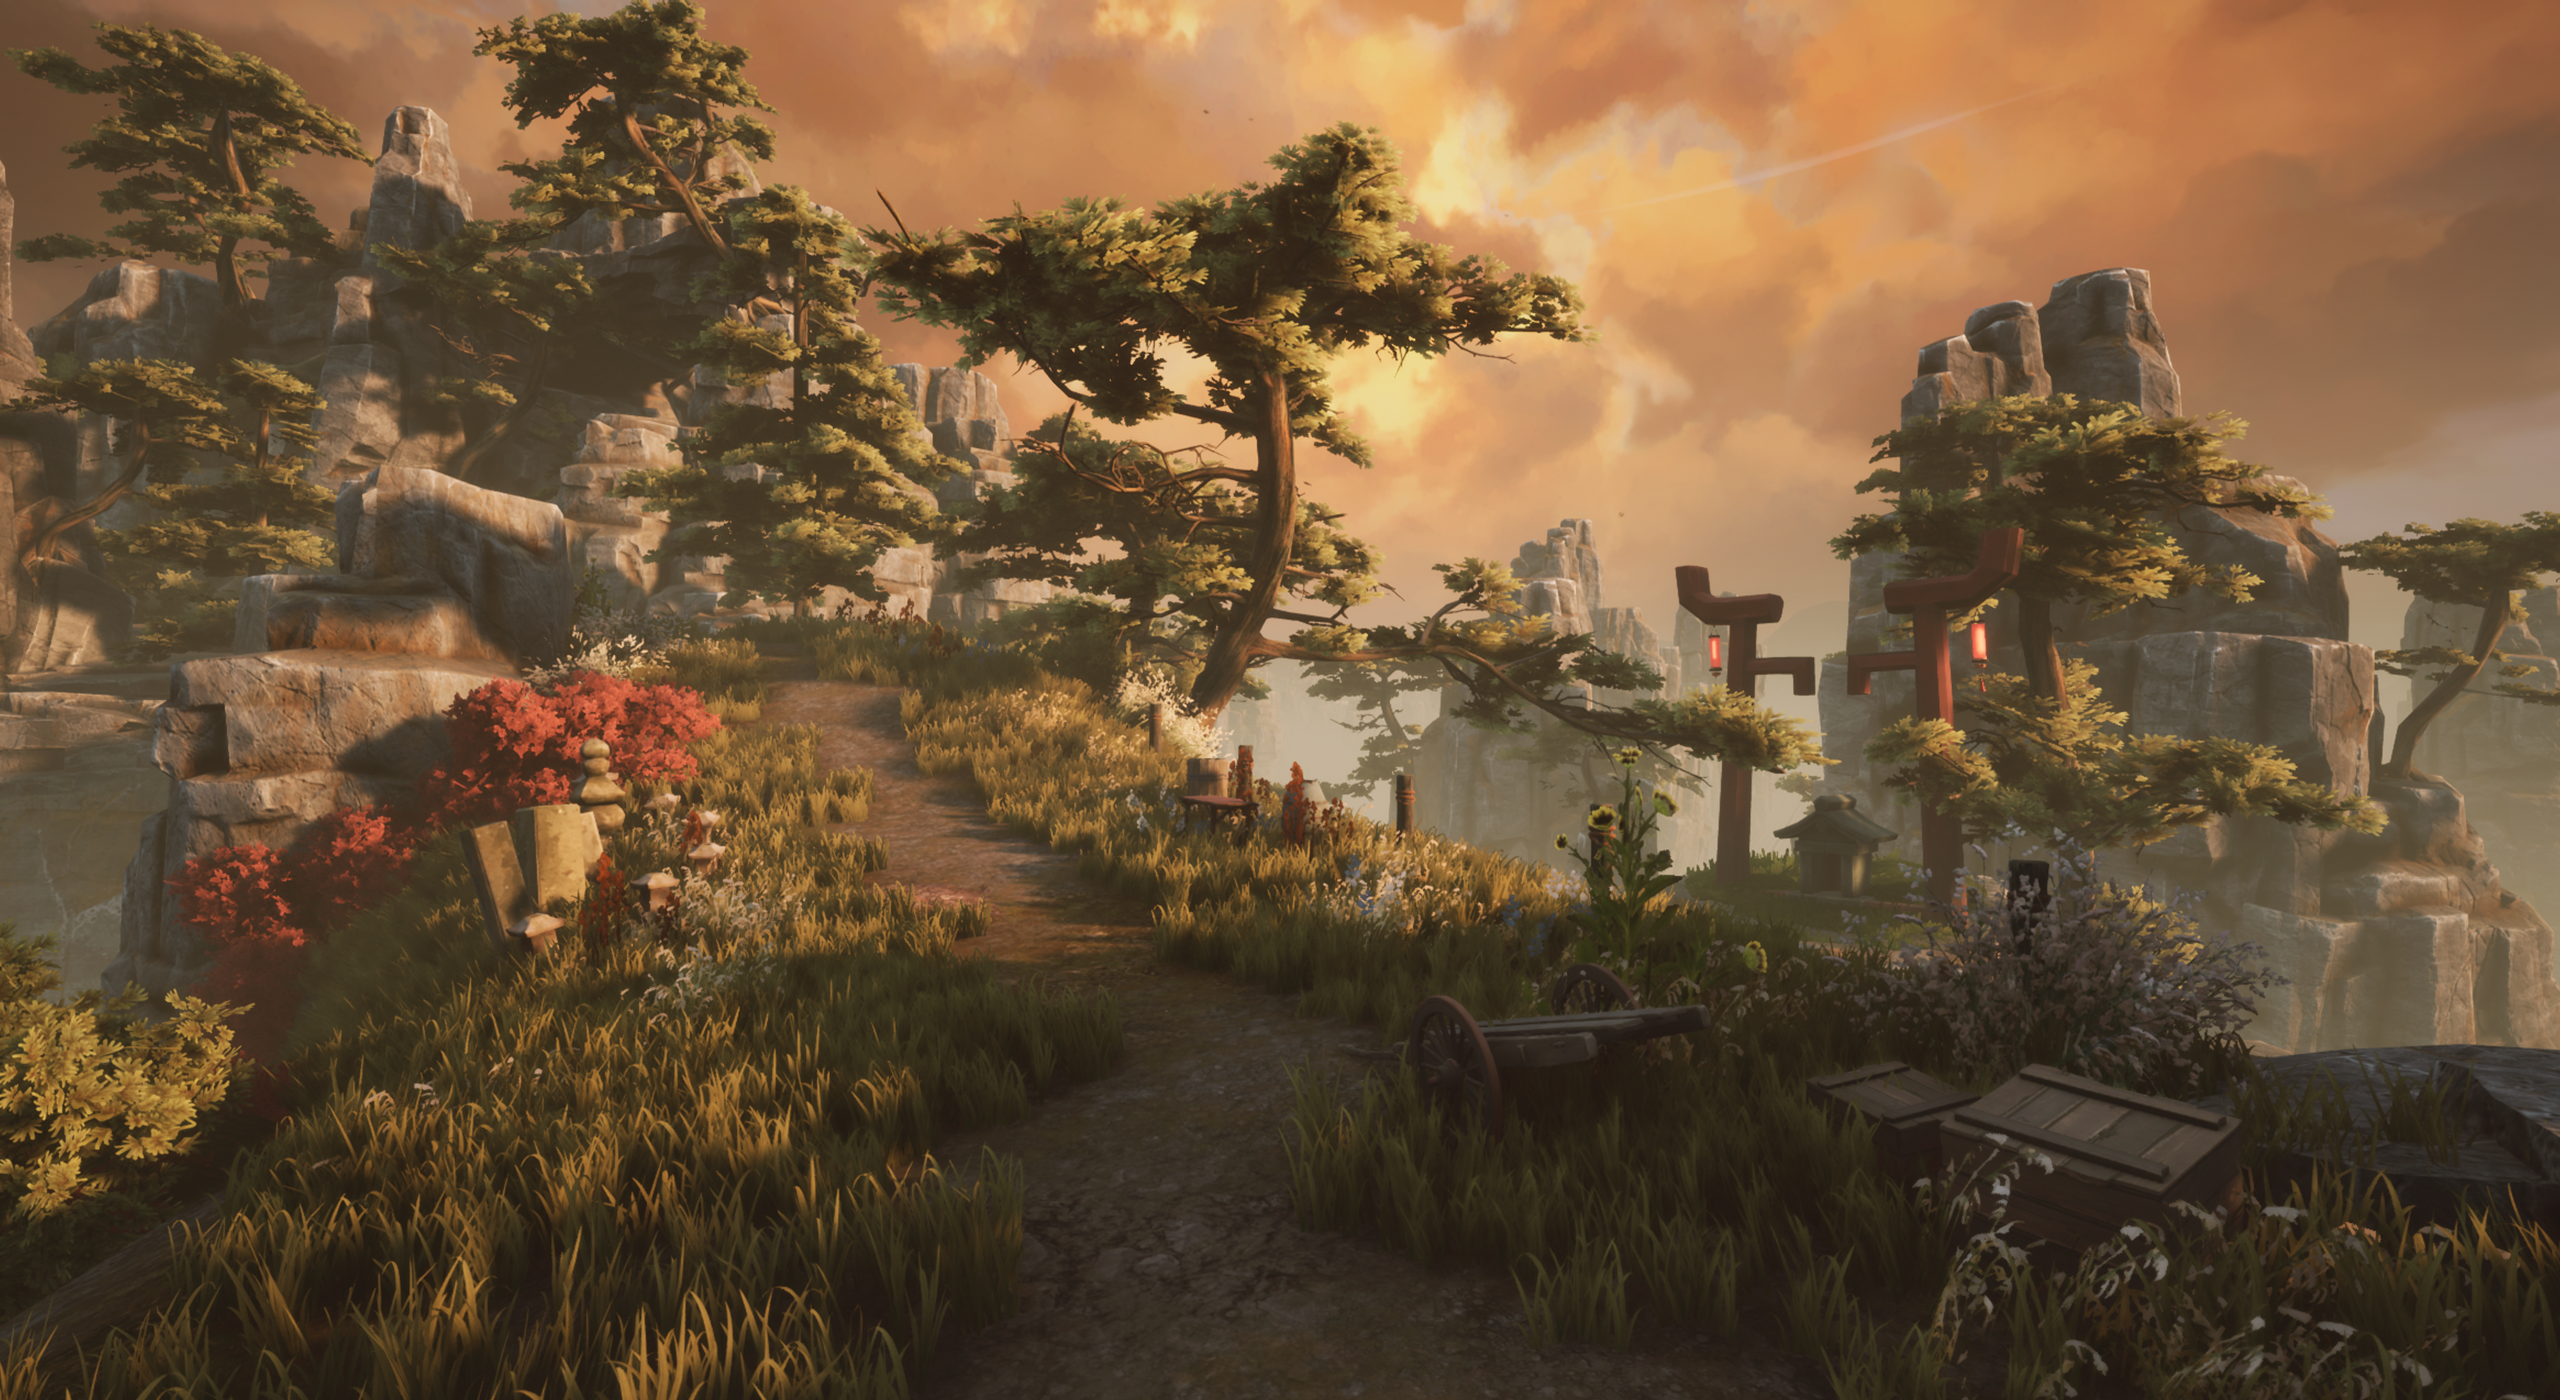
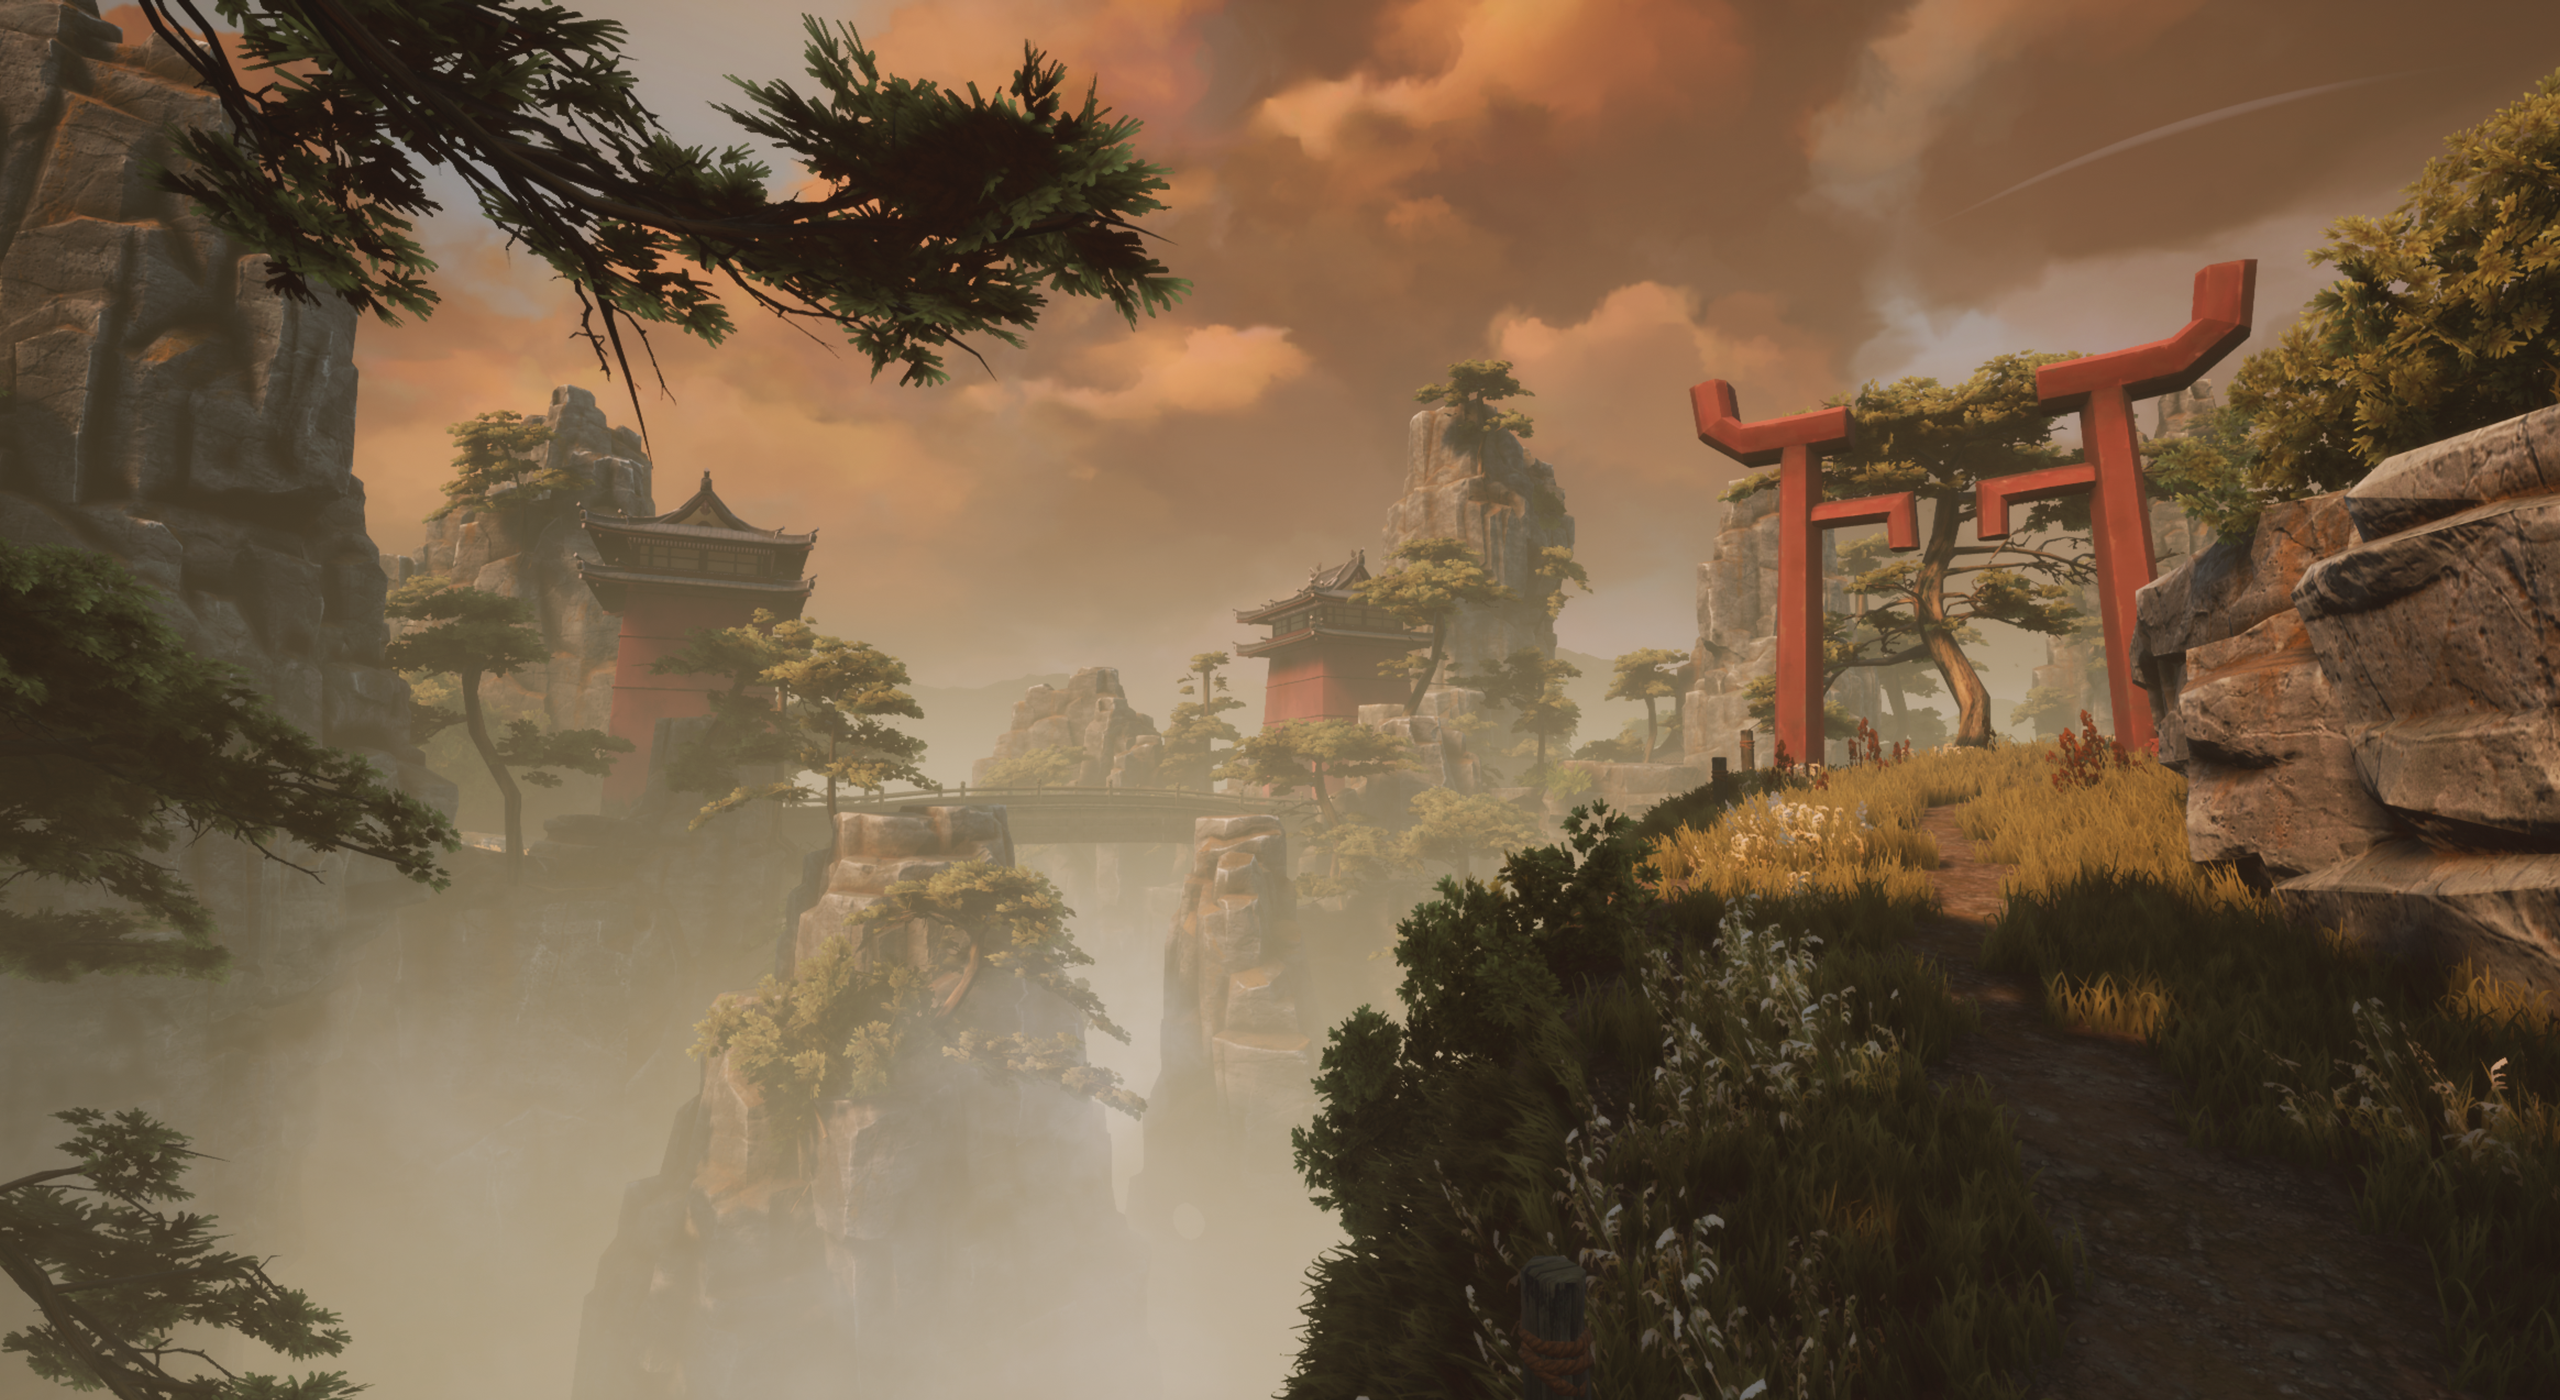
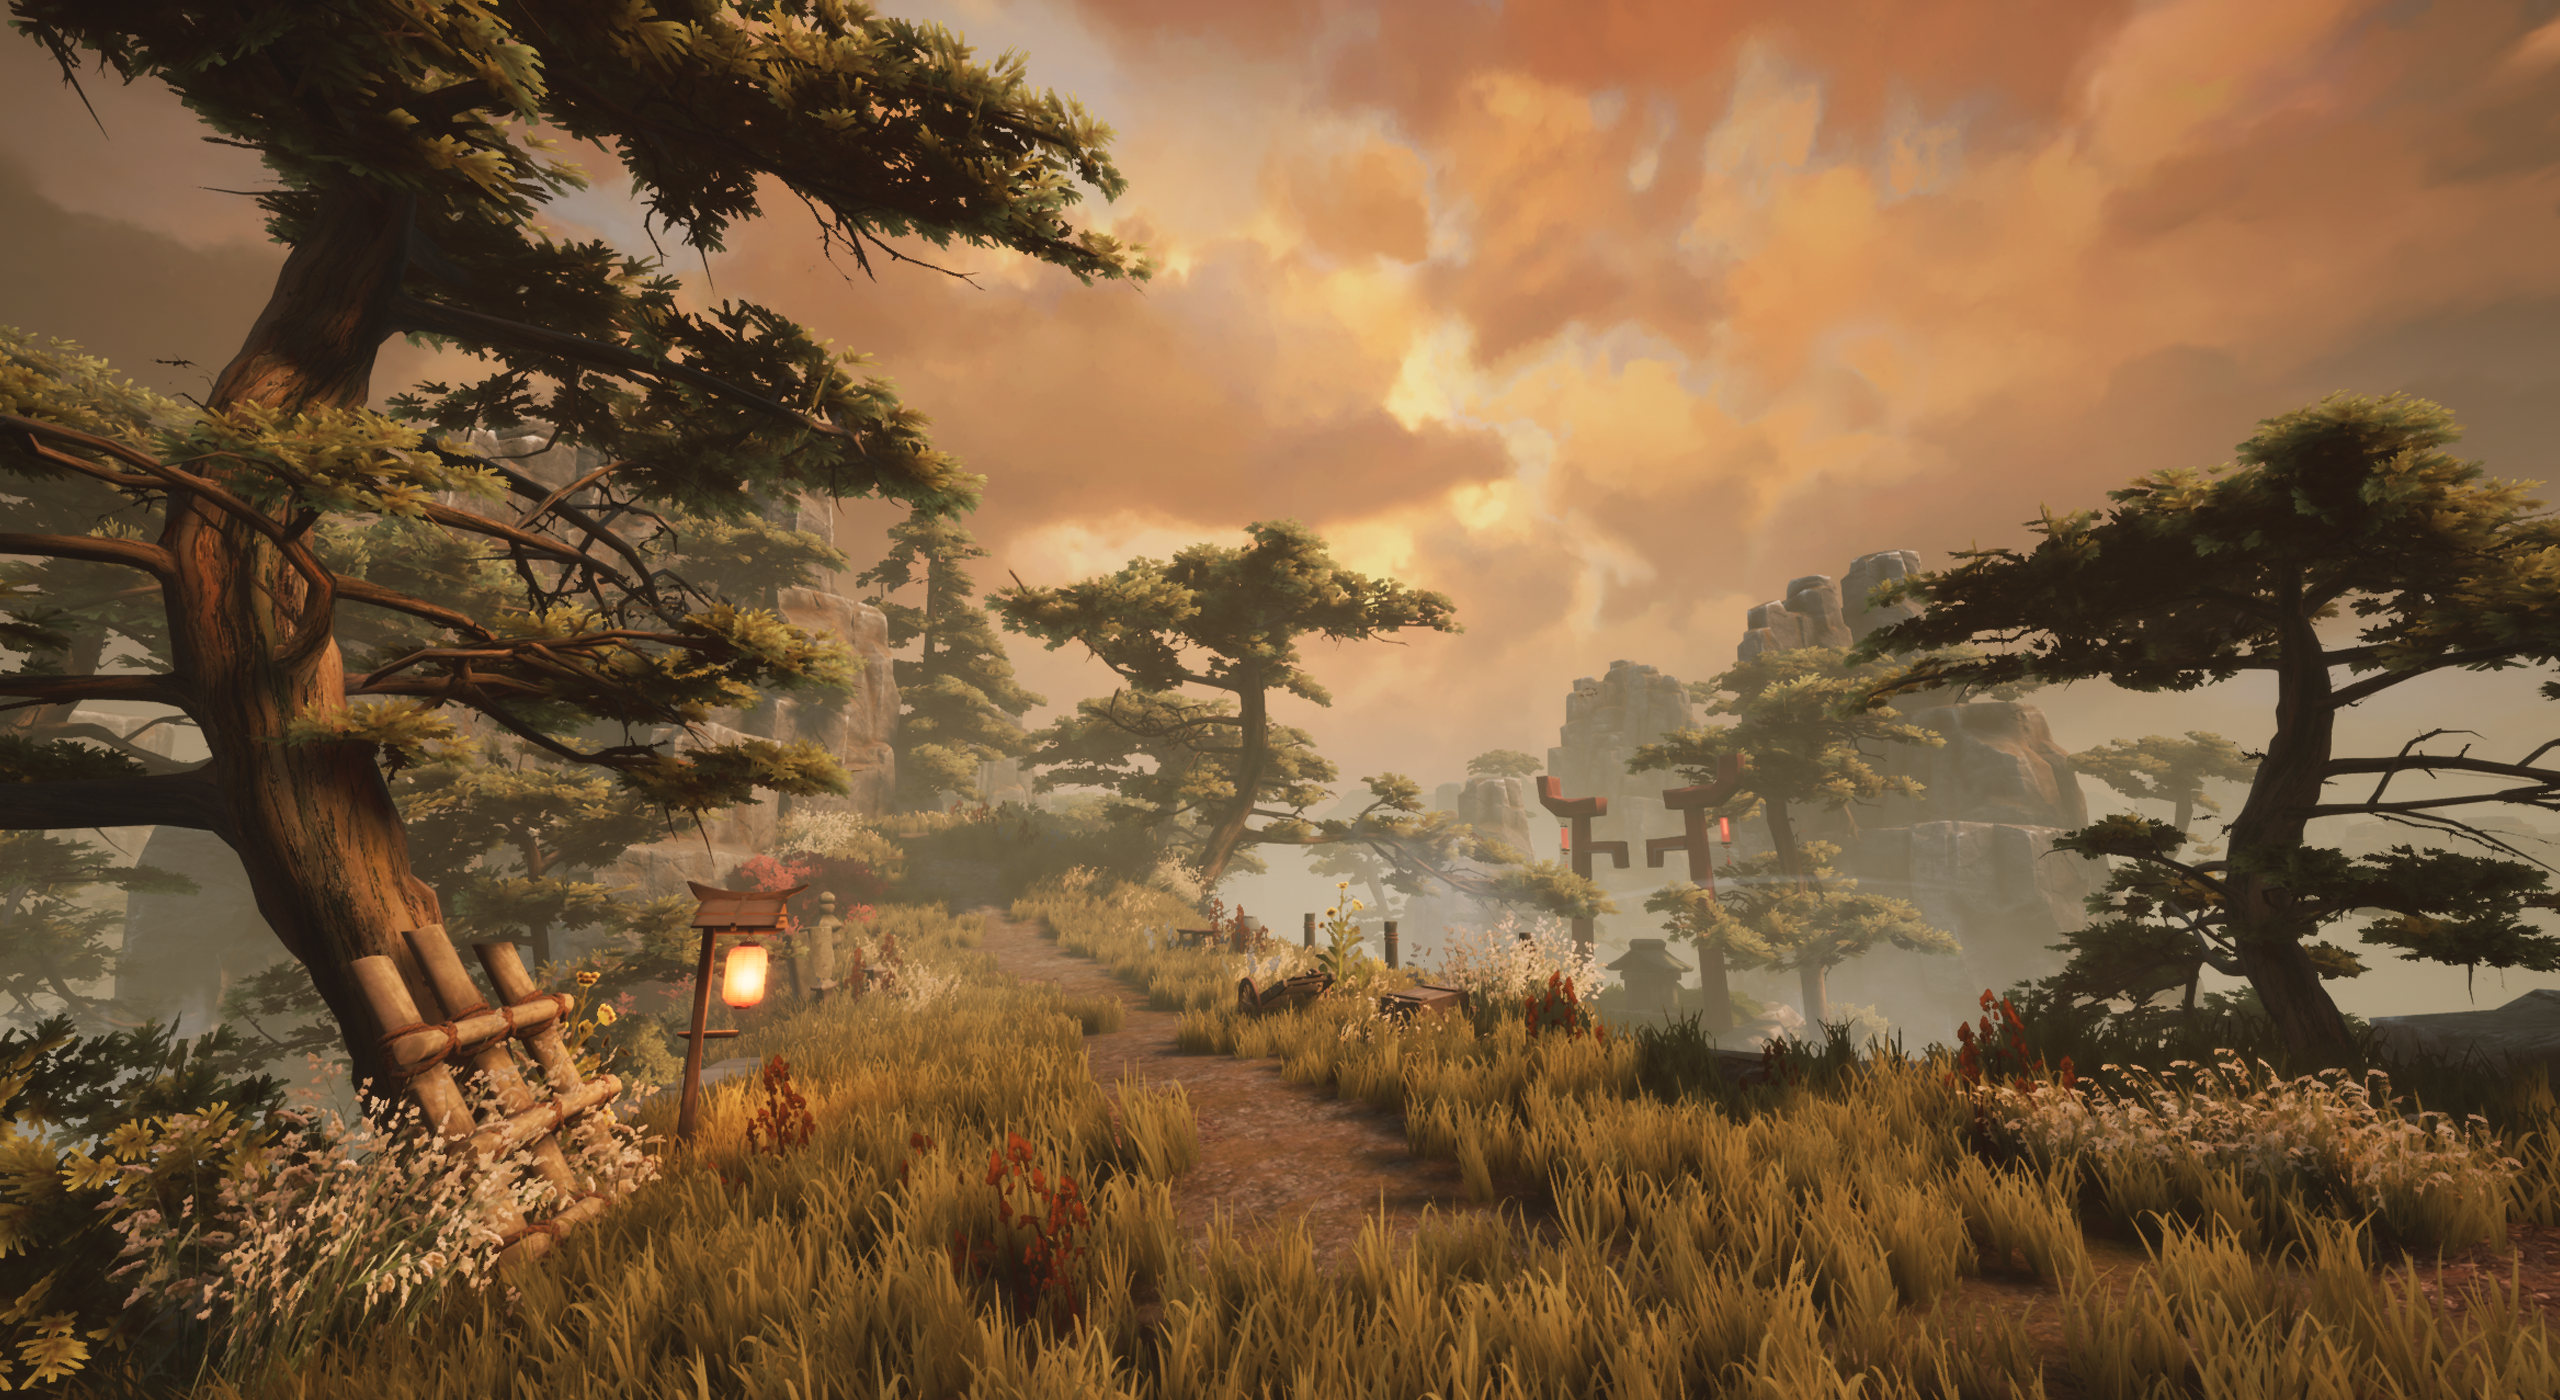
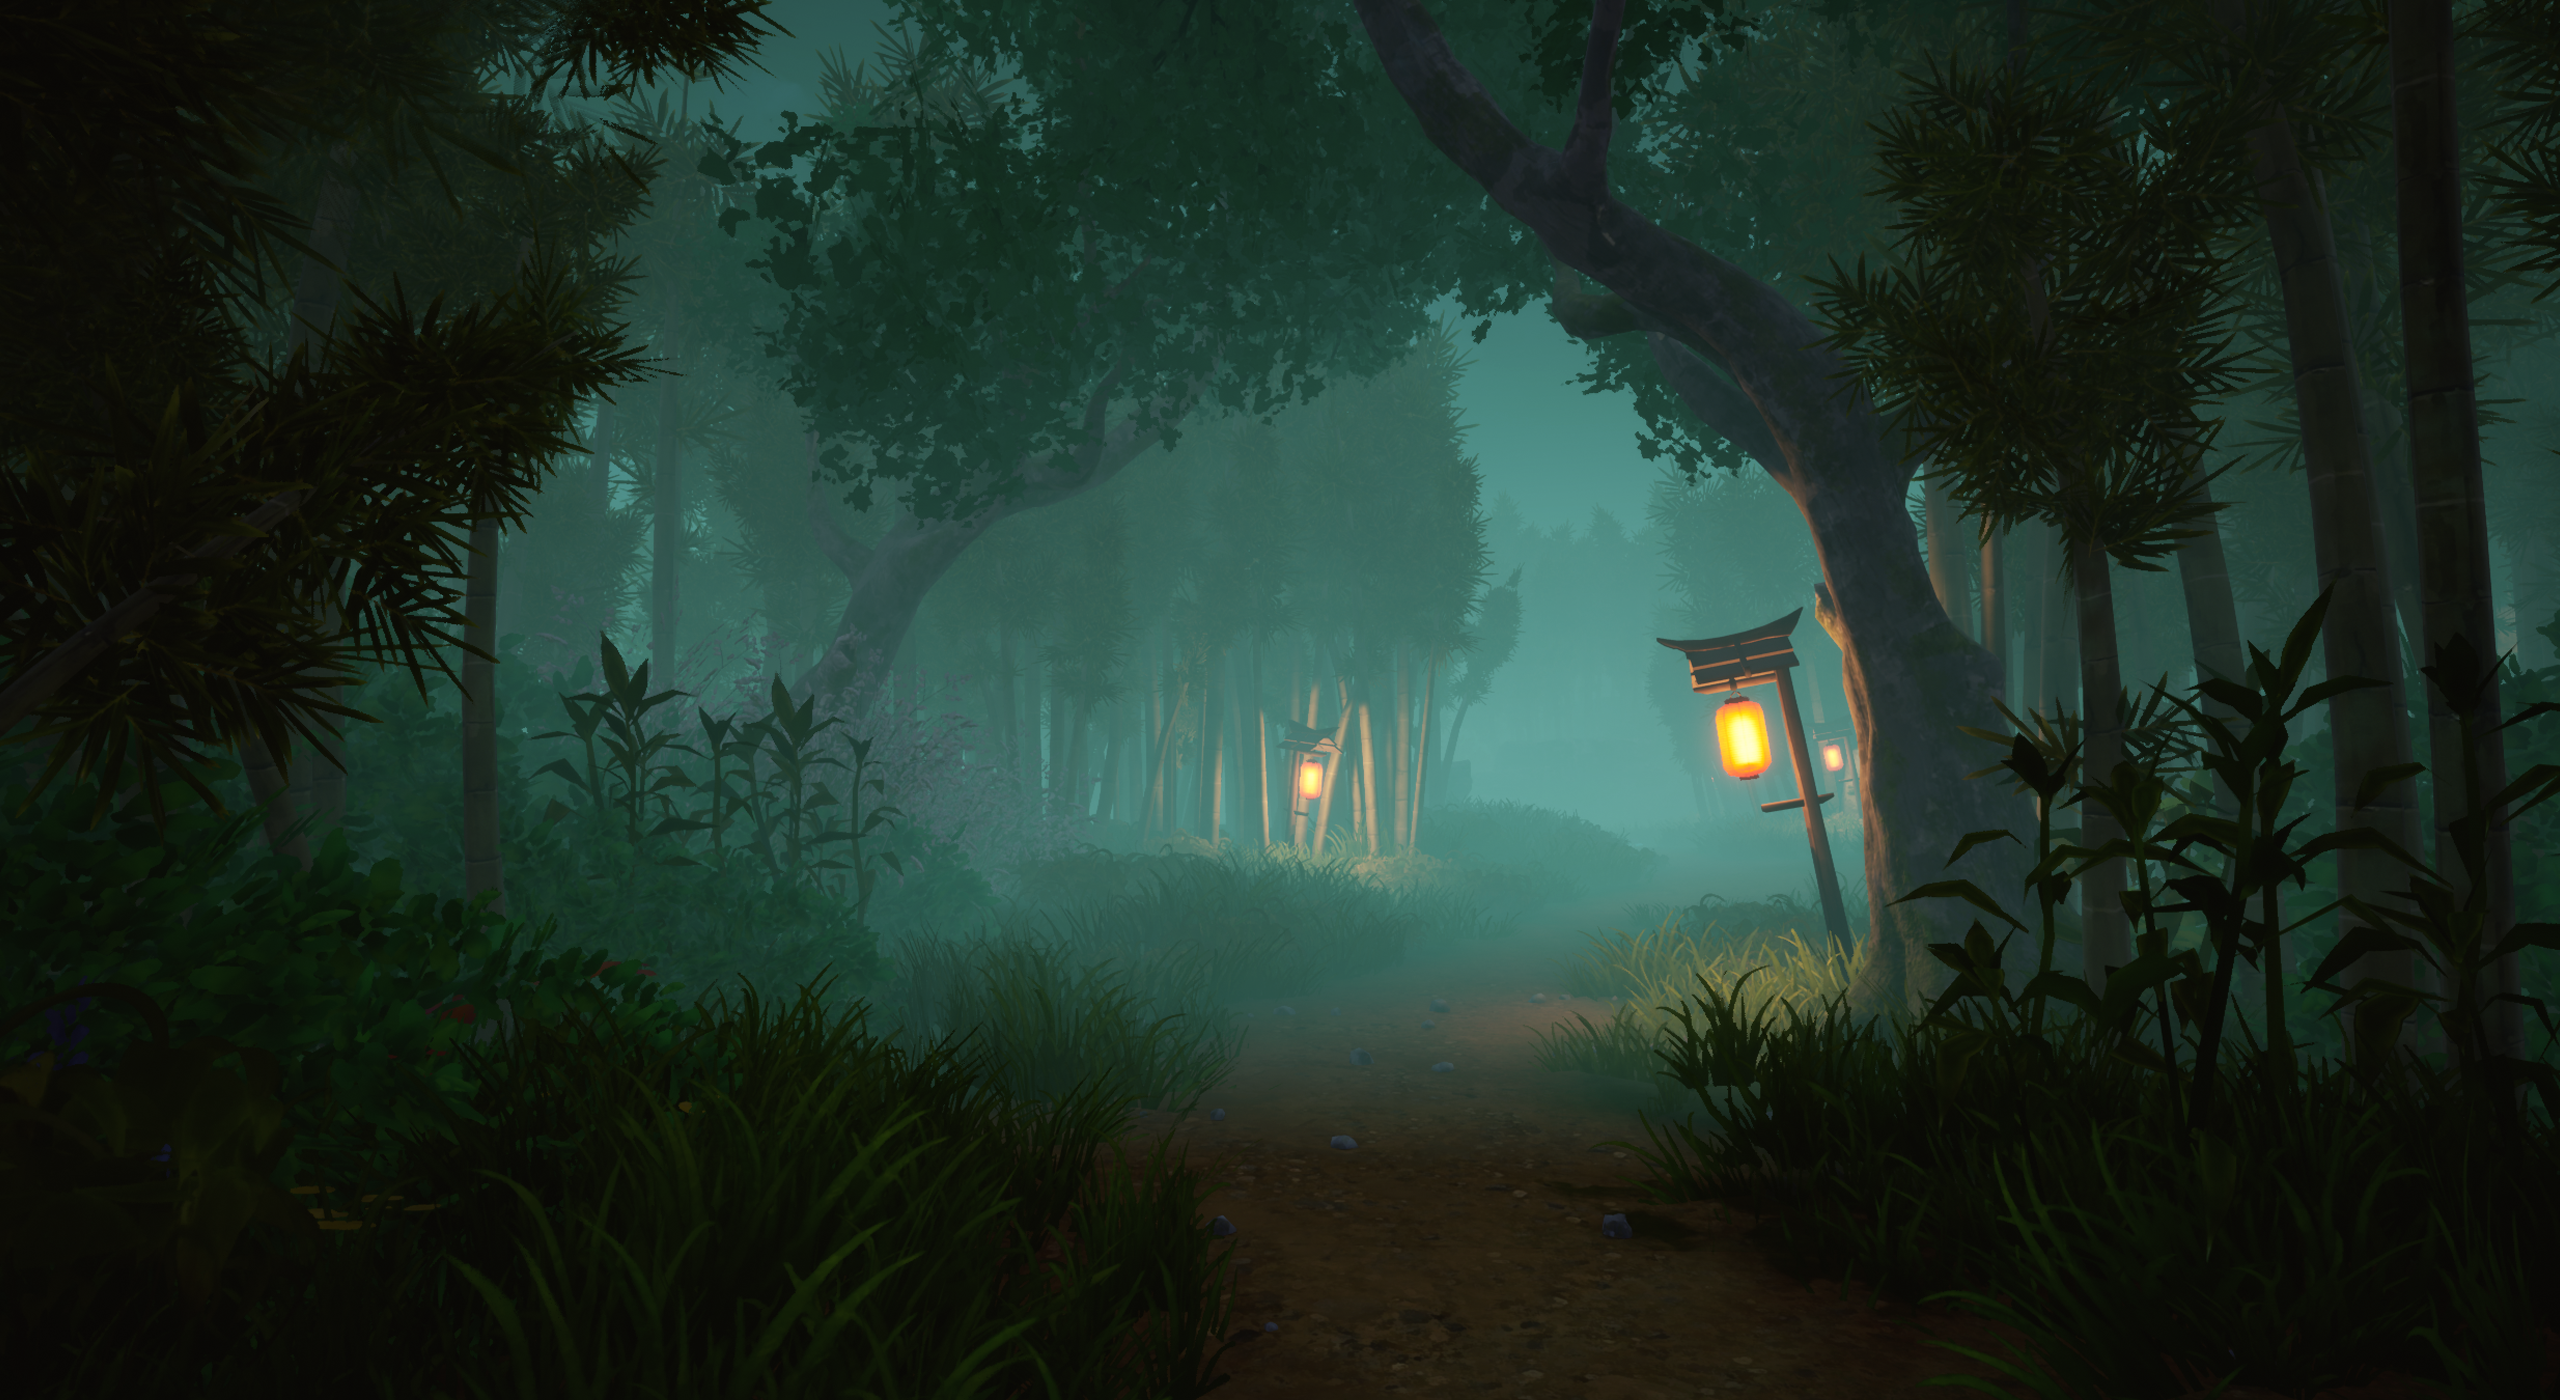
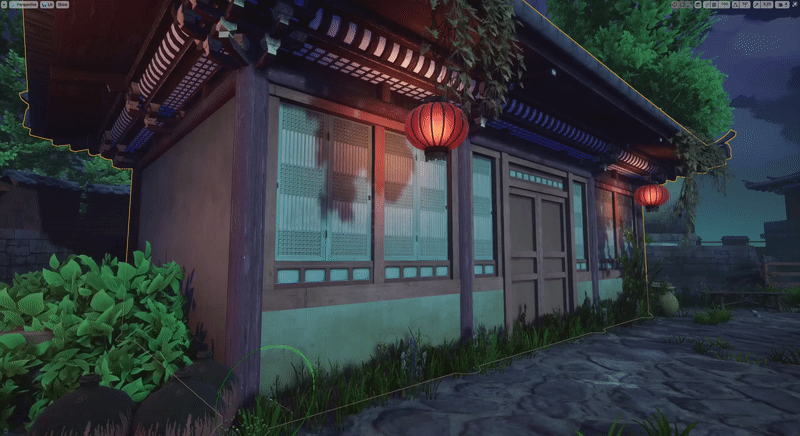
Here you can see some raw screenshots from Unreal Engine 4.


Textures
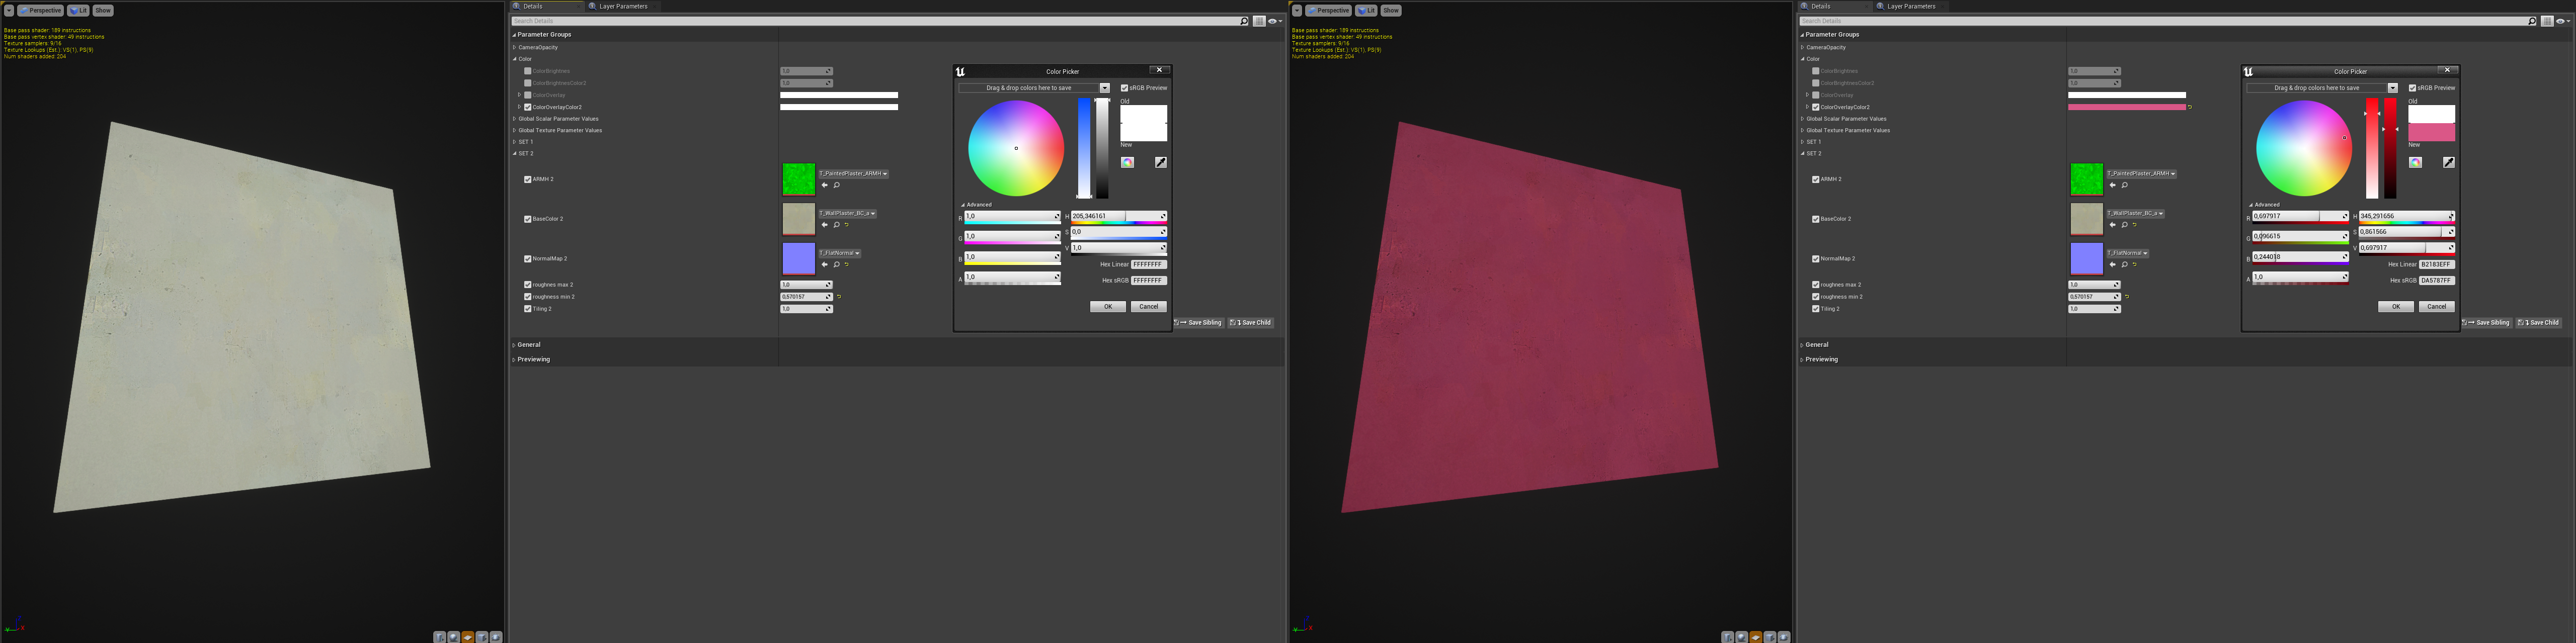
The biggest difficulty in trying to recreate the Ghibli style was creating textures that require an enormous amount of work. Currently, we do not have a dedicated texture artist, who could do textures full-time, so we often overpainted photos.
We tried to apply them to different objects due to the time it takes to create textures. Most of the buildings that were created for the project use the same tiled textures that we could directly tweak in the material settings in UE4 e.g. color, color brightness or vertex paint, etc.
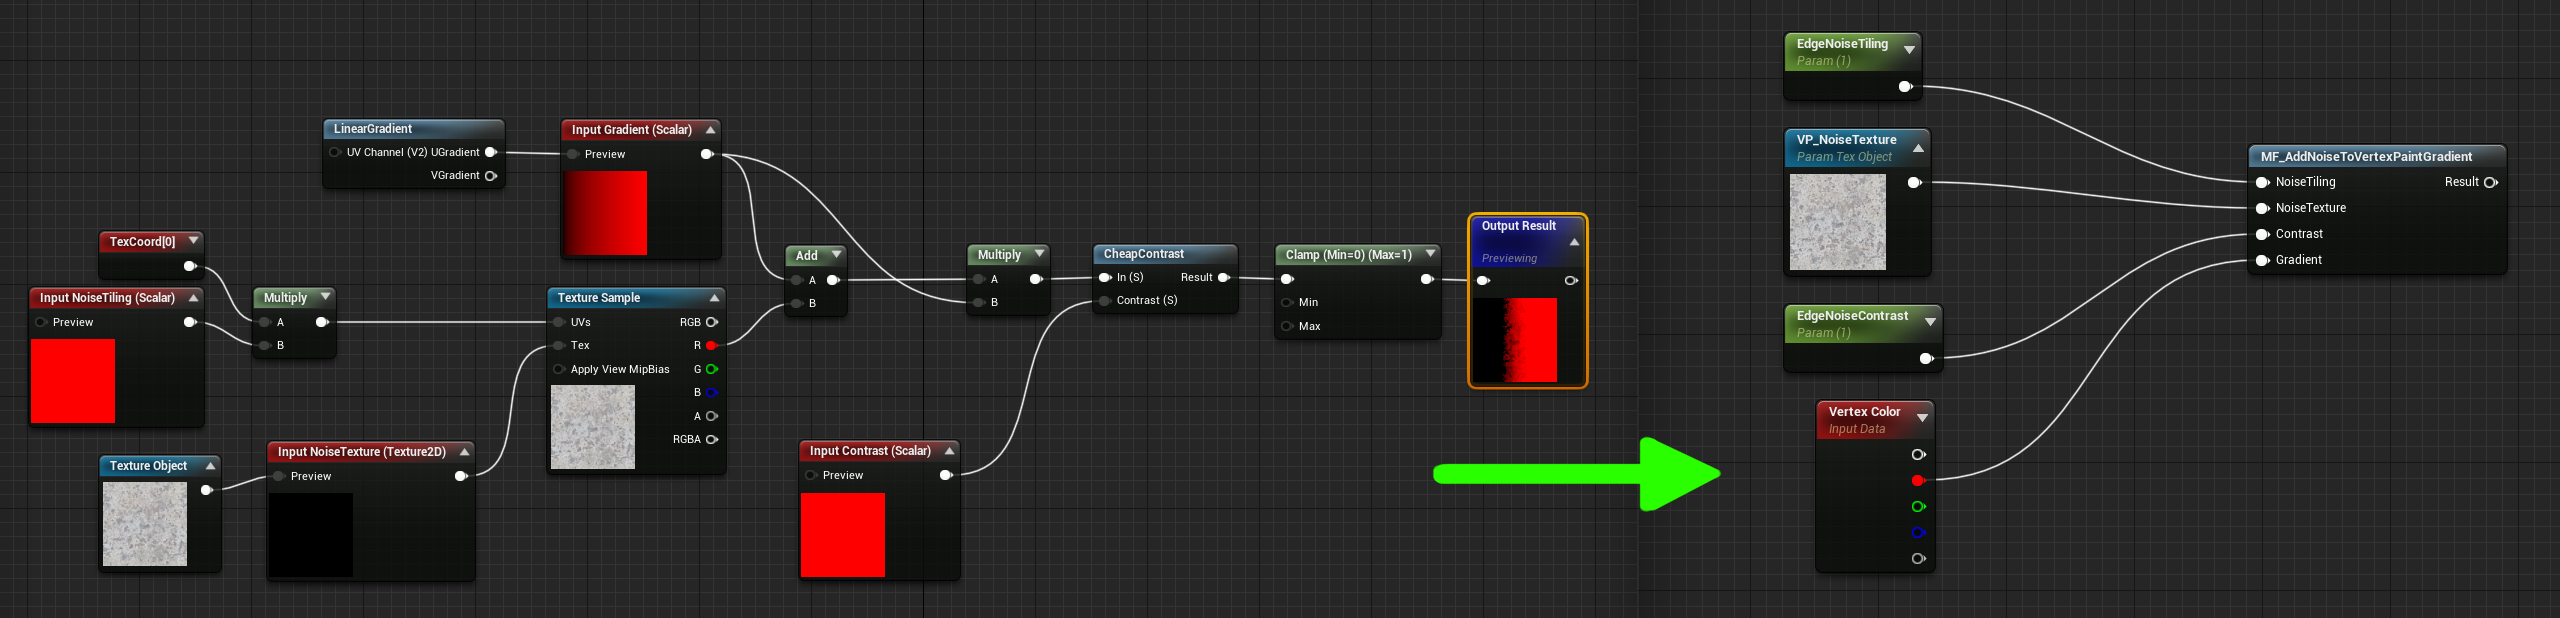
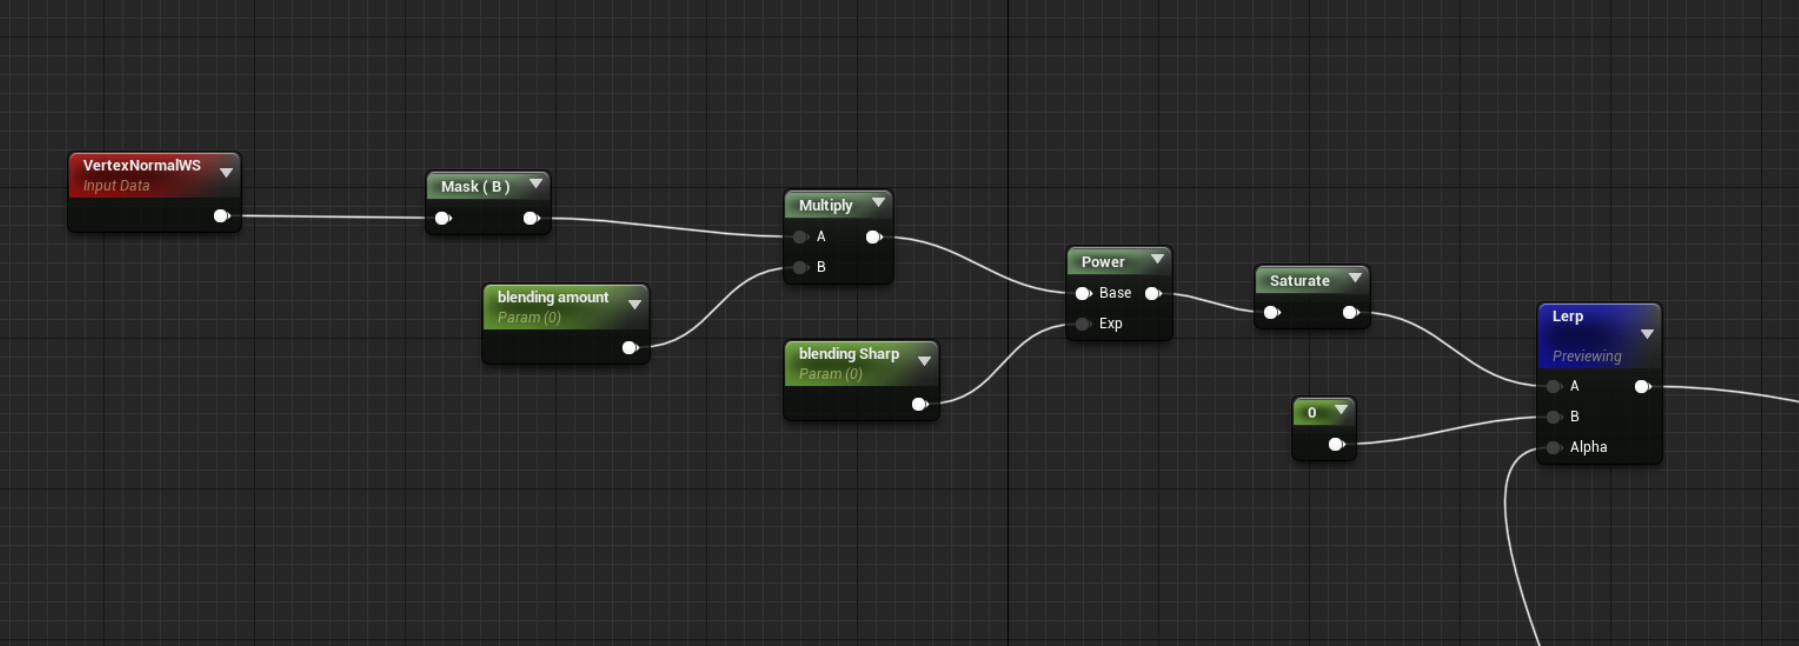
Vertex Paint in UE4 requires quite dense meshes, but there is a way to work around it. It is possible by adding a noise texture into the gradient, which you can see below in the material function graph
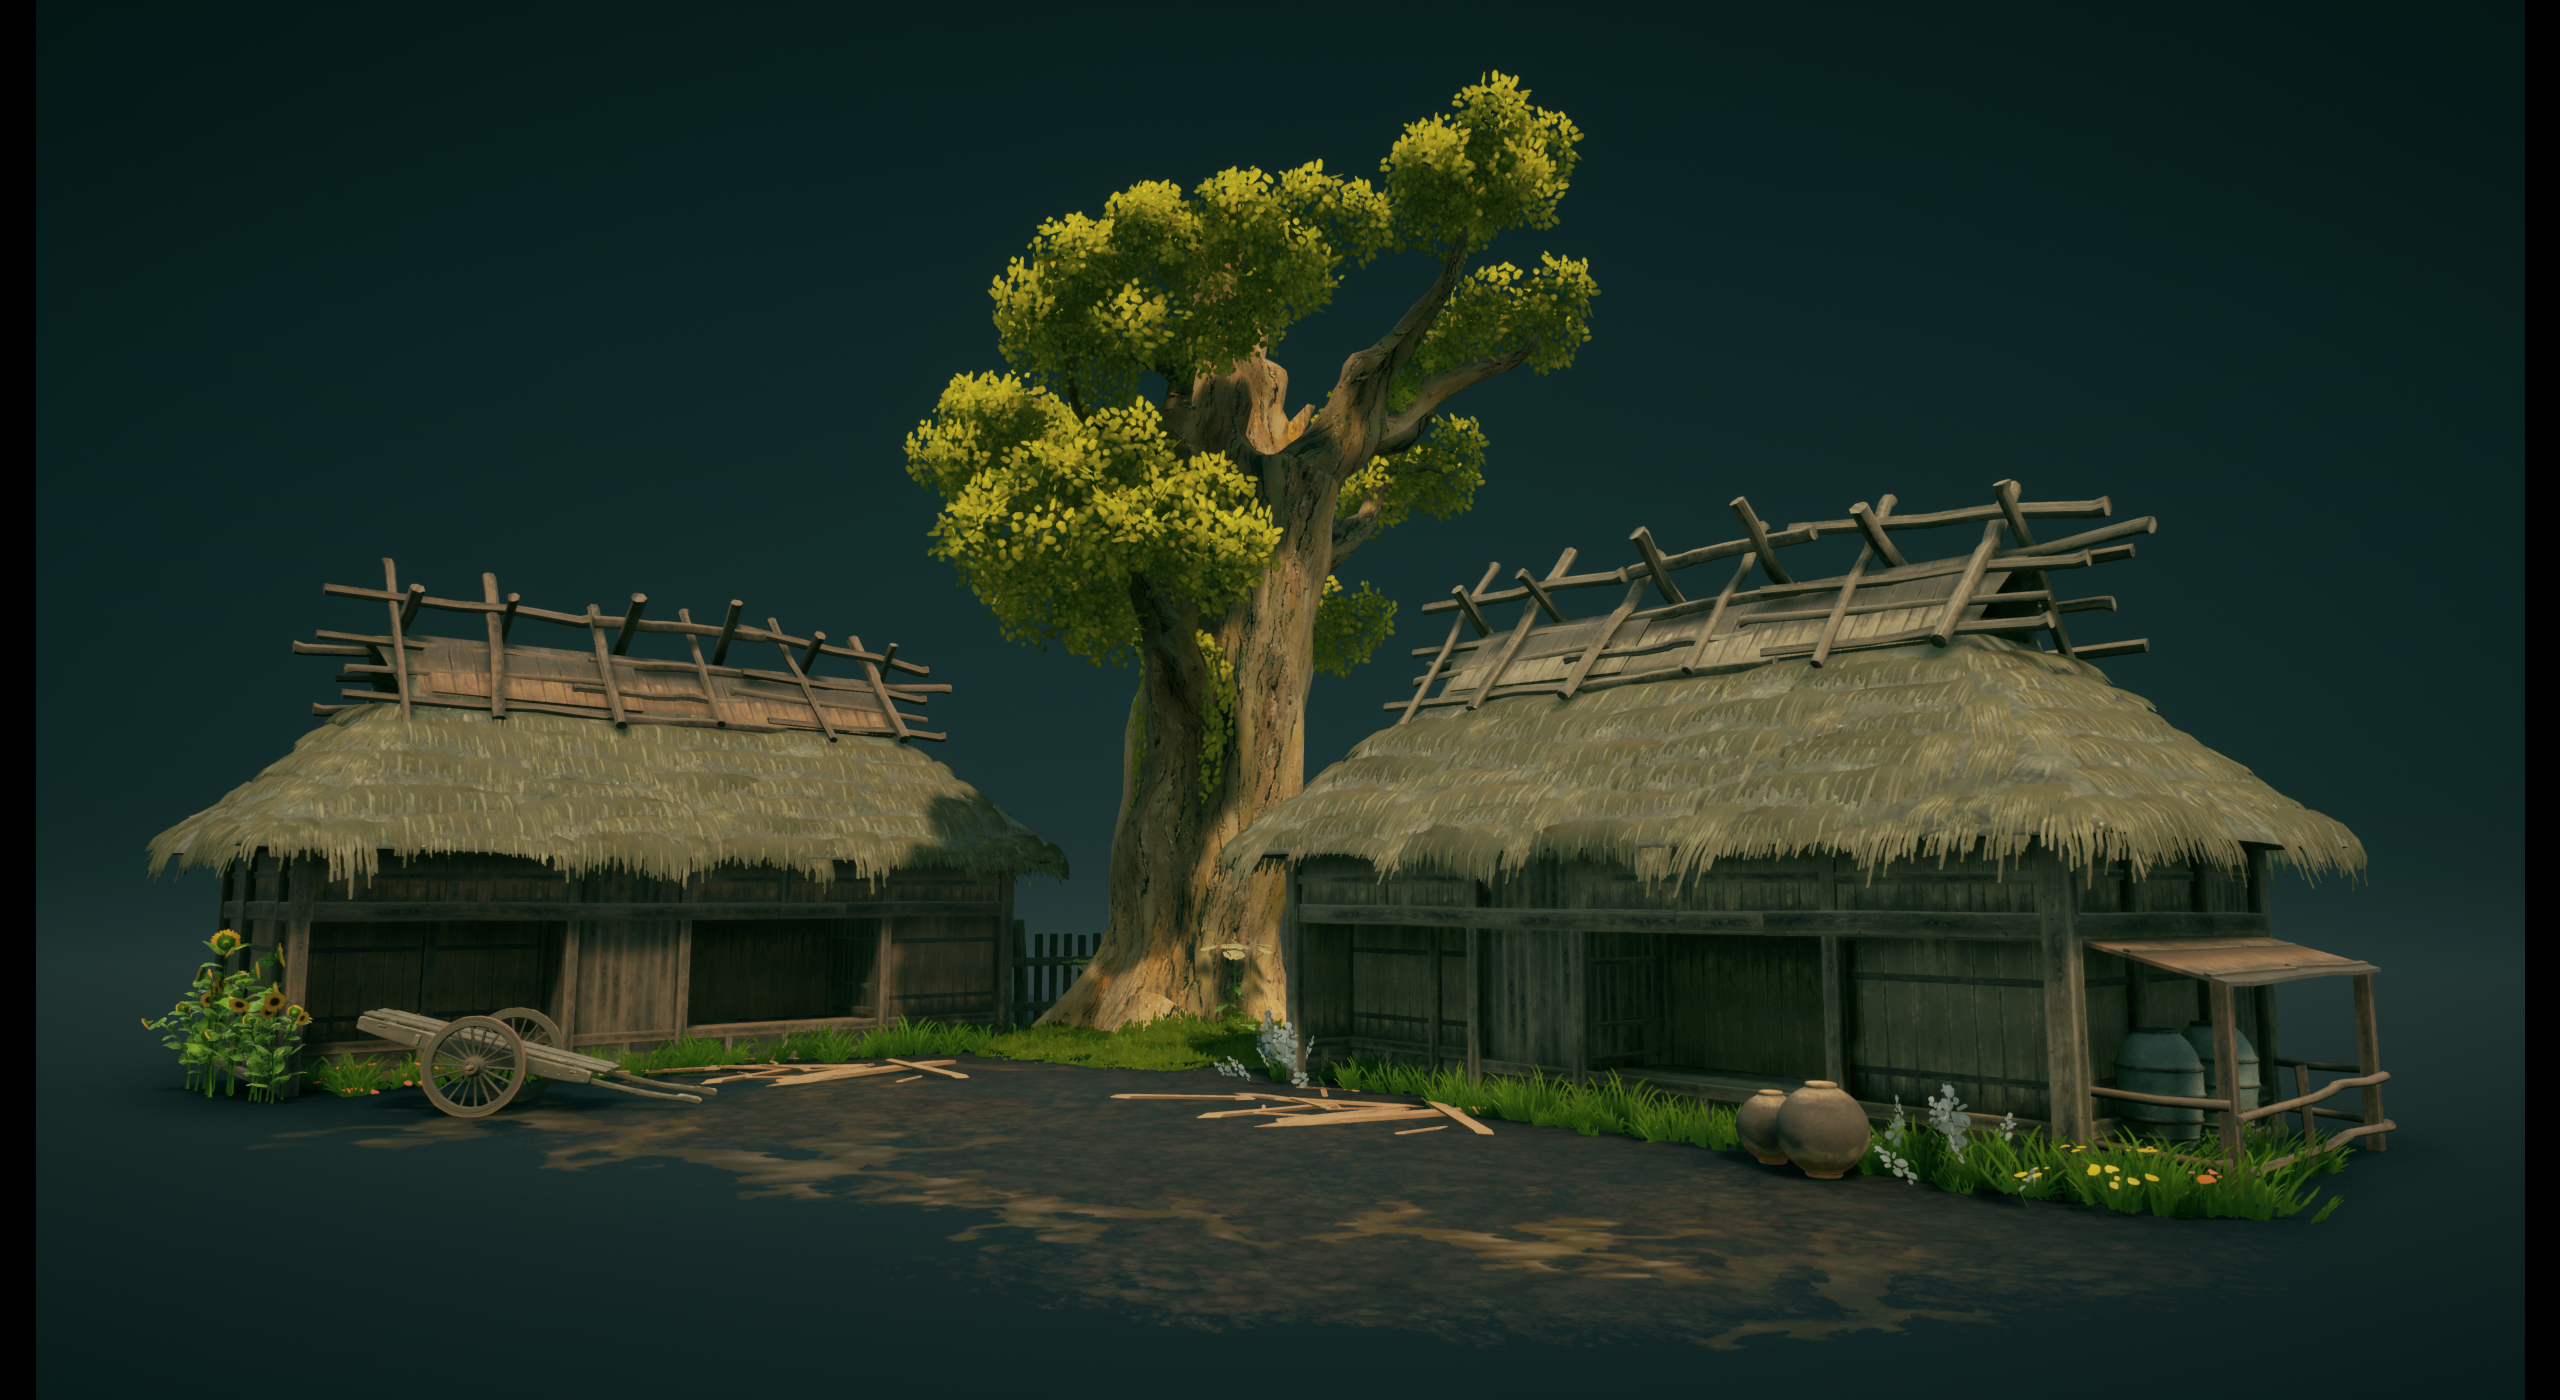
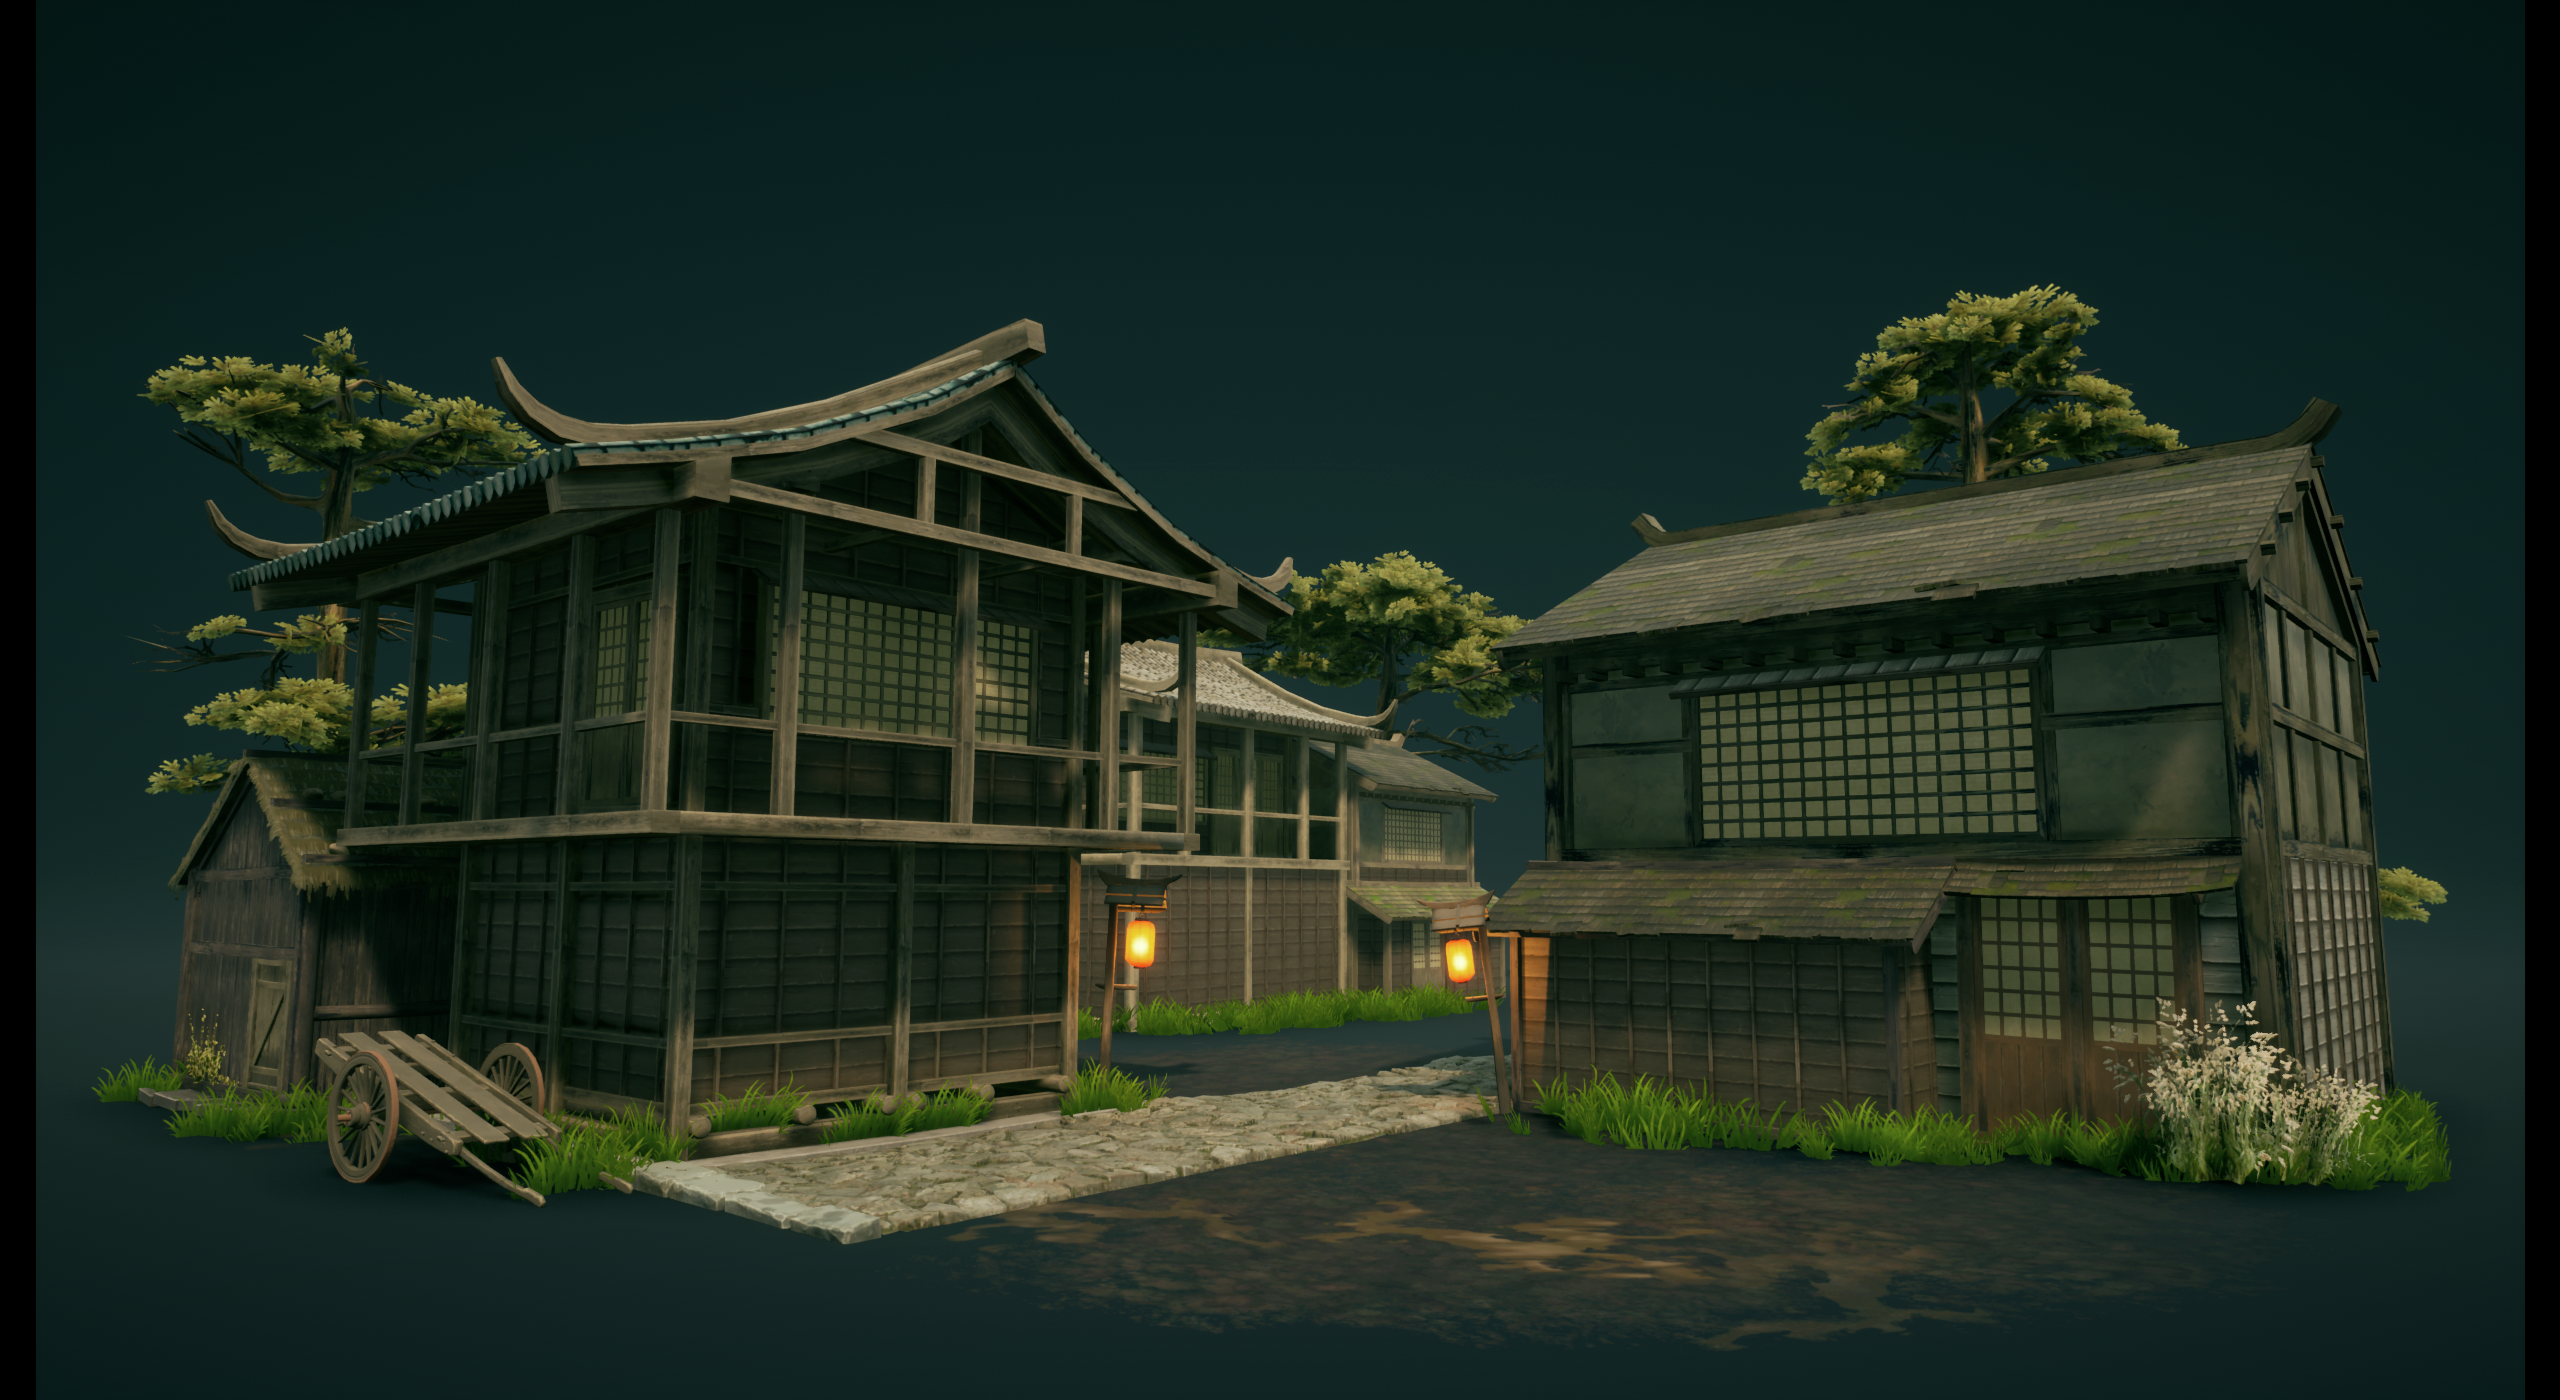
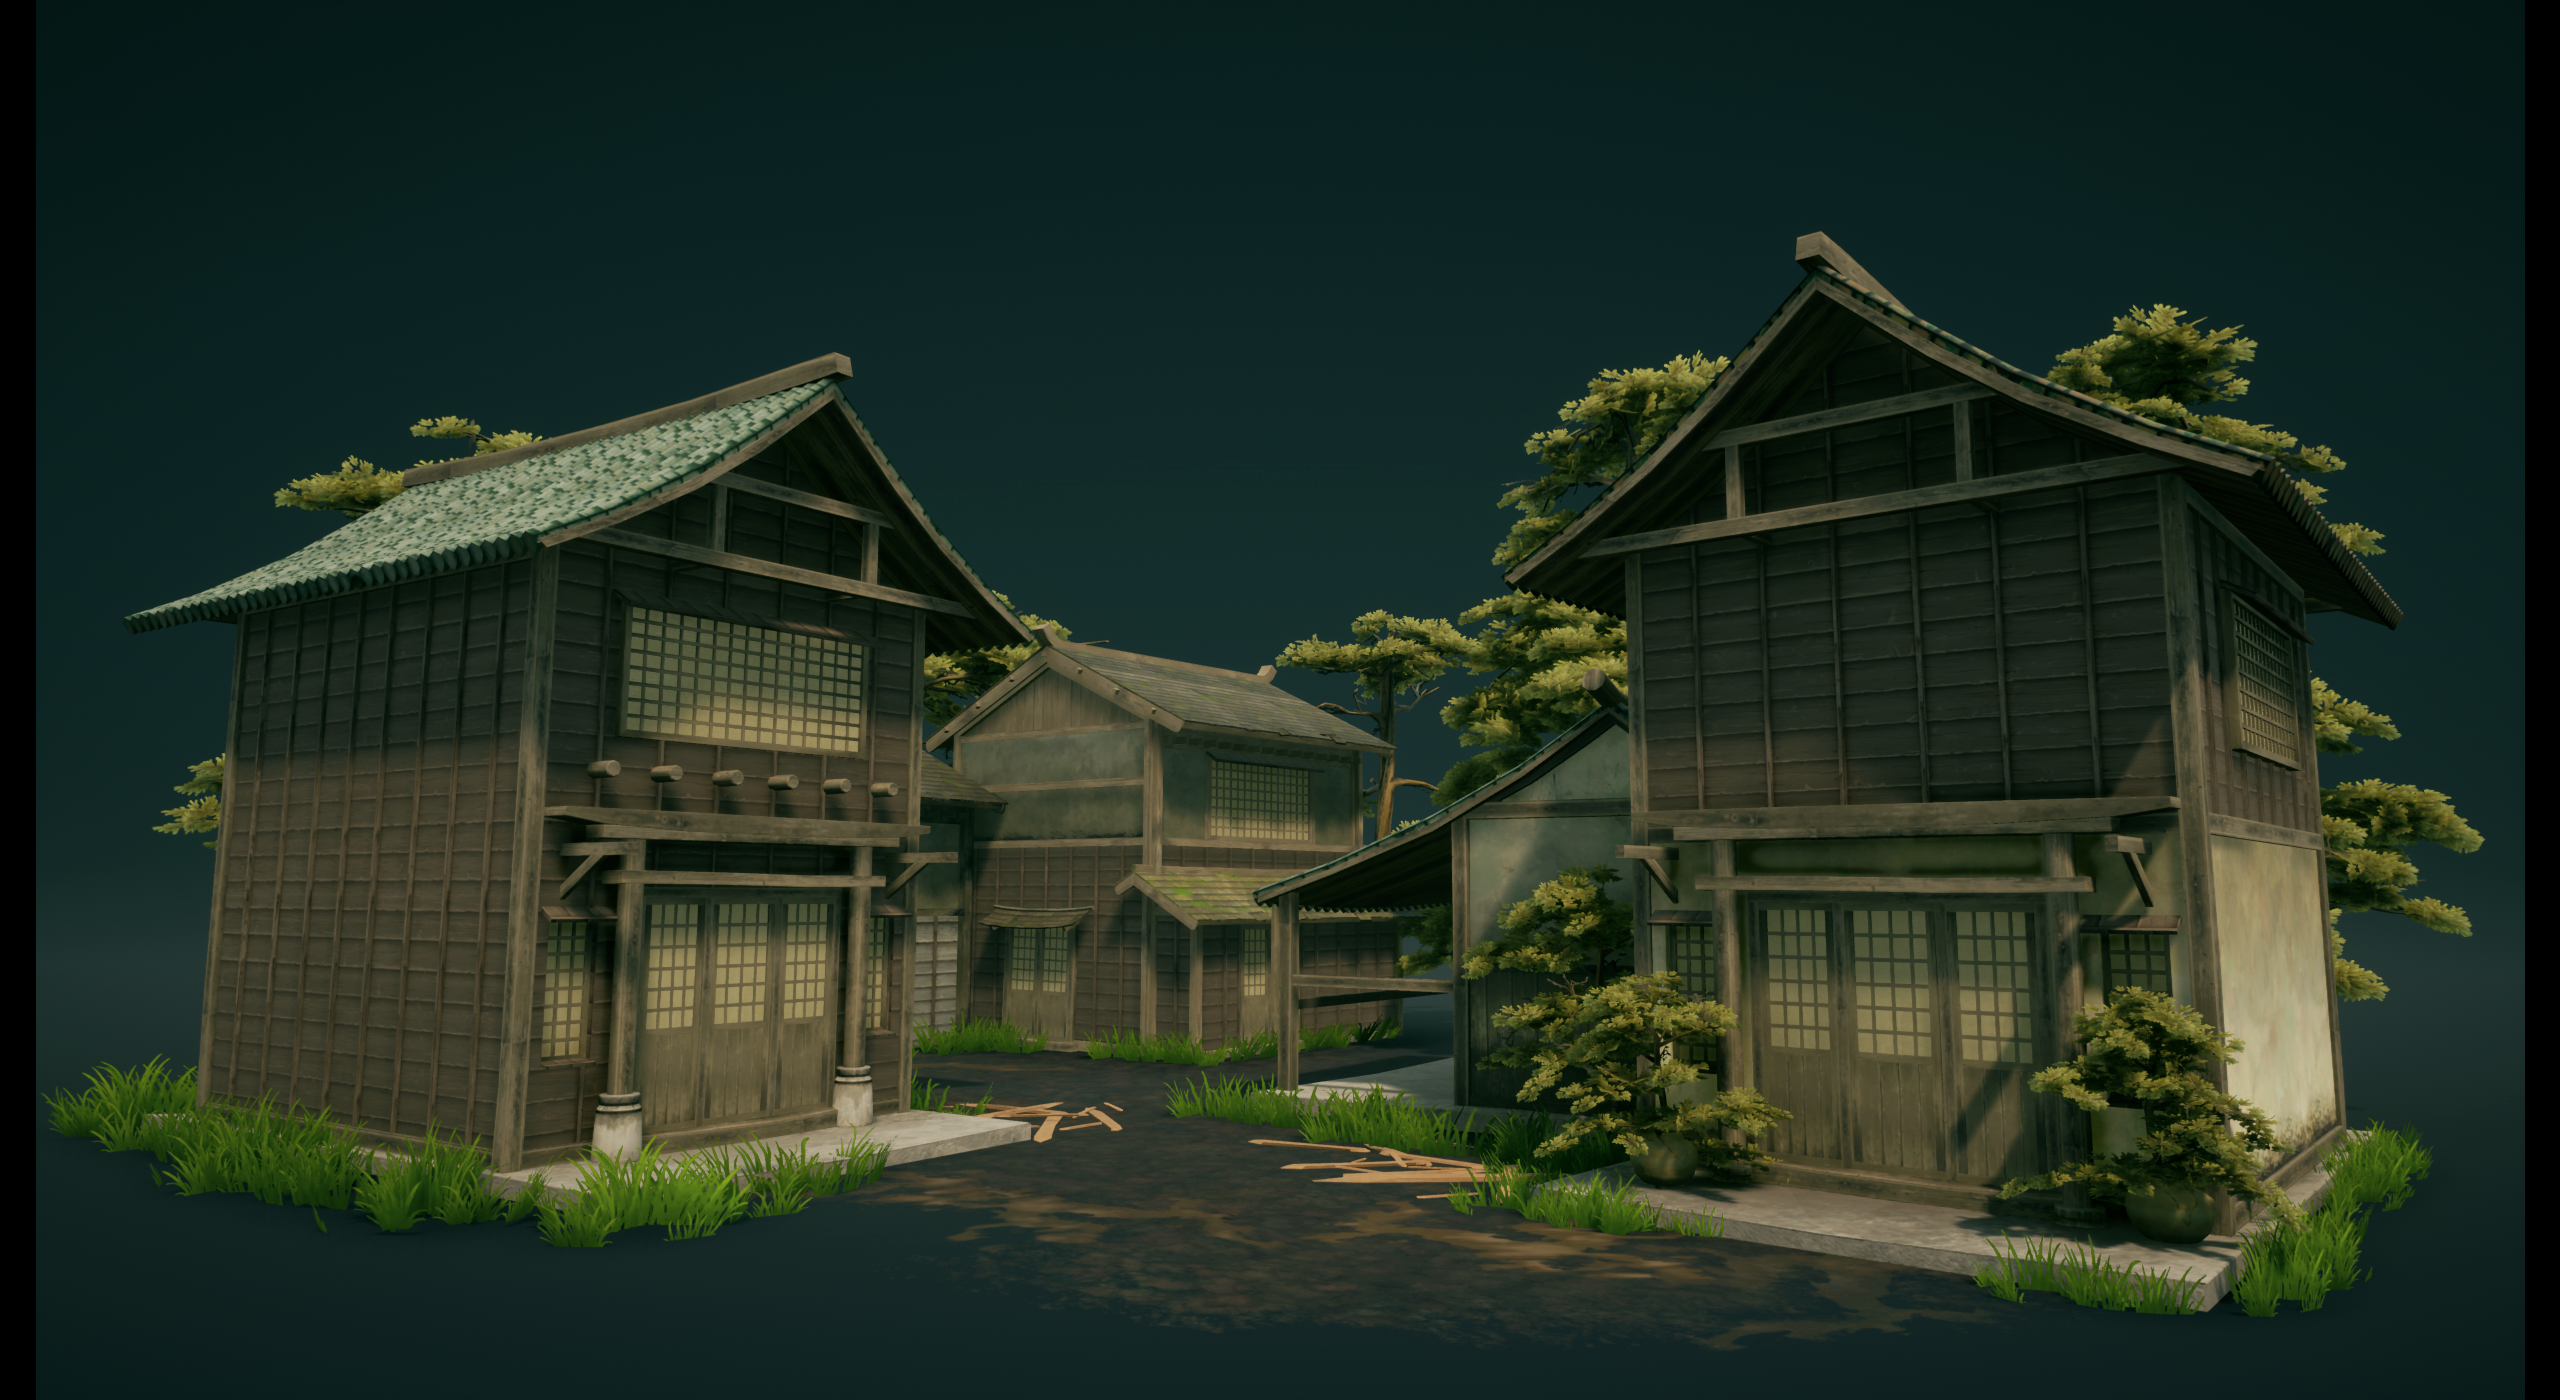
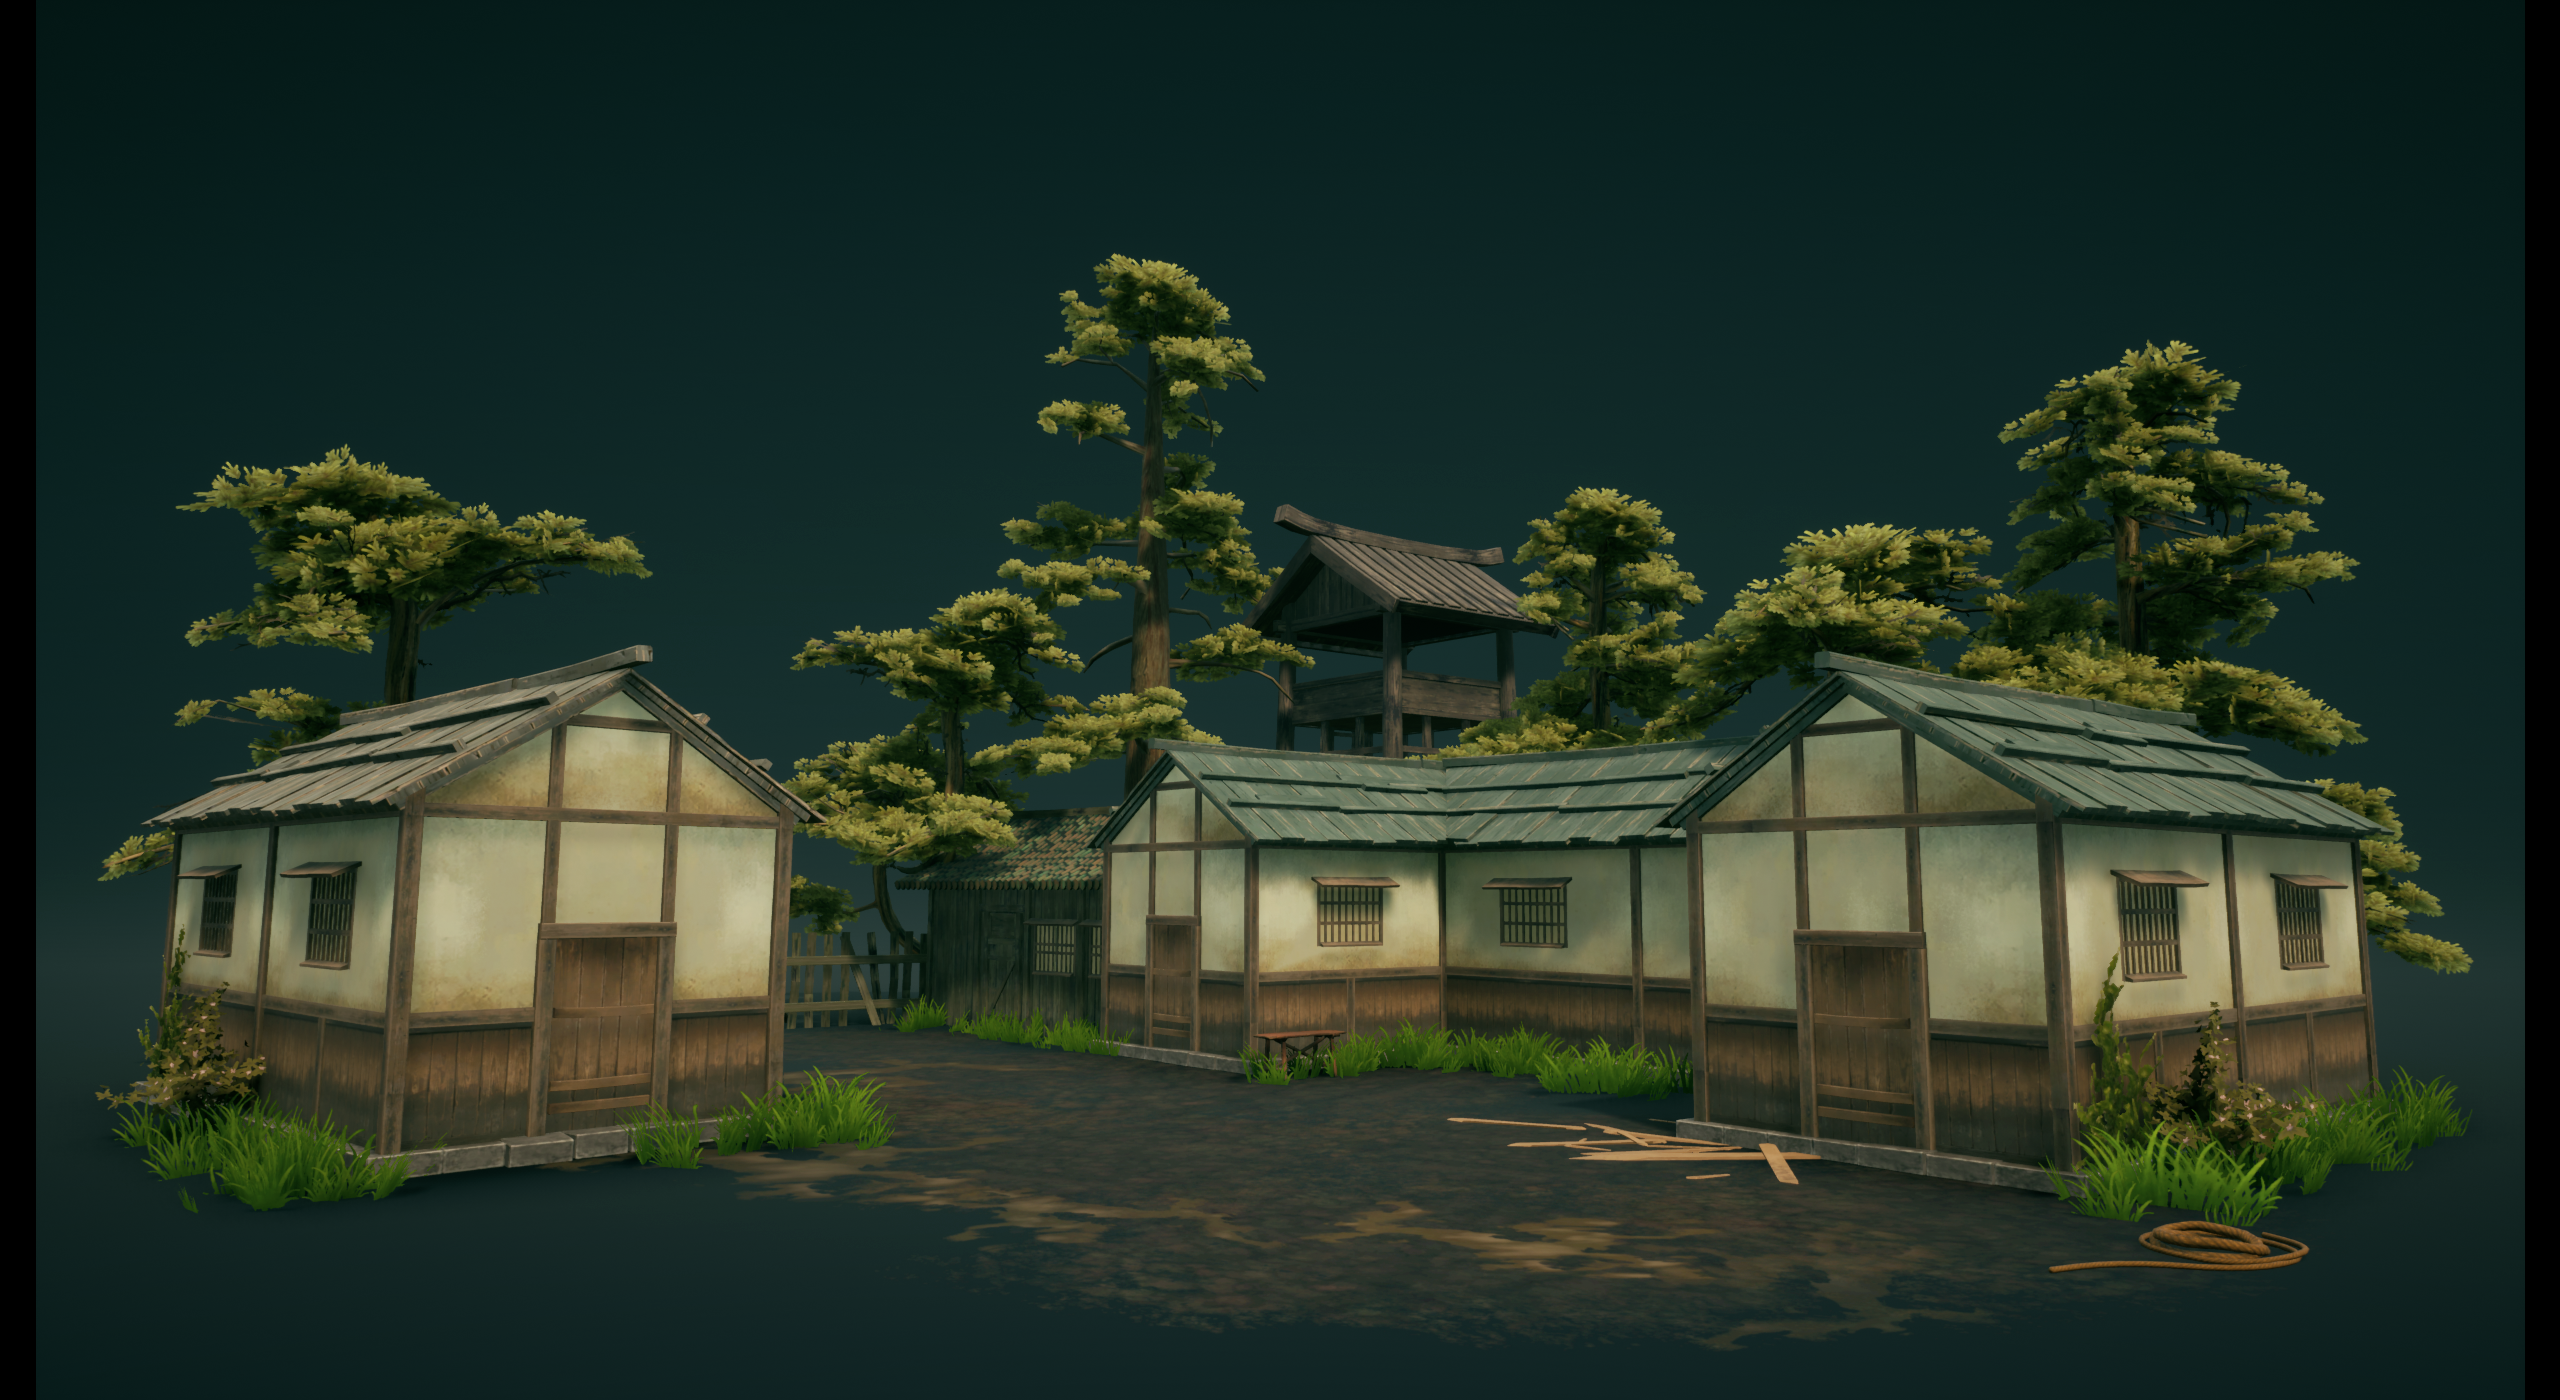
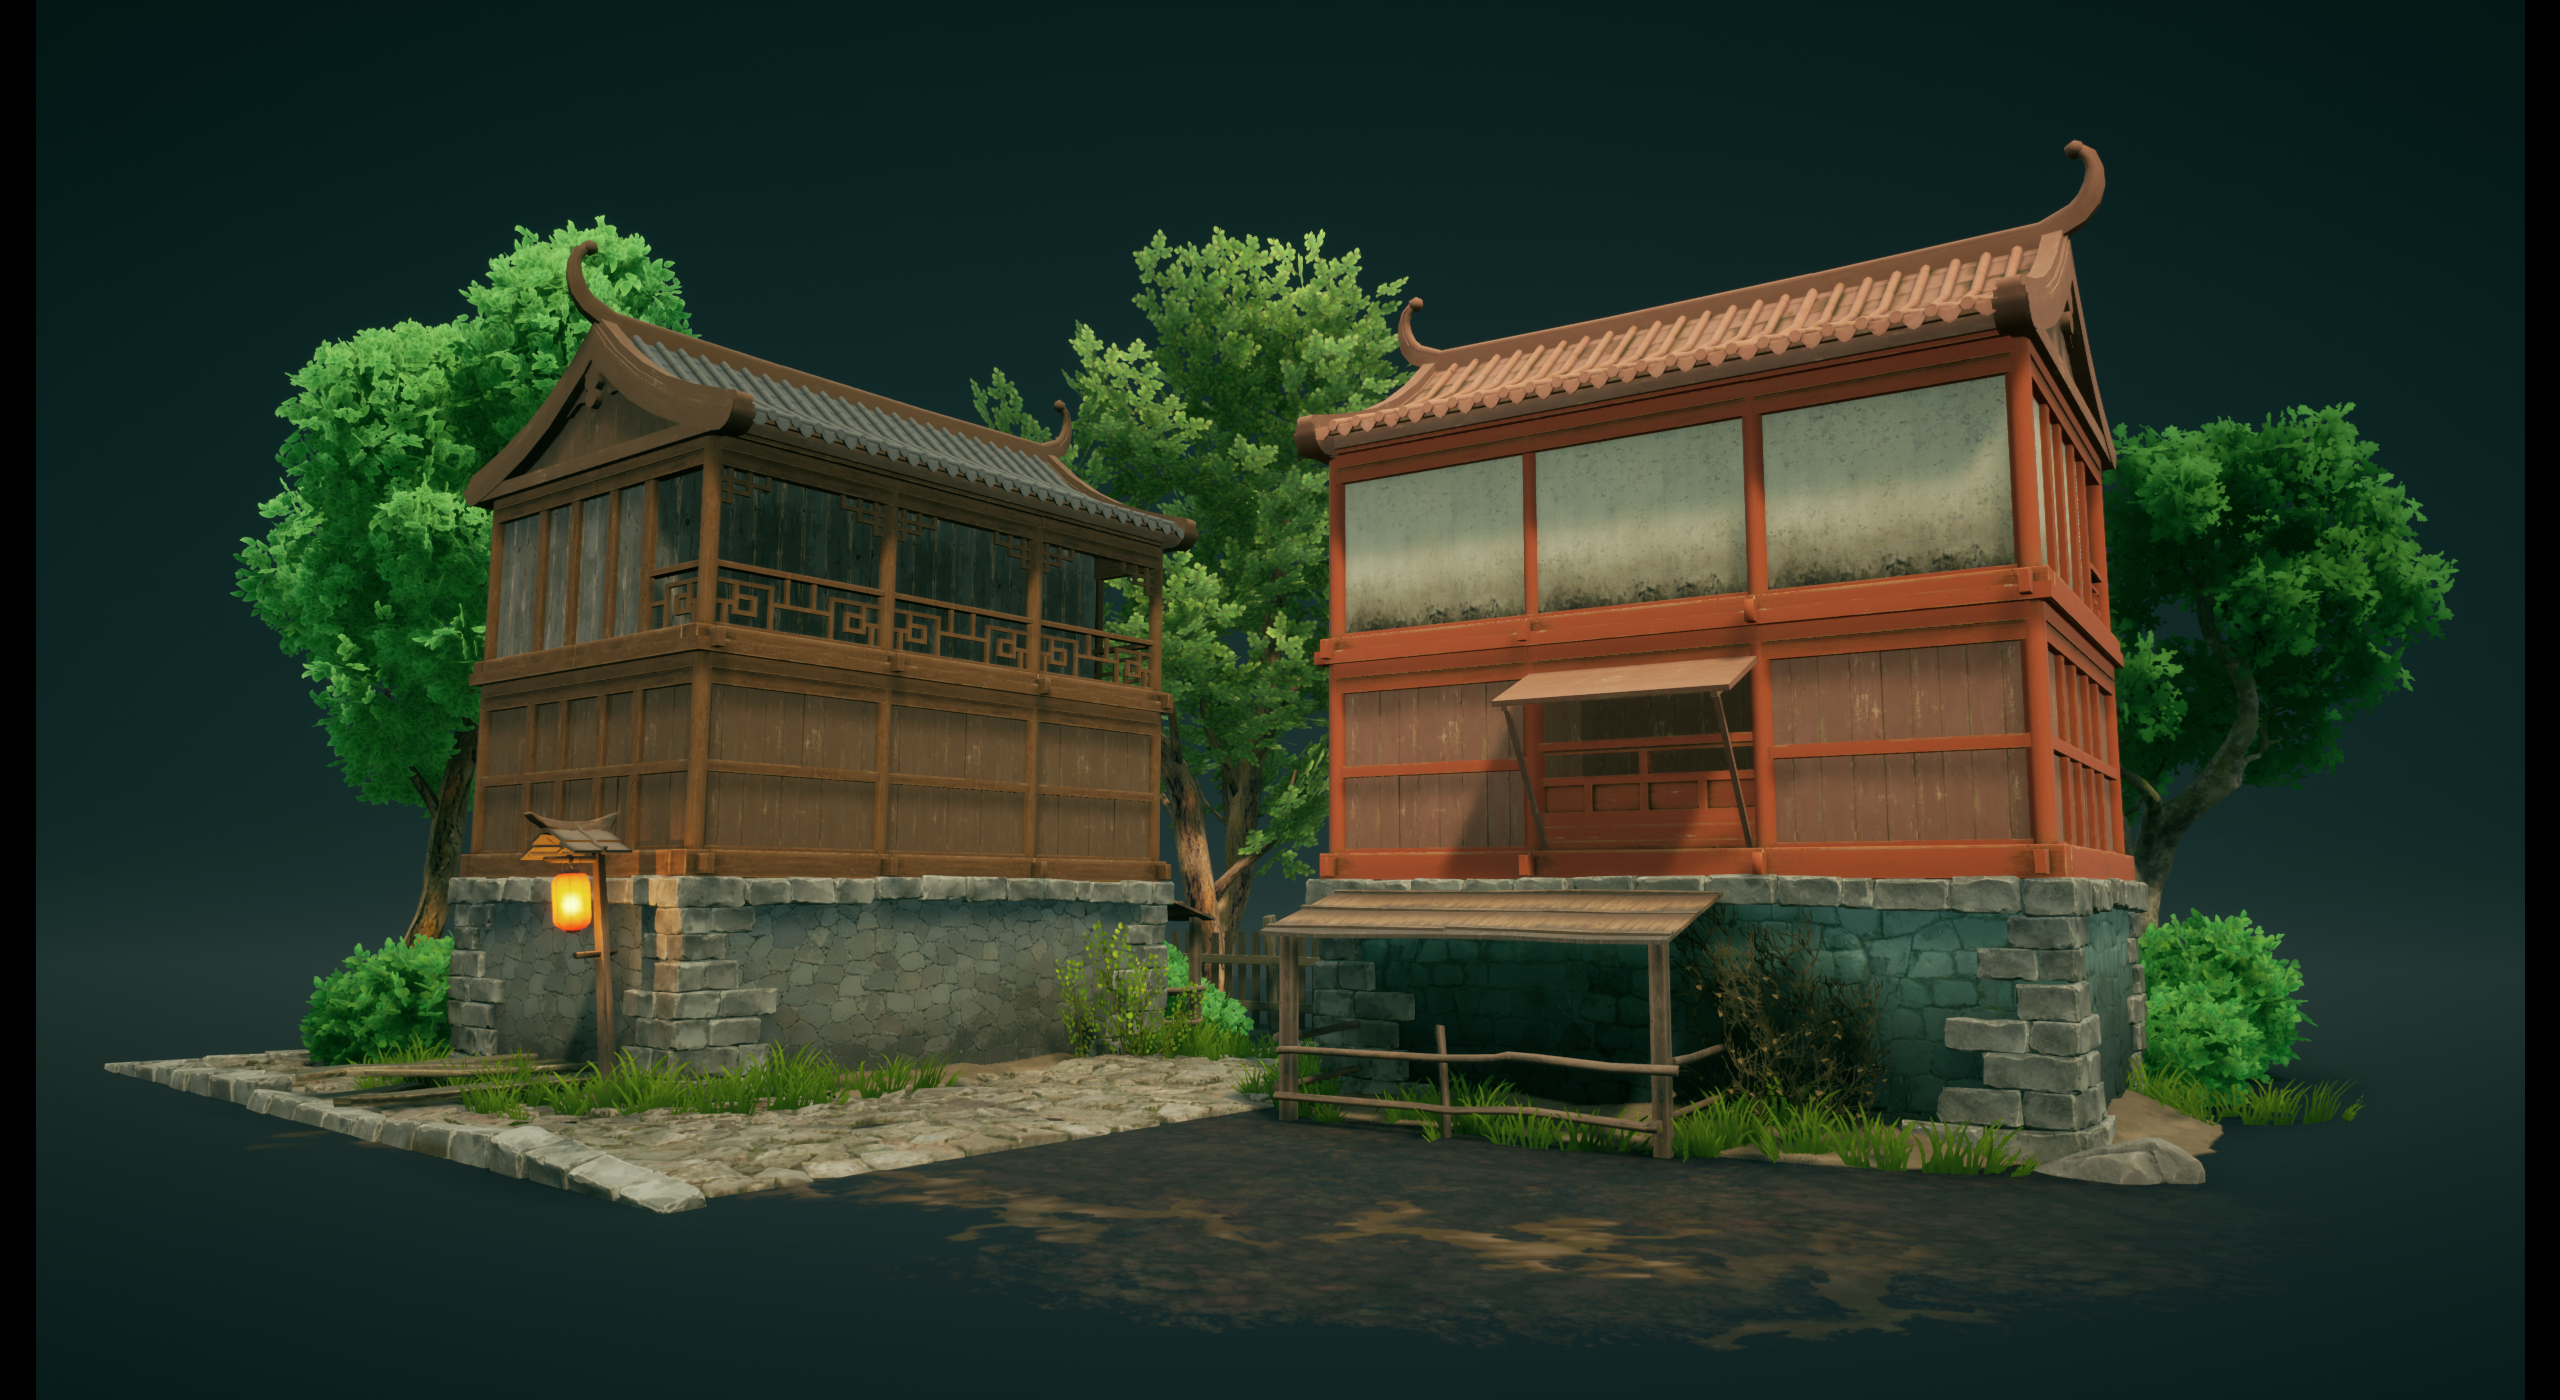
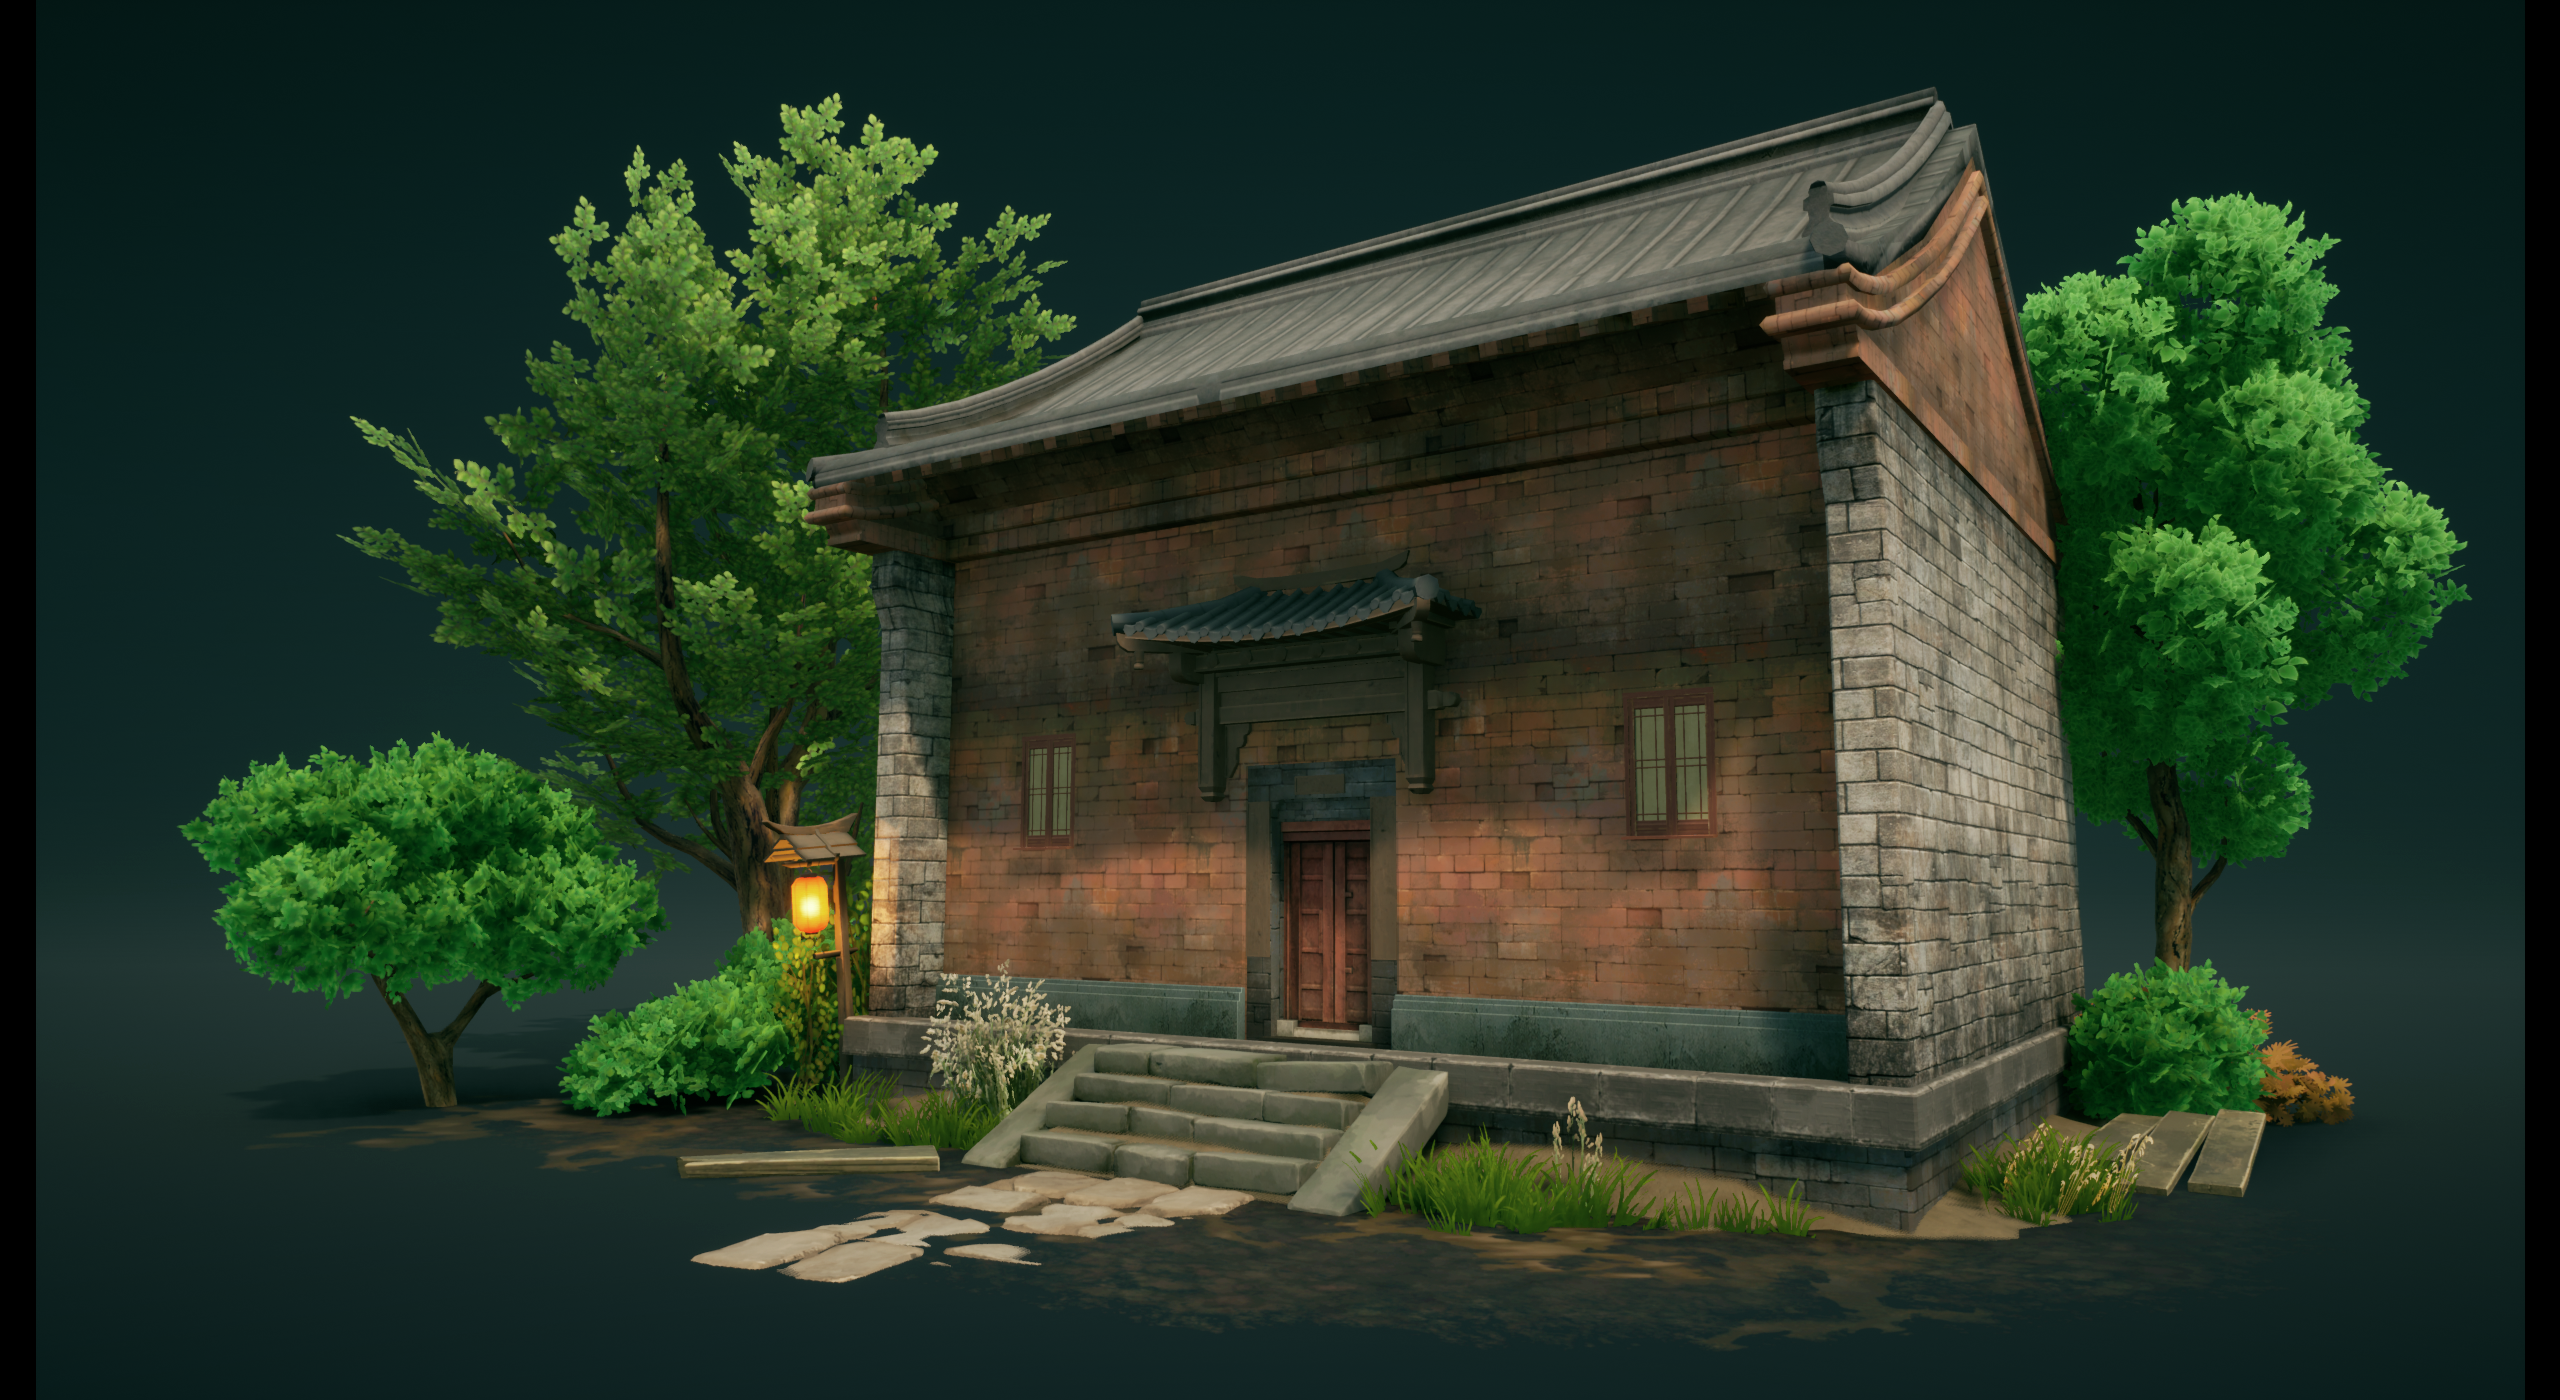
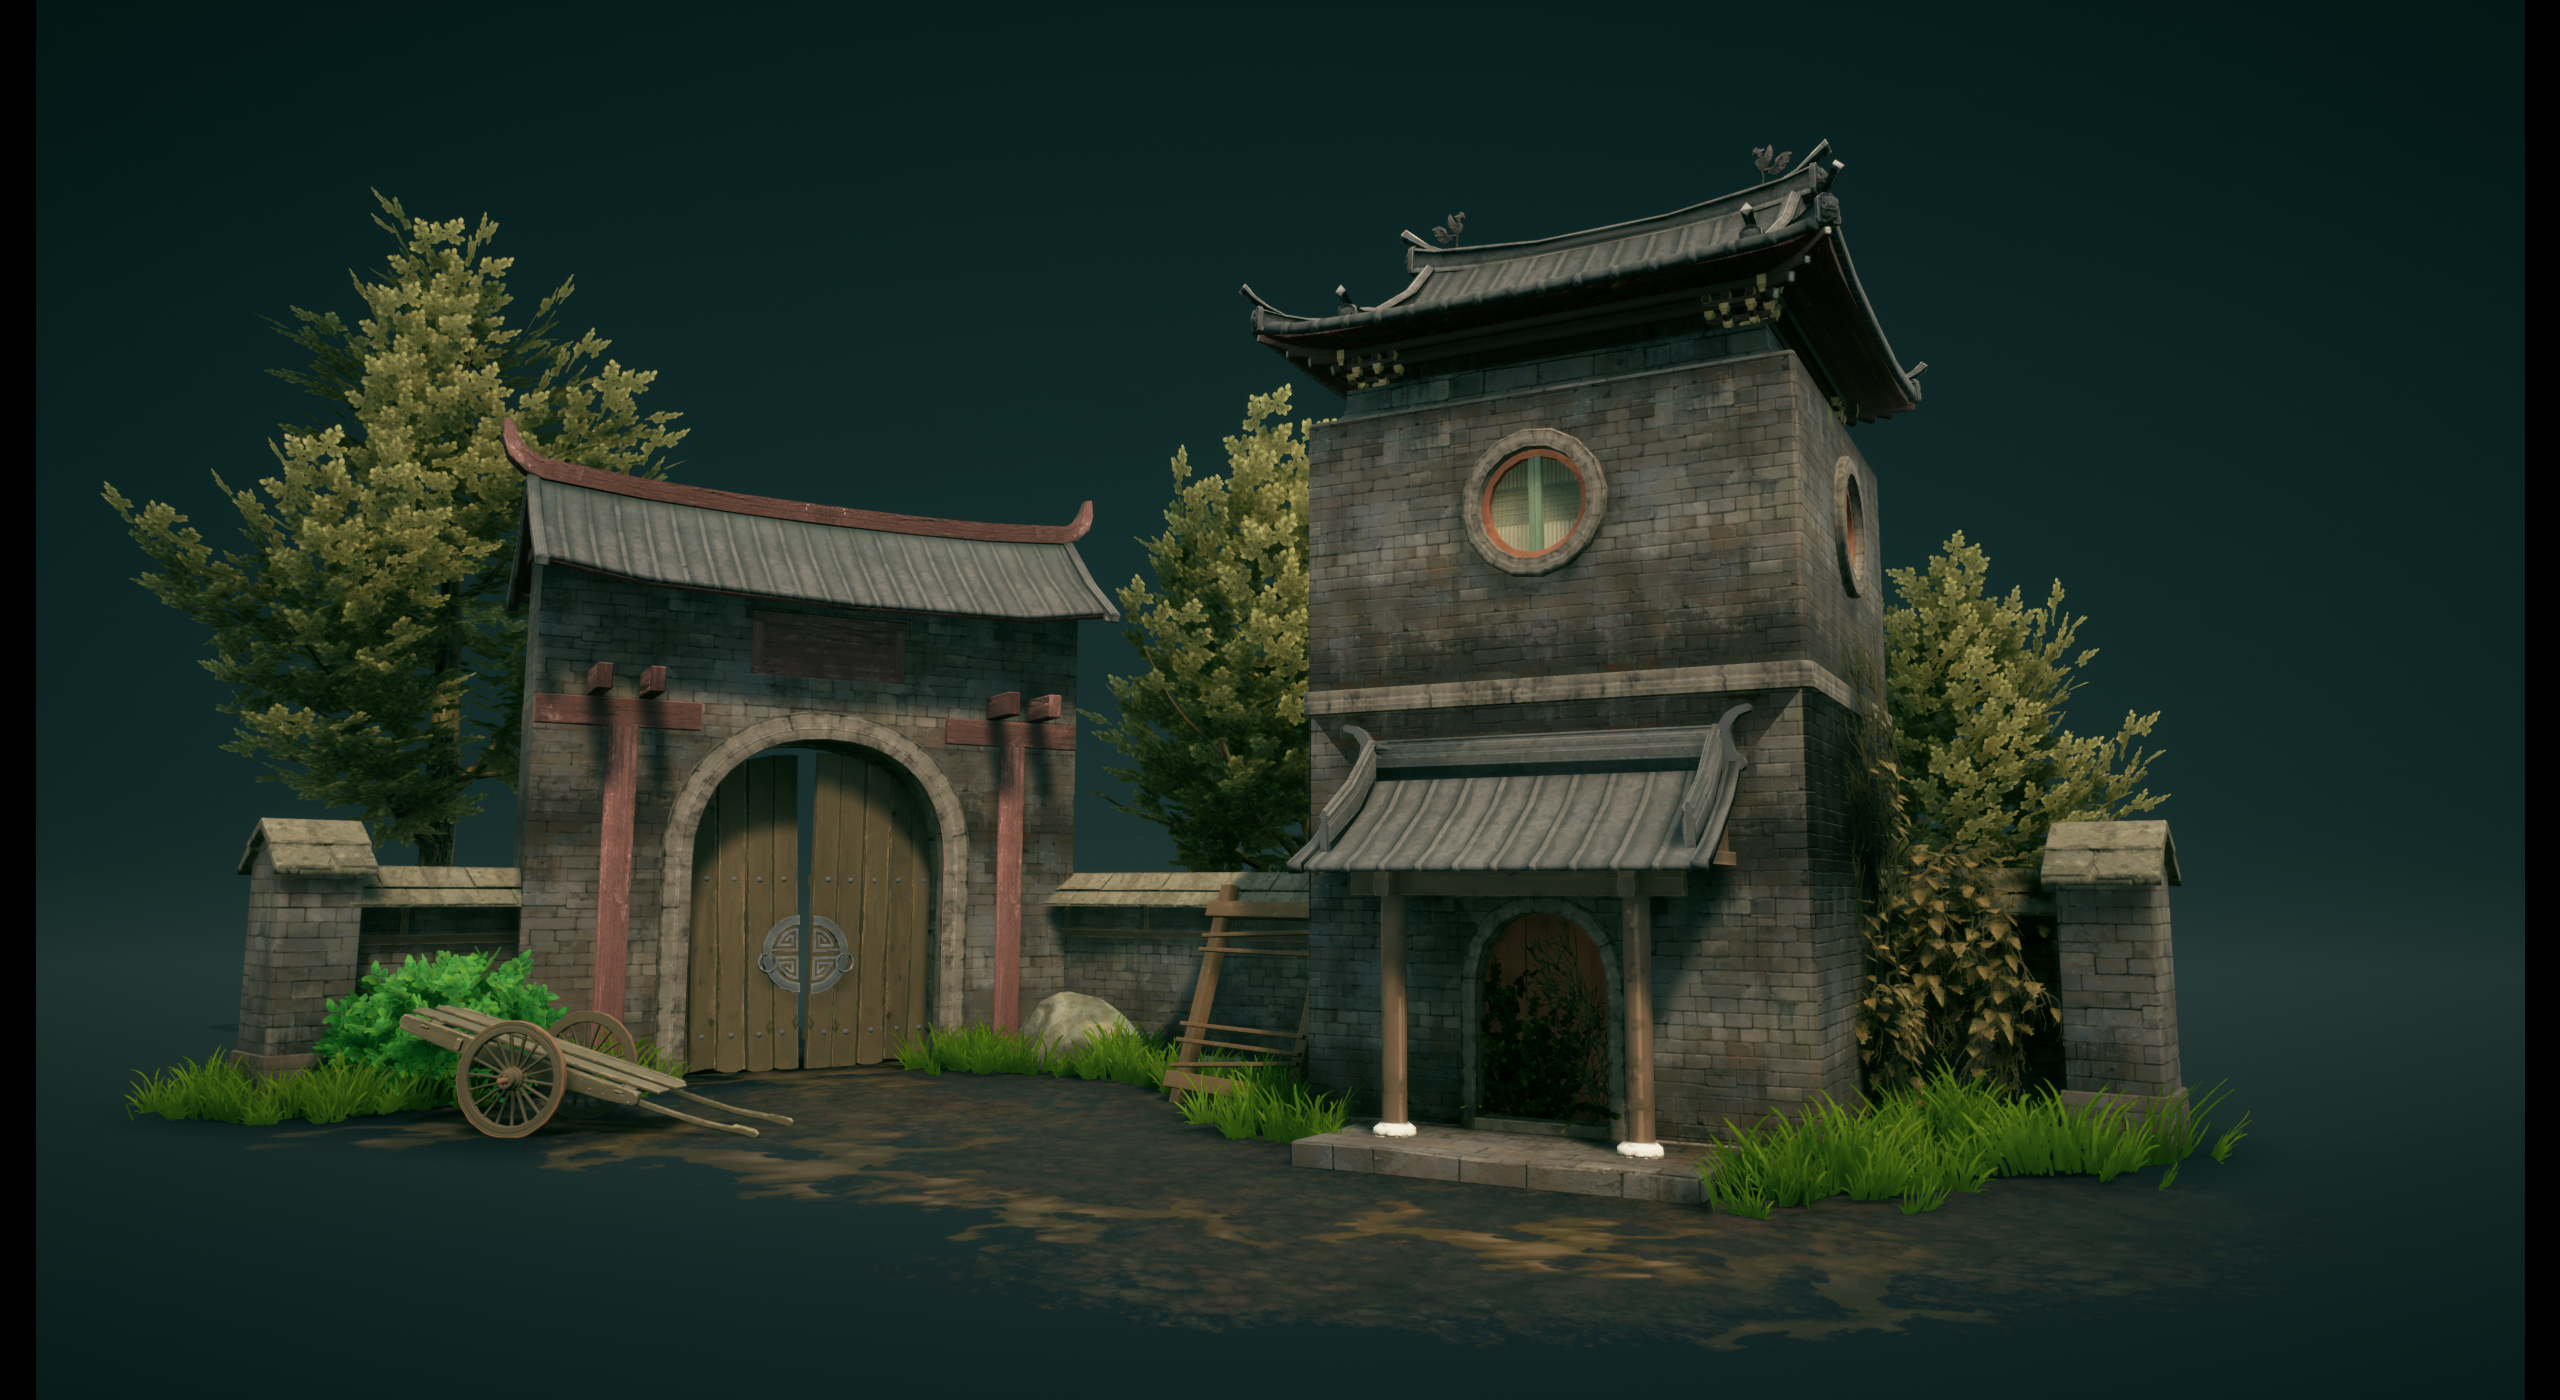
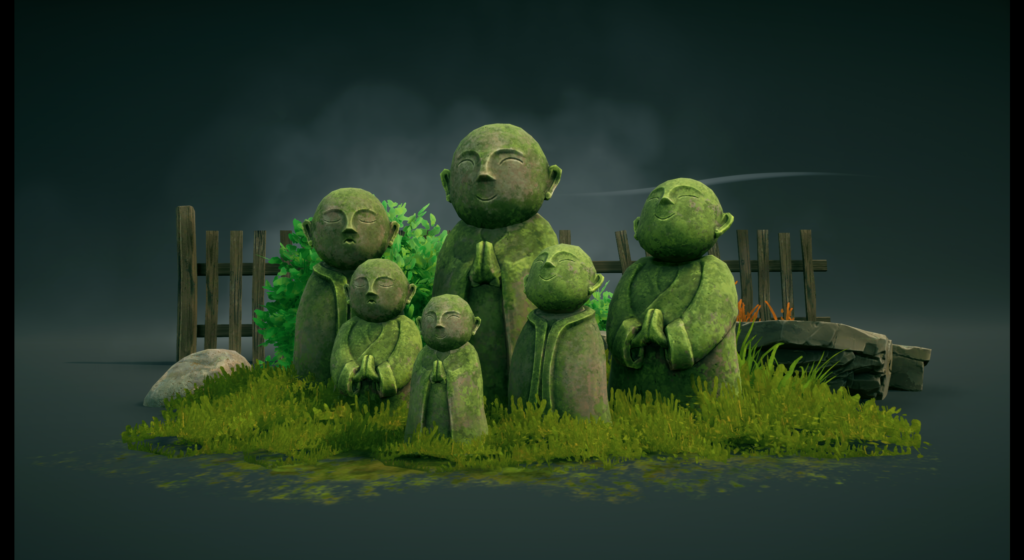
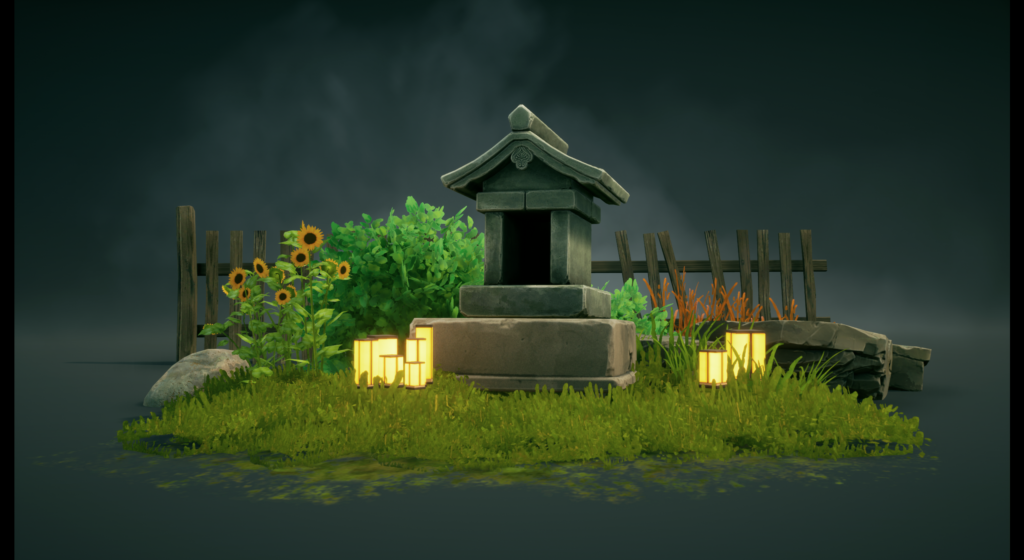
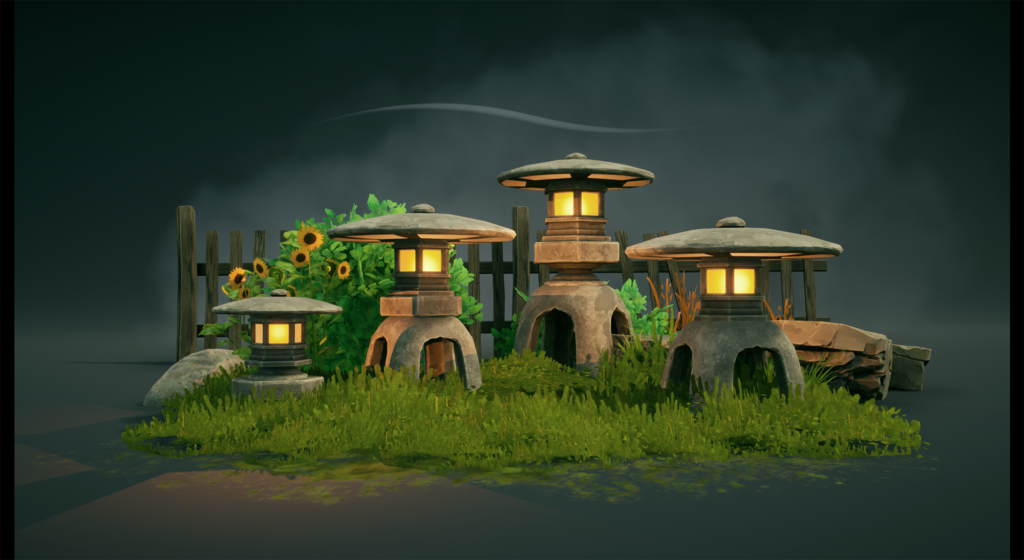
Buildings
The process of creating buildings was not complicated. We created them in Blender using modules that had been prepared earlier for quick re-use without the need to unwrap each element individually. Most of them have a very simple form, materials, and a relatively small number of polygons. In architecture, we mainly relied on the use of tiled textures or an atlas for a given set of buildings.
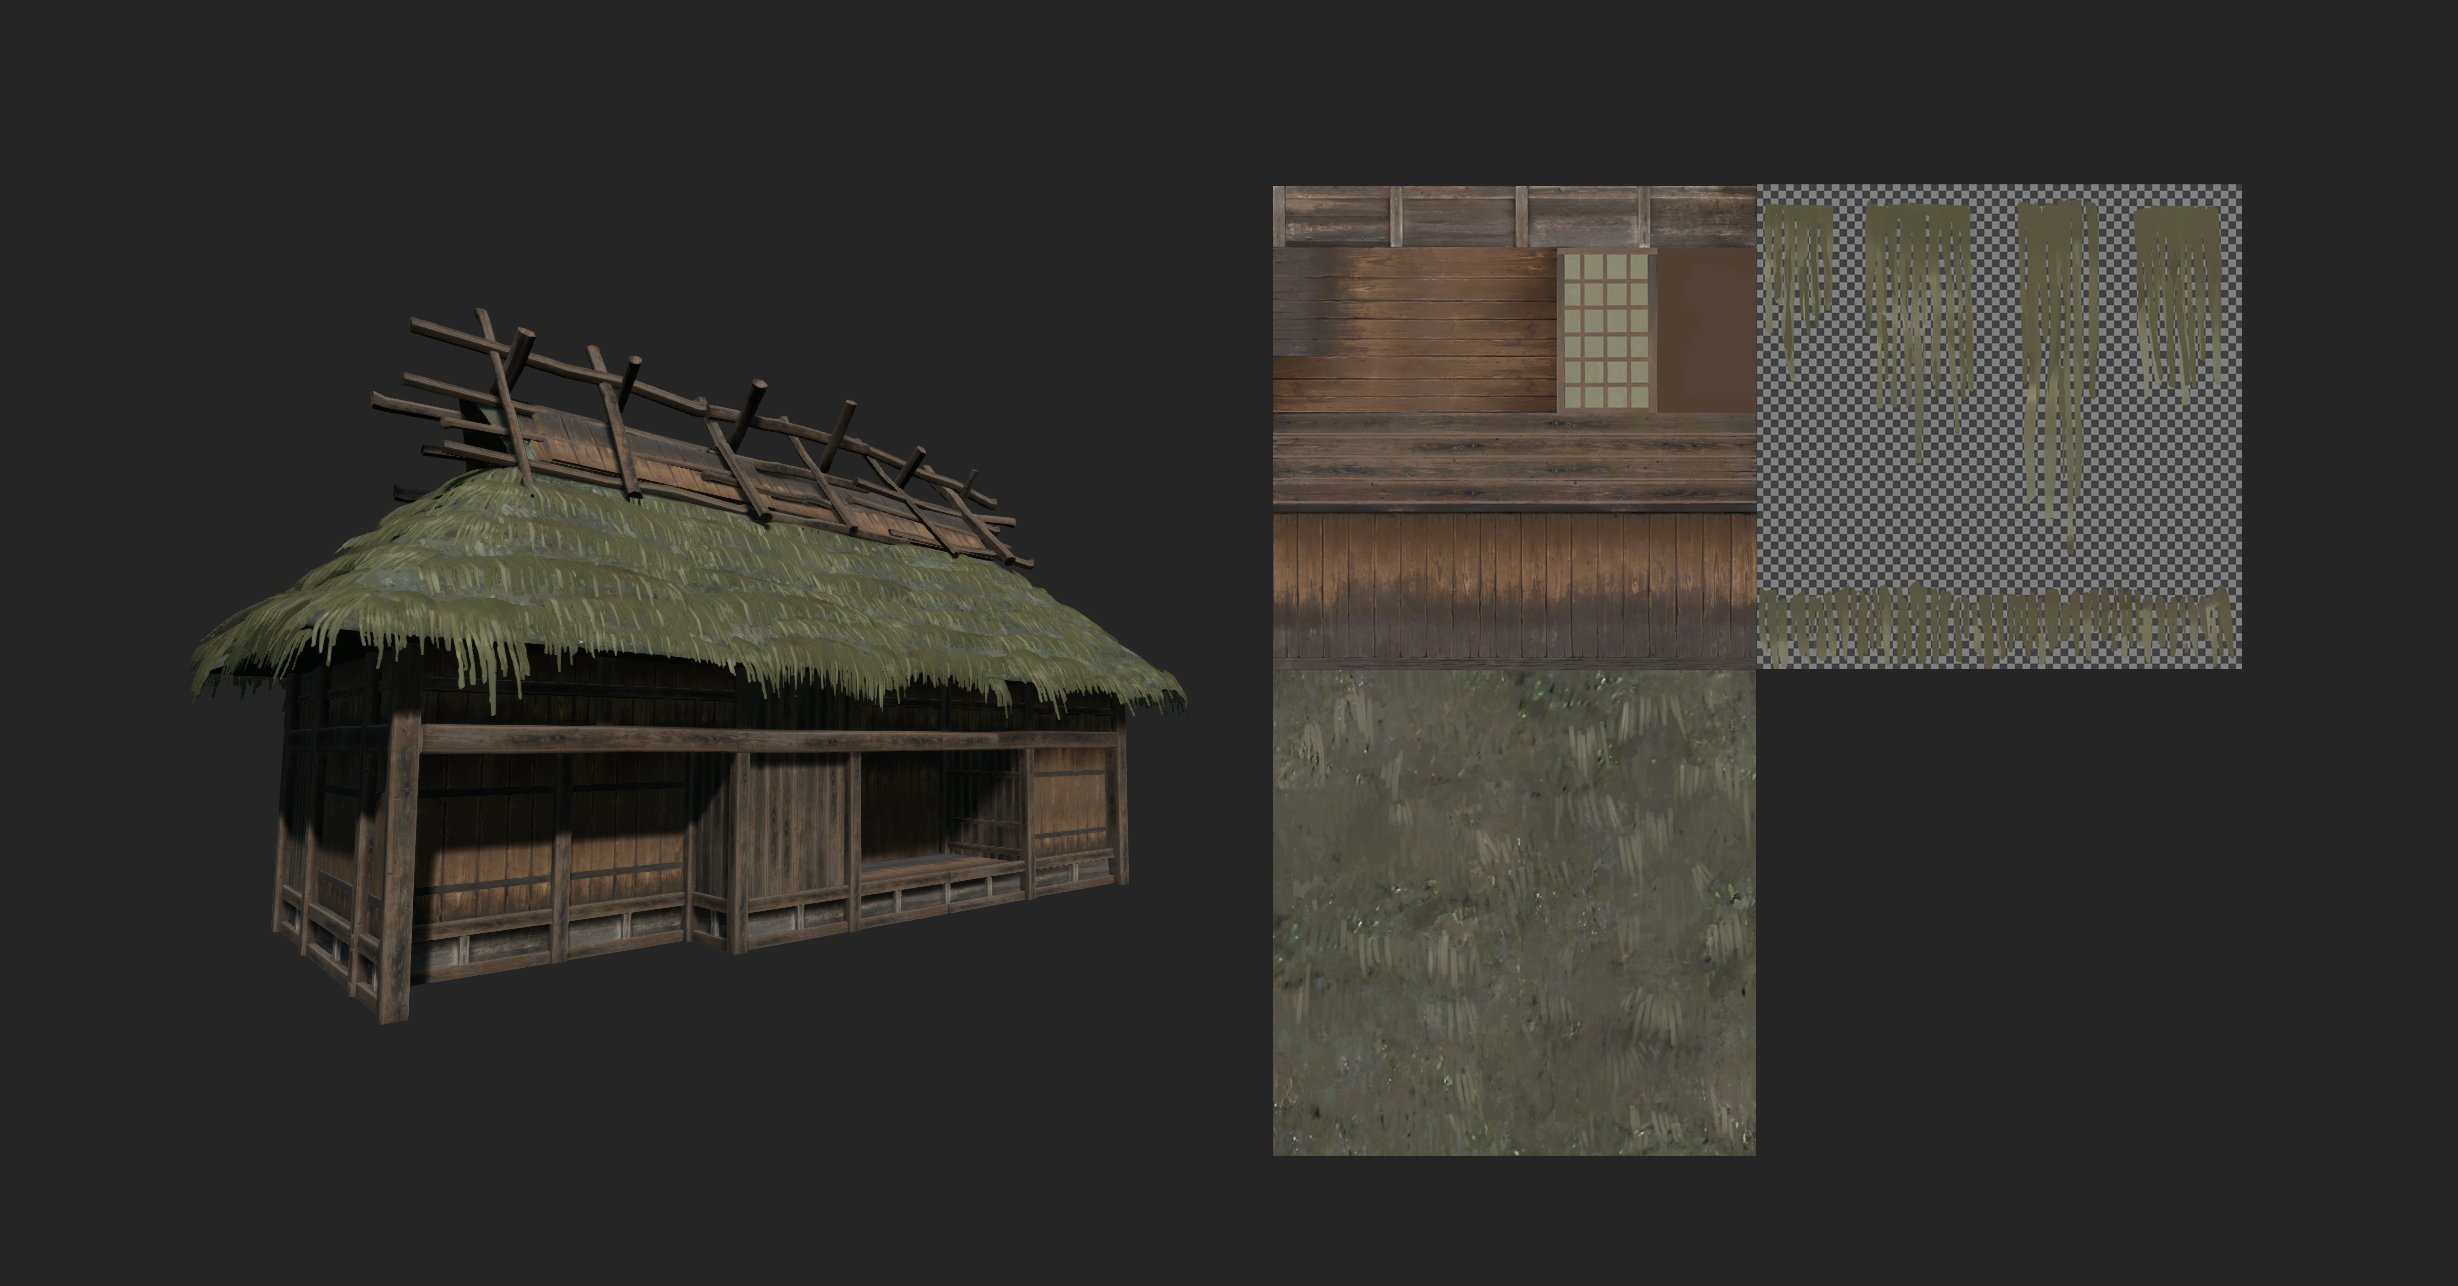
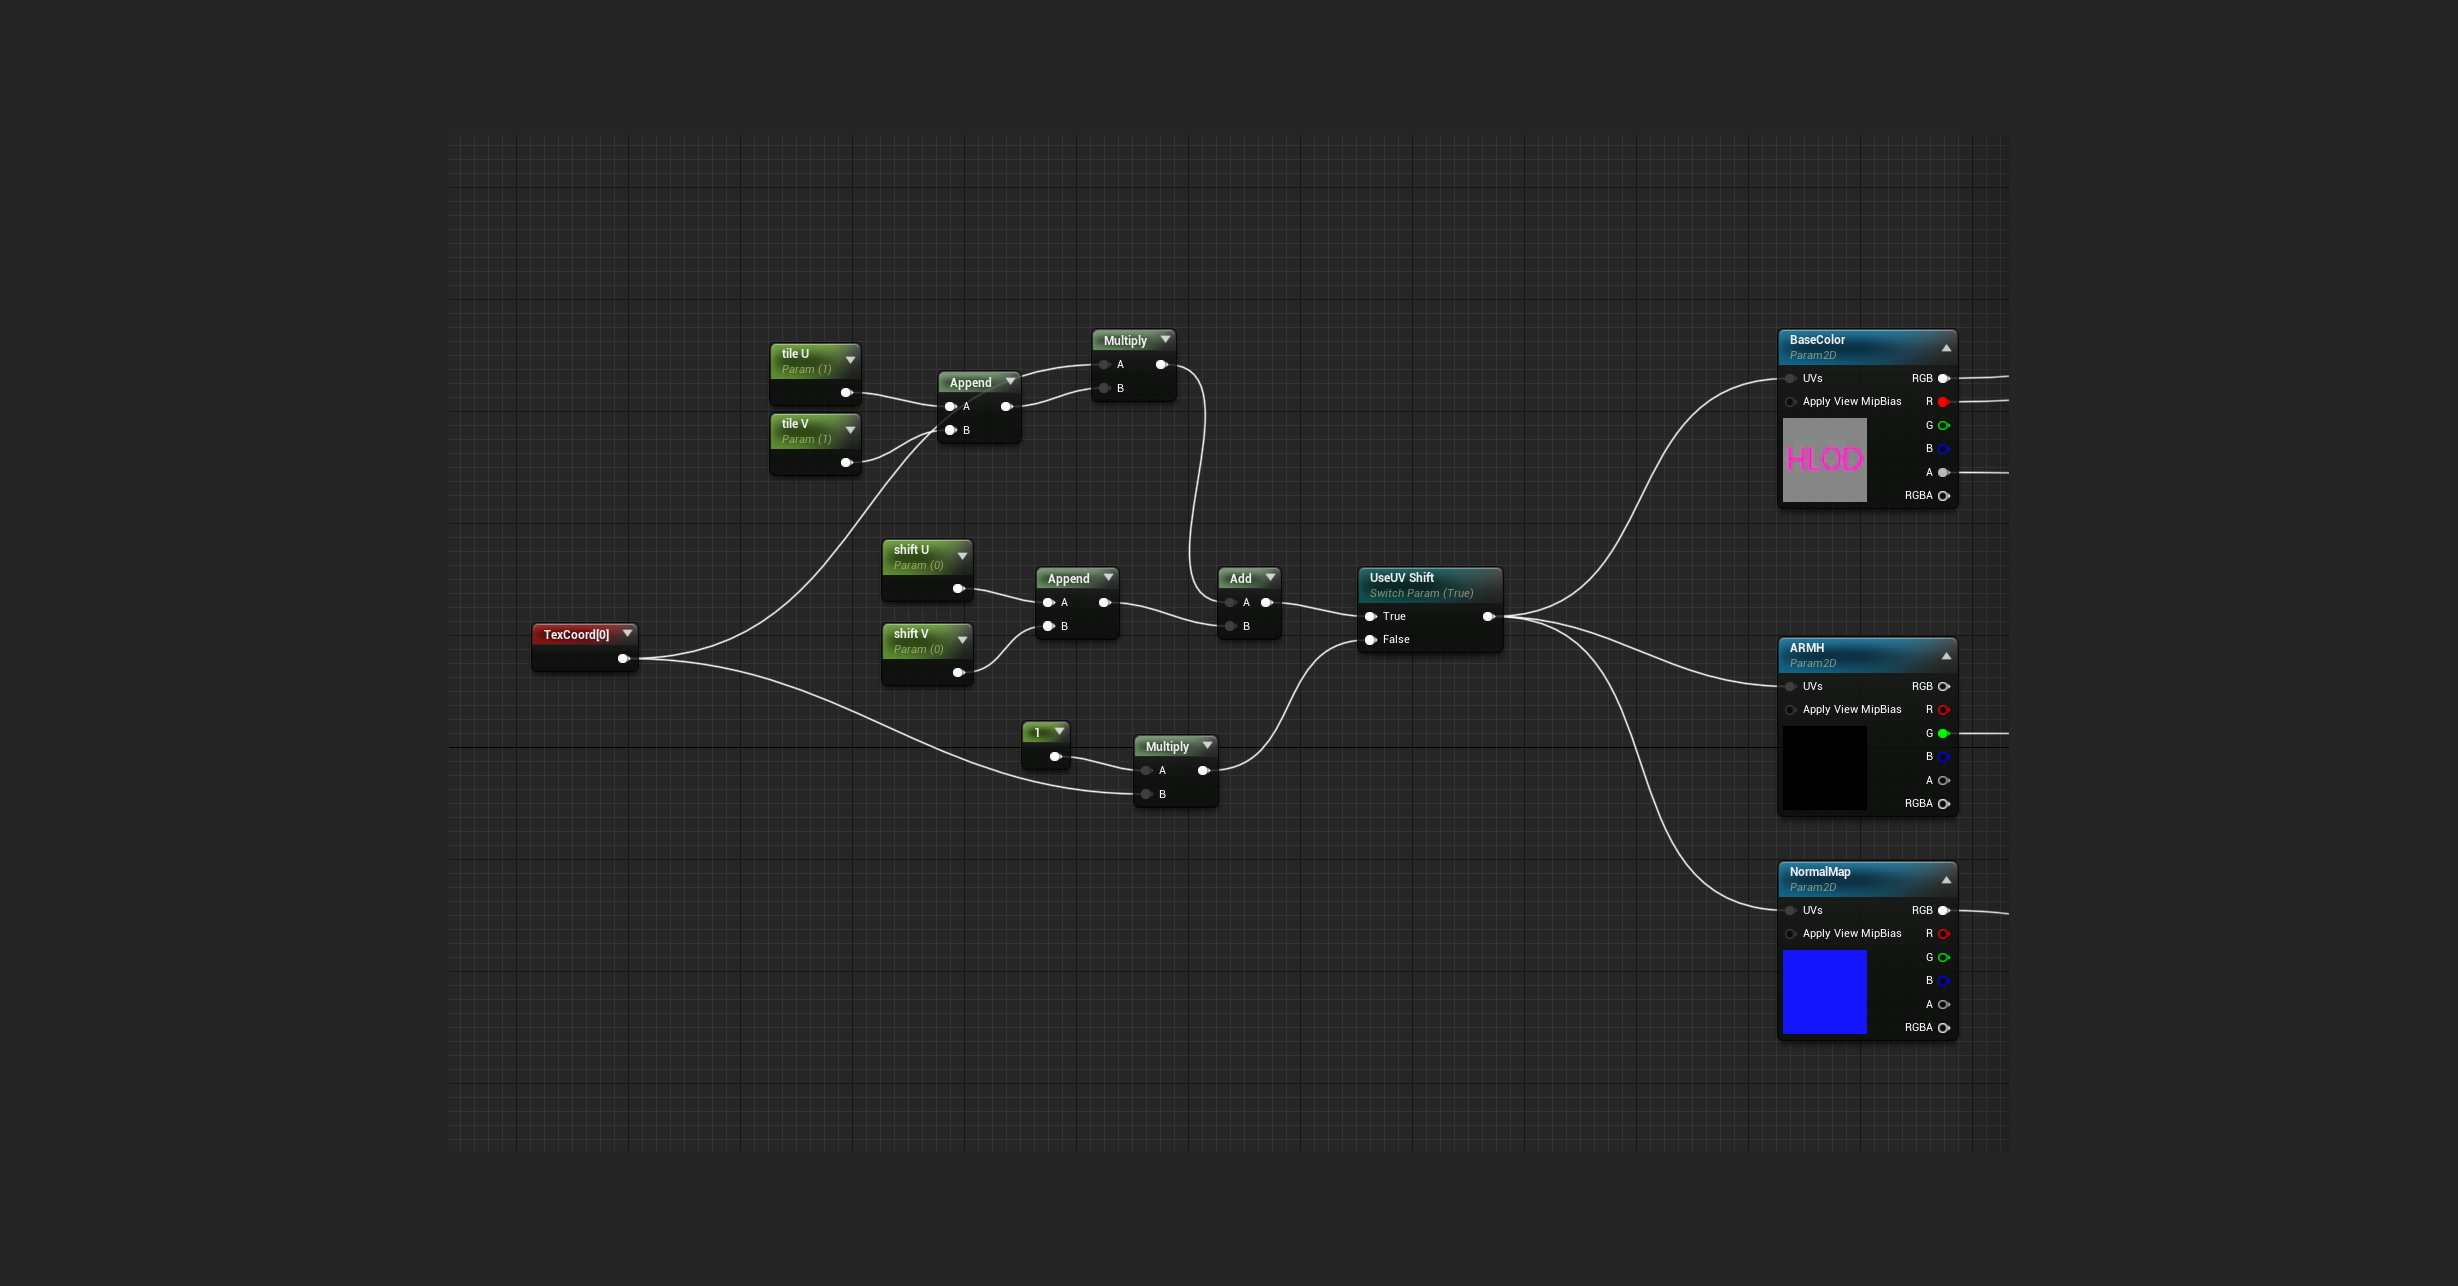
To achieve additional details on the buildings, we used decals which helped to break the repetition of the tiled textures. After creating the atlas with stains and the specific material in UE4, we were able to freely use them on each building.
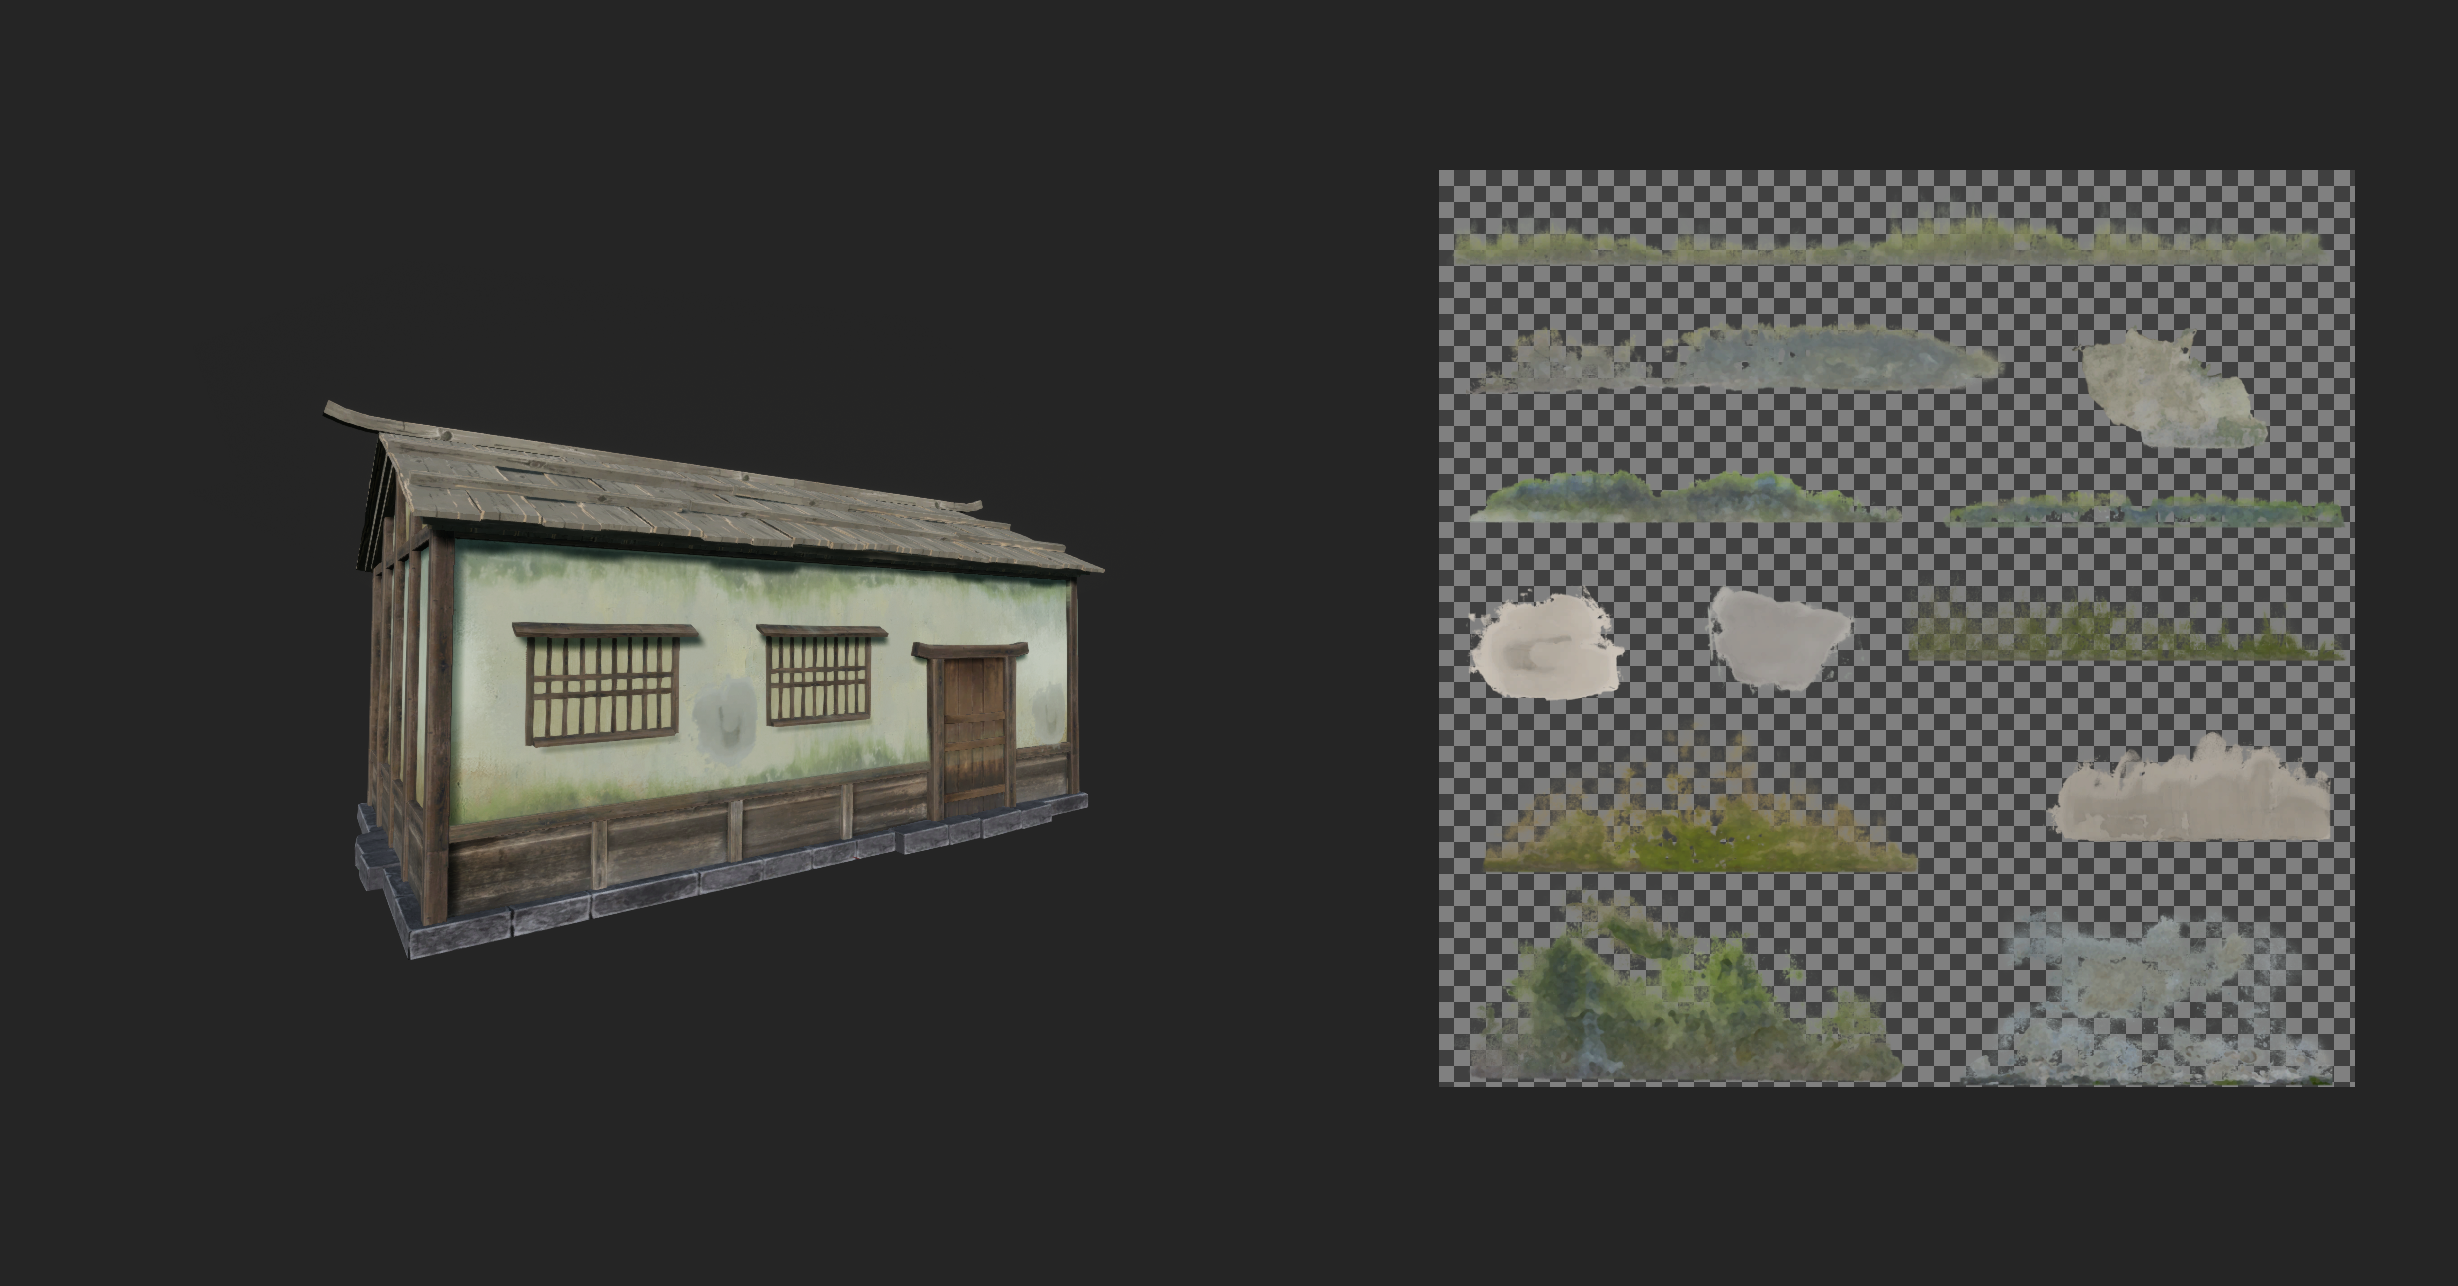
To use the atlas, we needed a material that would allow us to accurately display a given part of the texture.
Here is a small presentation of the buildings used in the project.


Megascans
In Rogue Spirit, we also used objects from Megascans. However, to maintain the style characteristics, it was necessary to properly prepare these objects to obtain a stylized look that would match the rest of the assets, and it was also necessary to optimize the objects in terms of the vertex count.
The tutorial by Galen Davis Stylized Environment Texturing in Mixer was very helpful. He shows how to stylize photo-scanned objects. Here is an example of what we achieved.
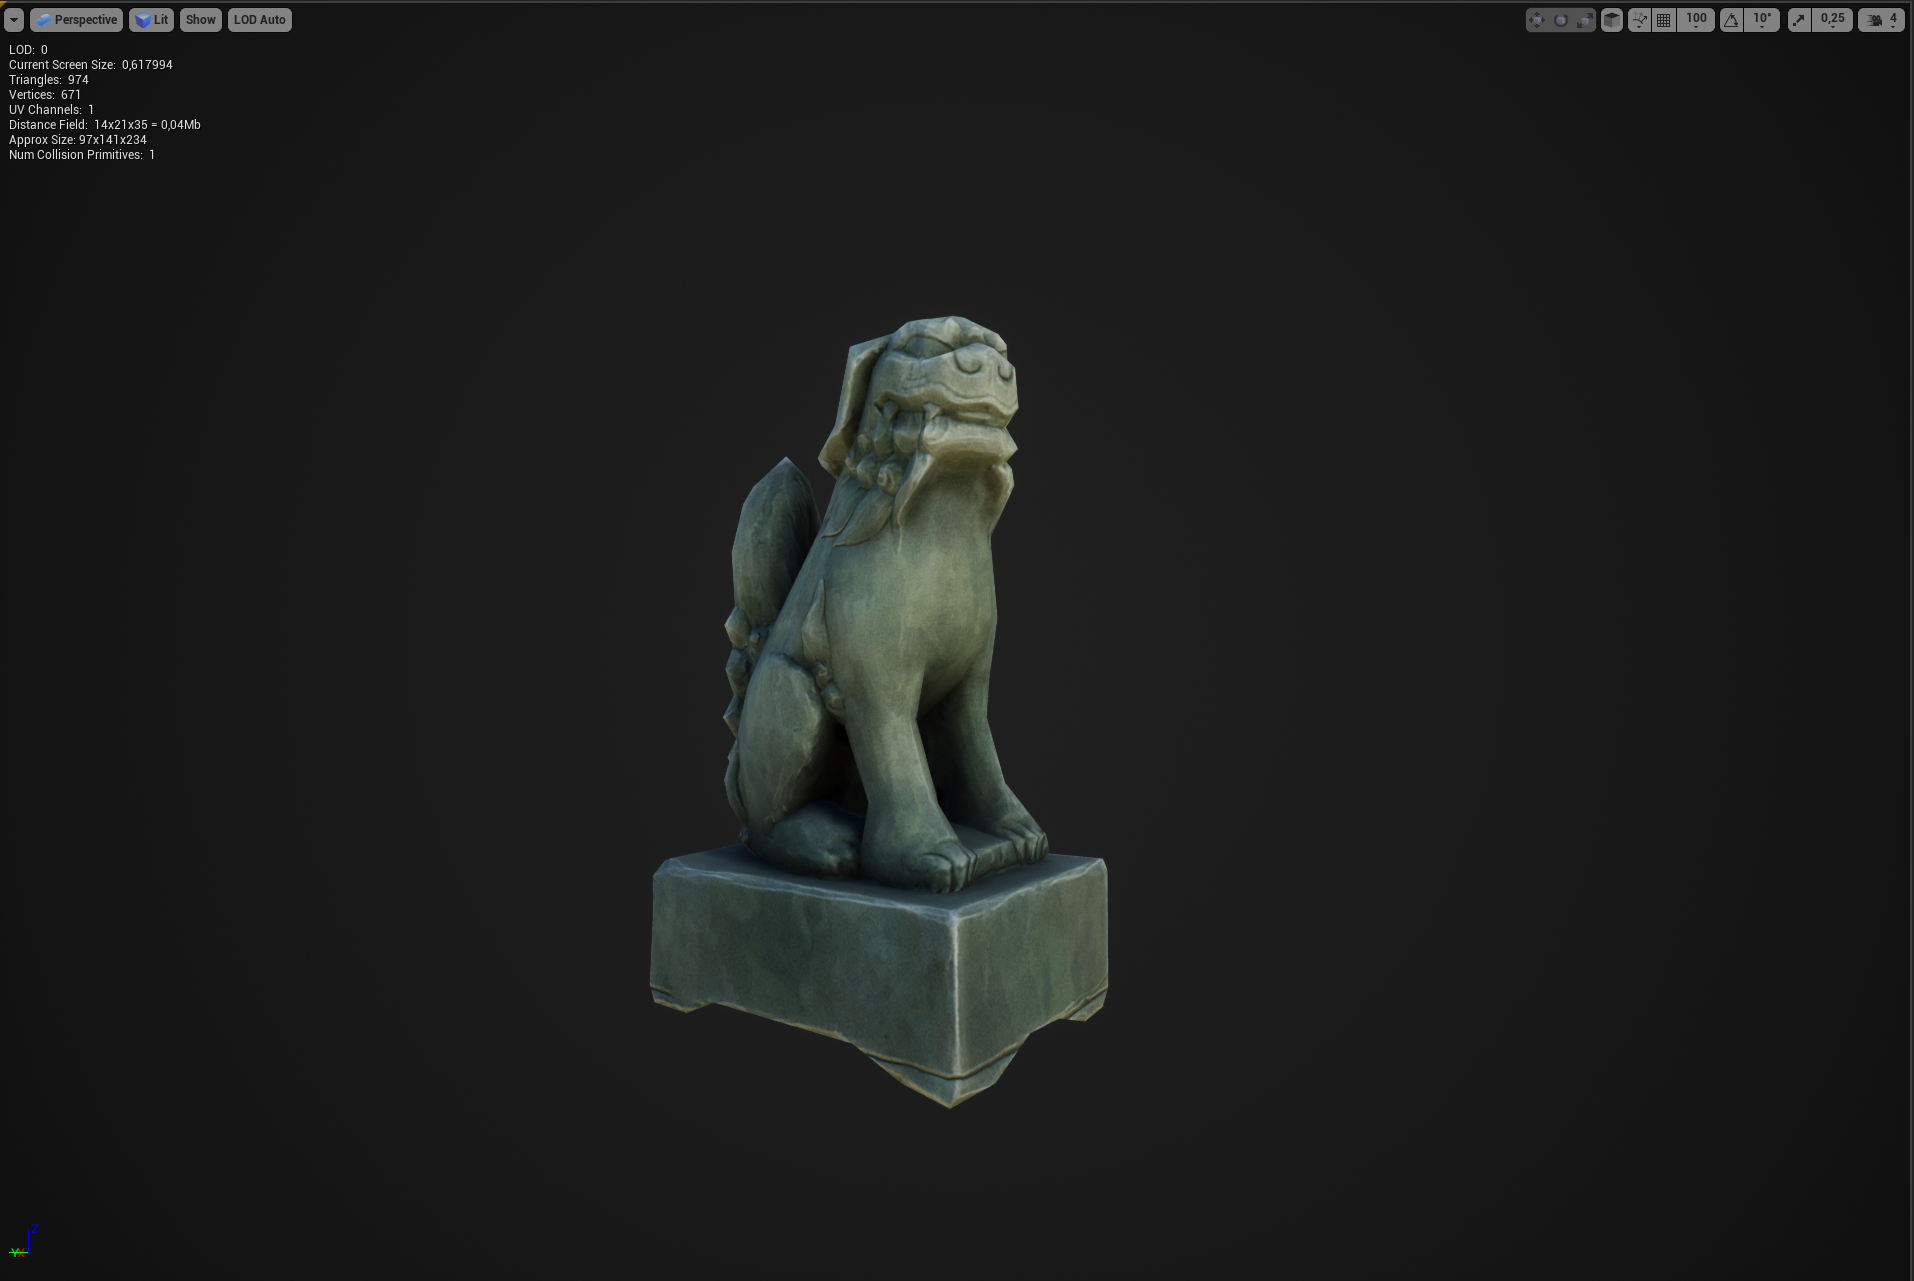
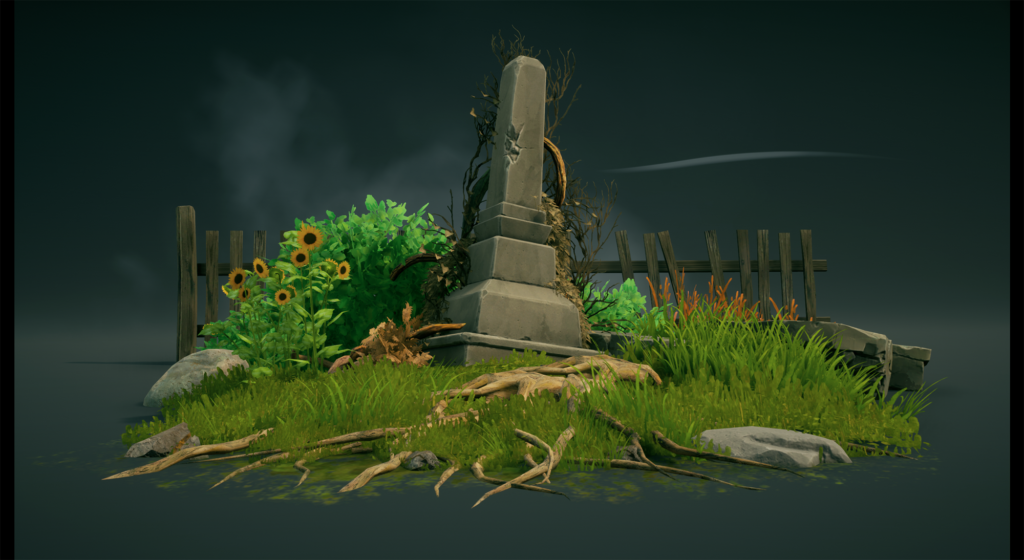
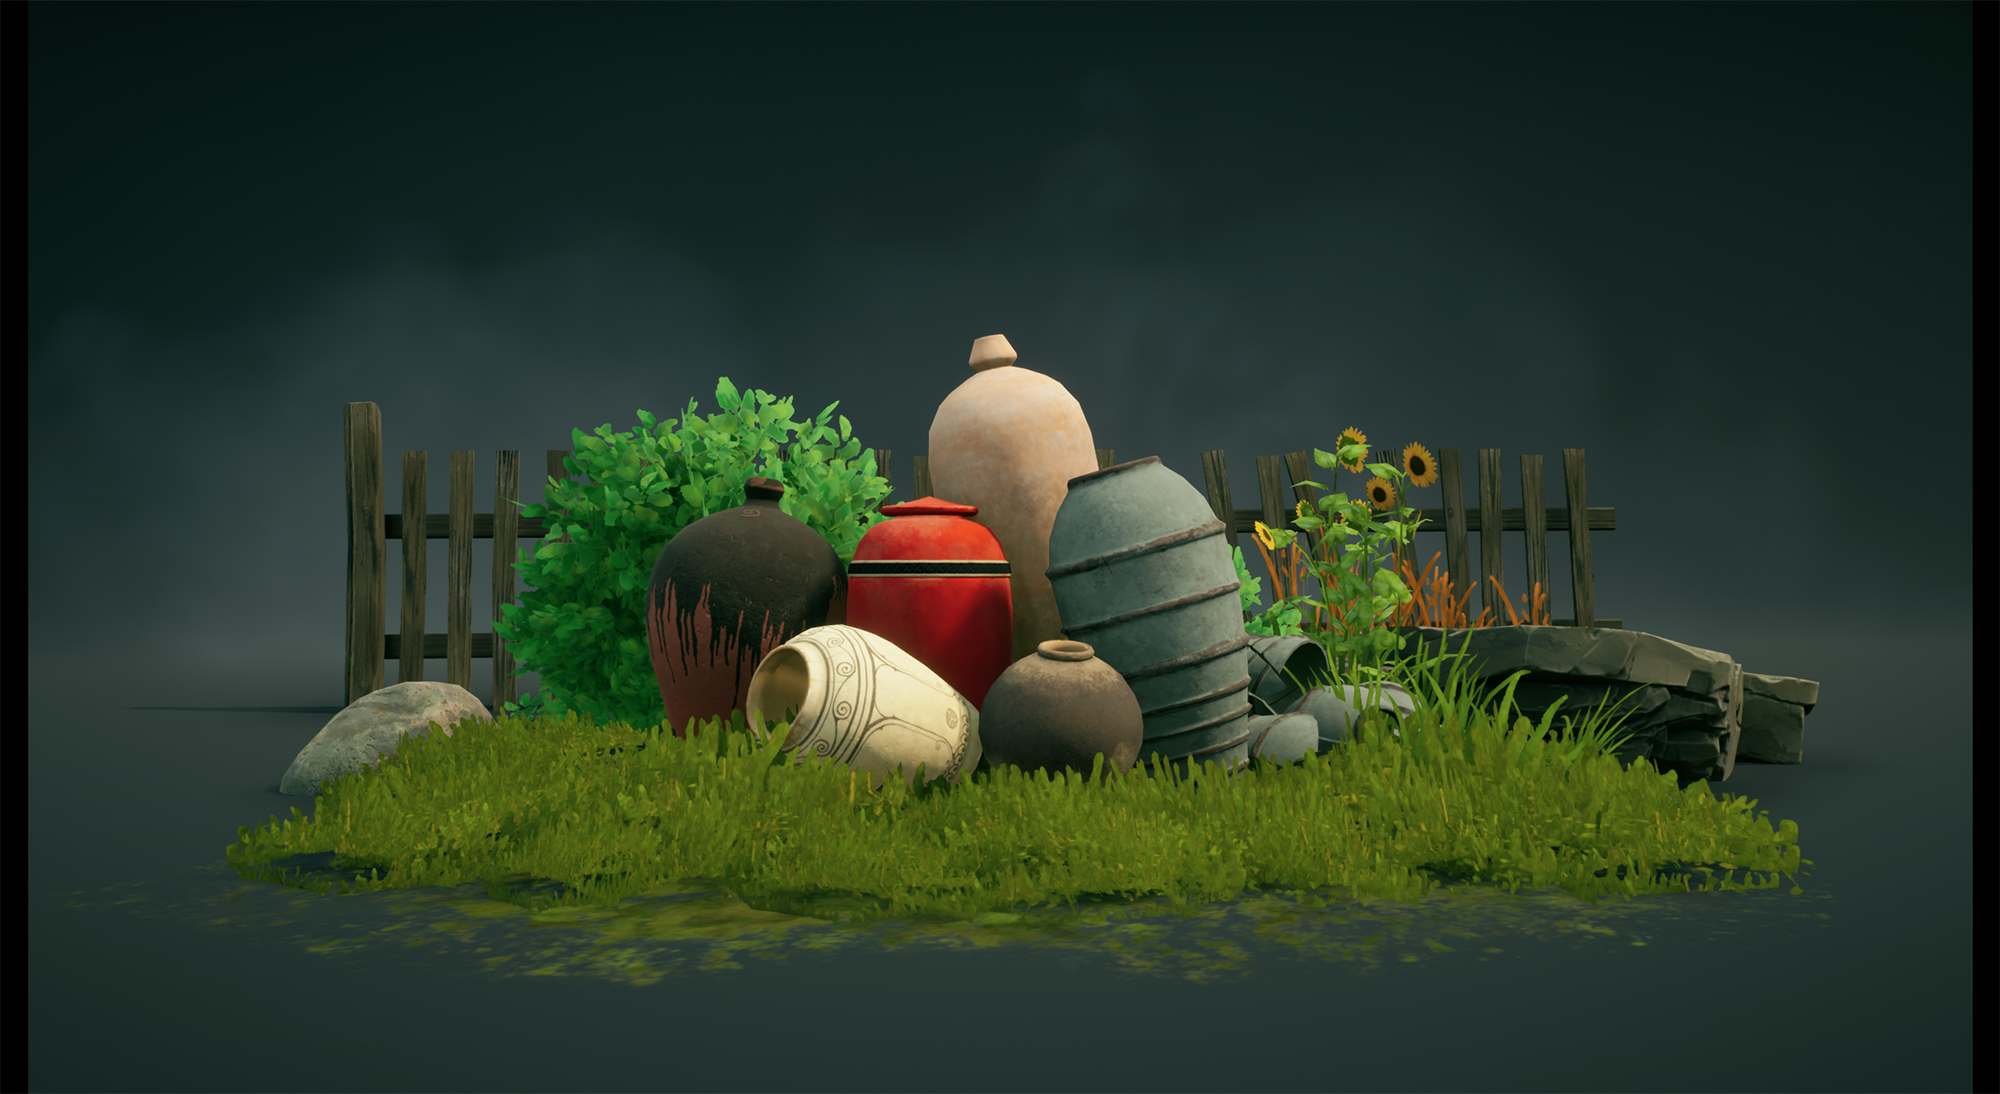
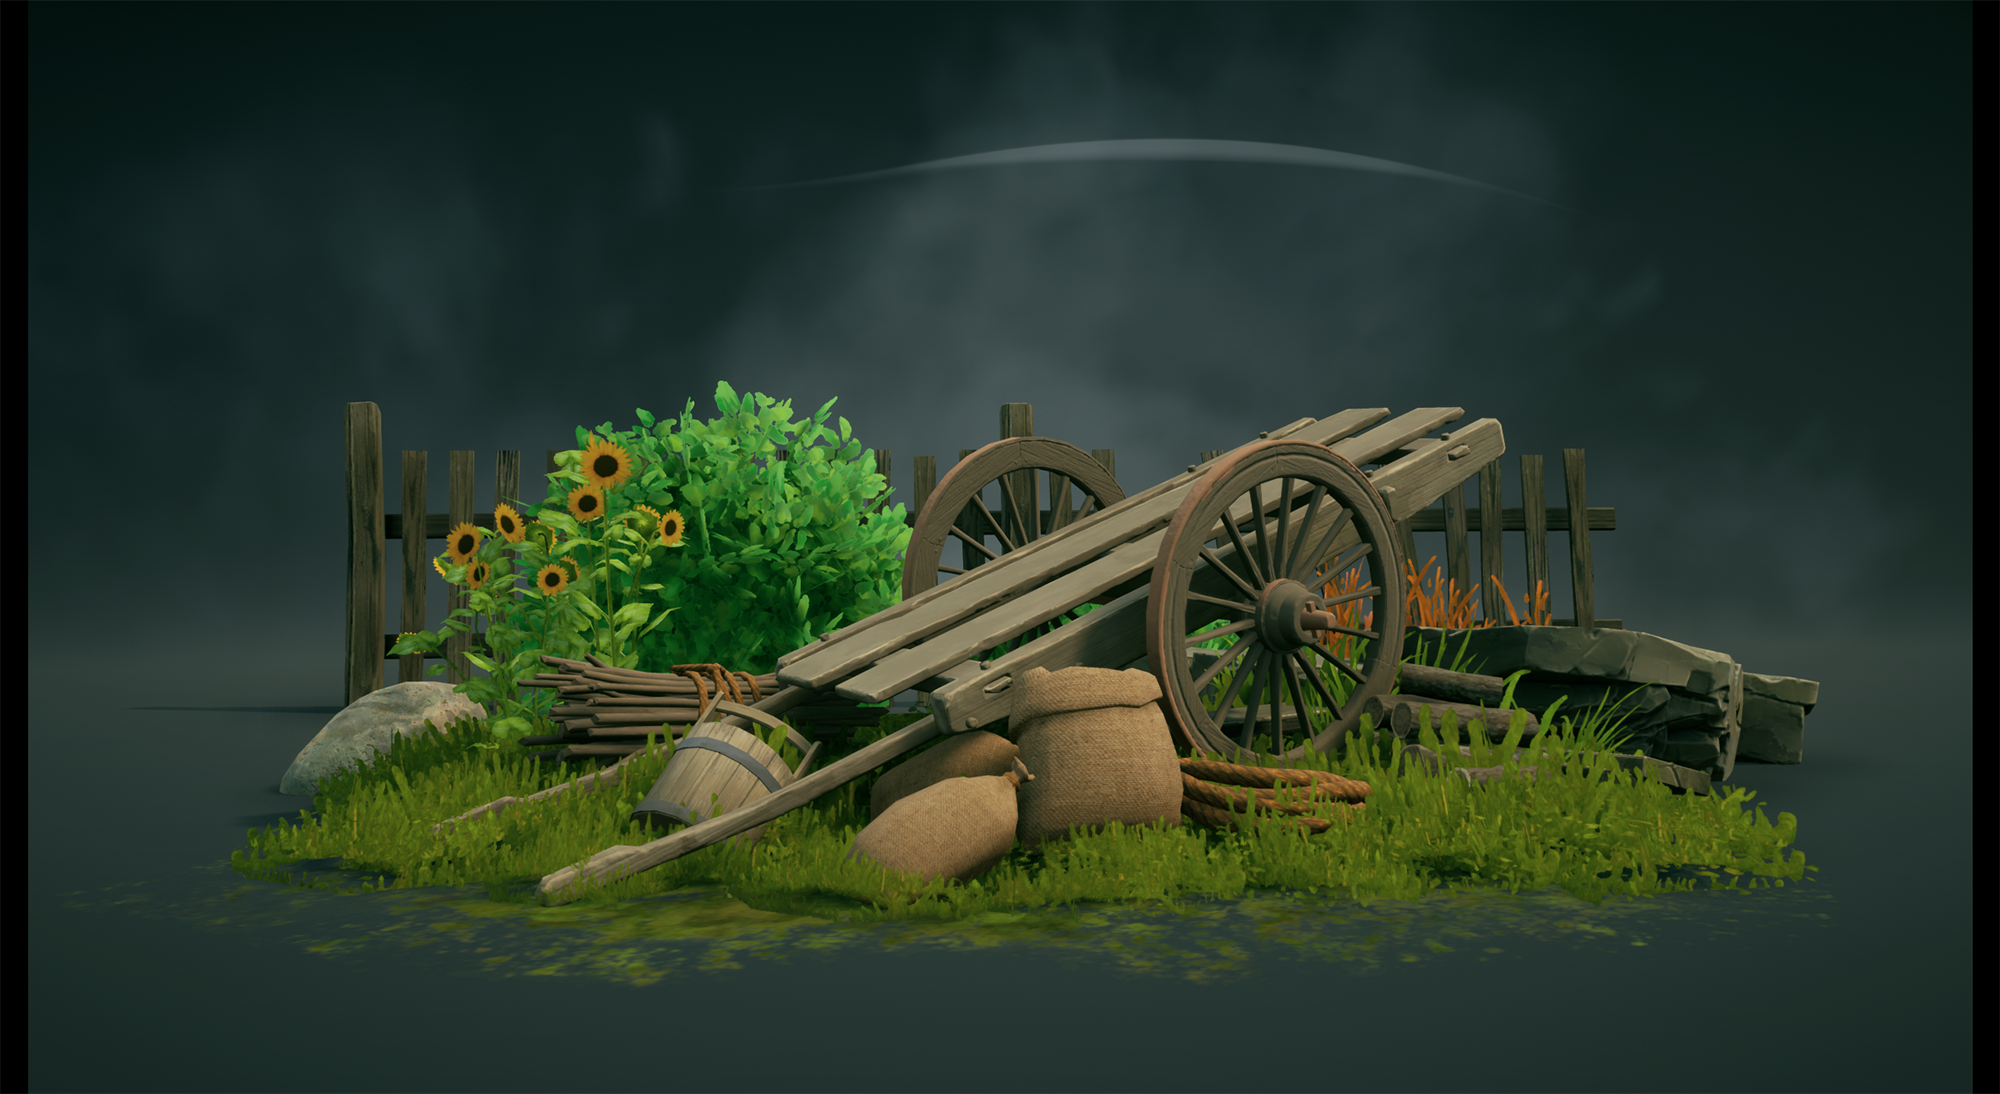
Props
During the creation of props for our project, we tried to think as much as possible about whether a given object needs a dedicated texture, if so, how can we optimize it by mirroring individual elements inside a given mesh. In addition, we tried to create several versions of the mesh to get as much variety as possible at a low cost.

Most of the props in Rogue Spirit are destructible, therefore they needed special preparation, here you can check the process of creating this type of object.
Creating a destructible object in Unreal Engine 4 & Blender
Here is a small presentation of the props used in the project.
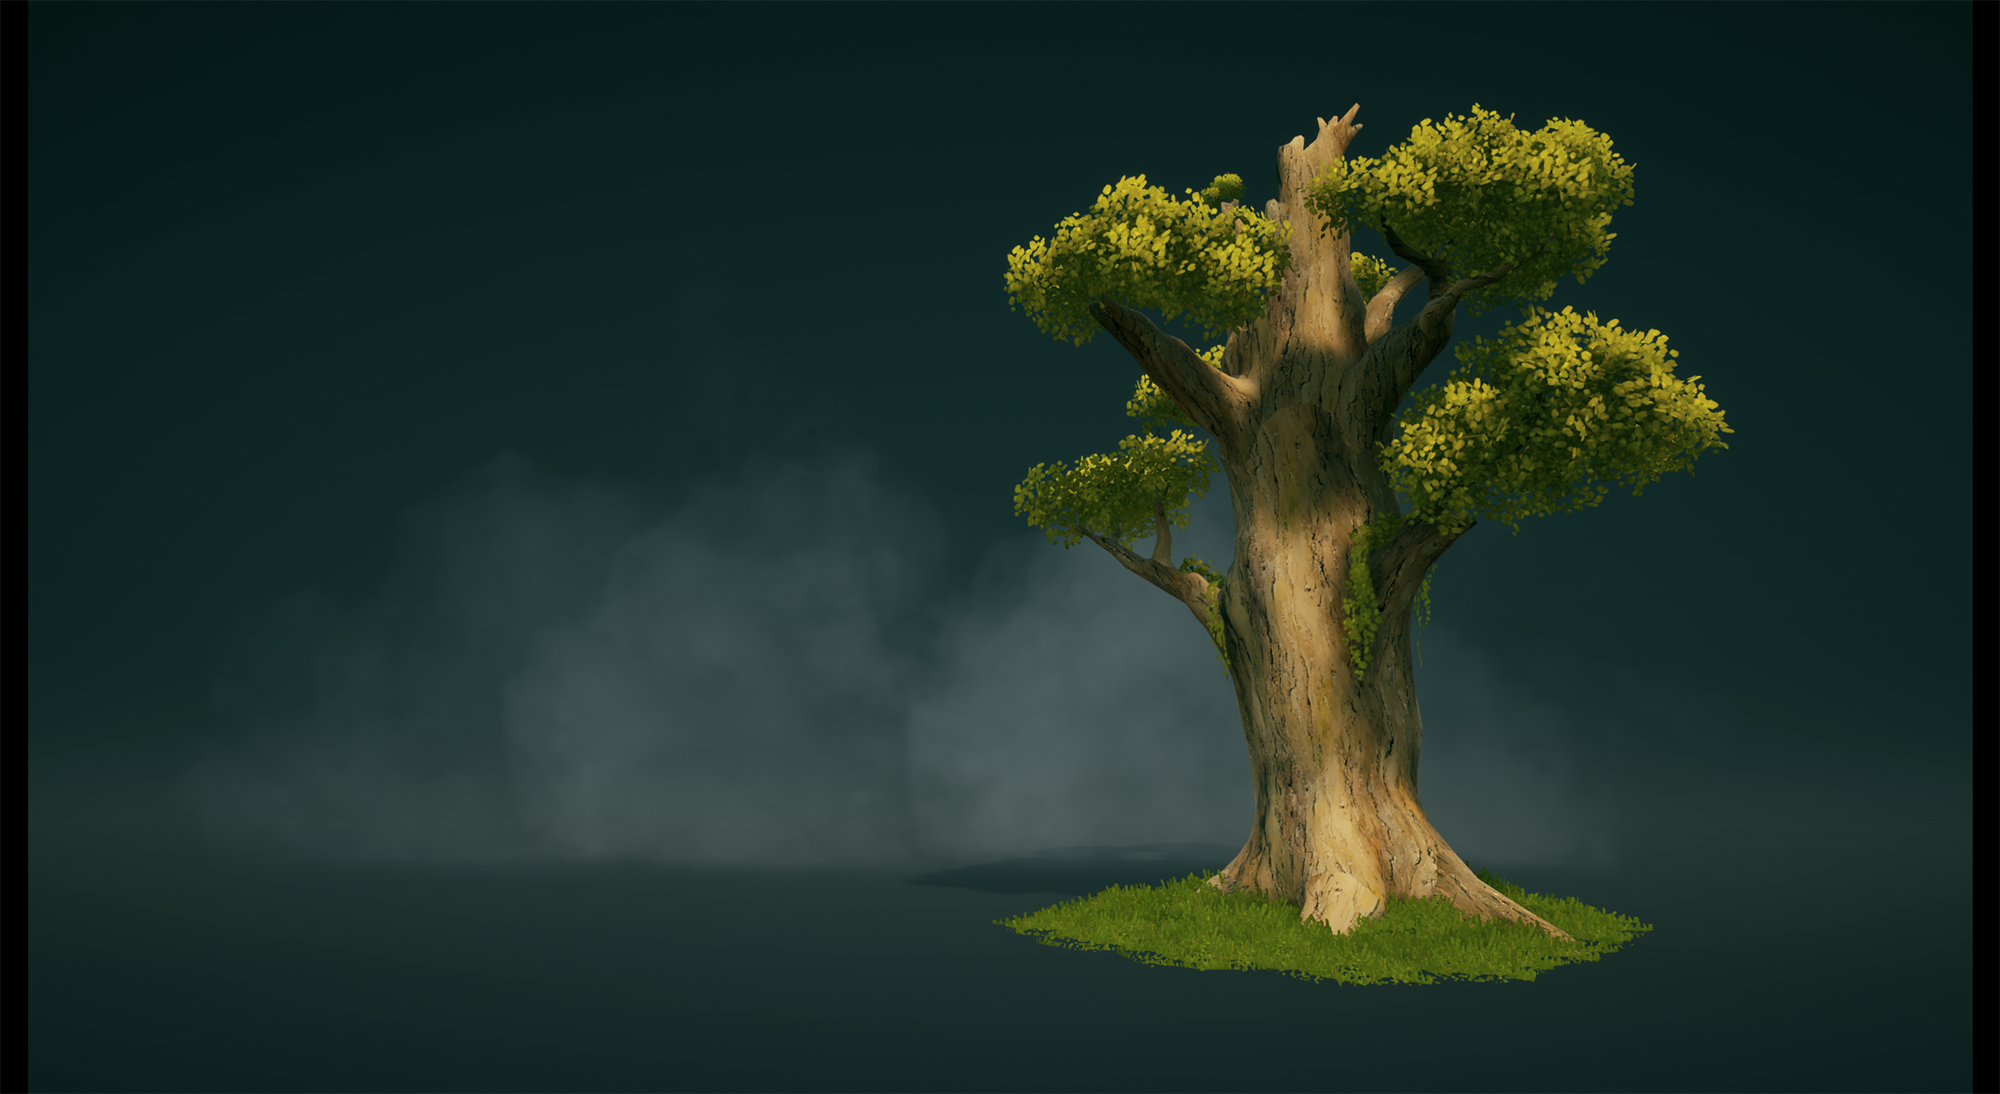
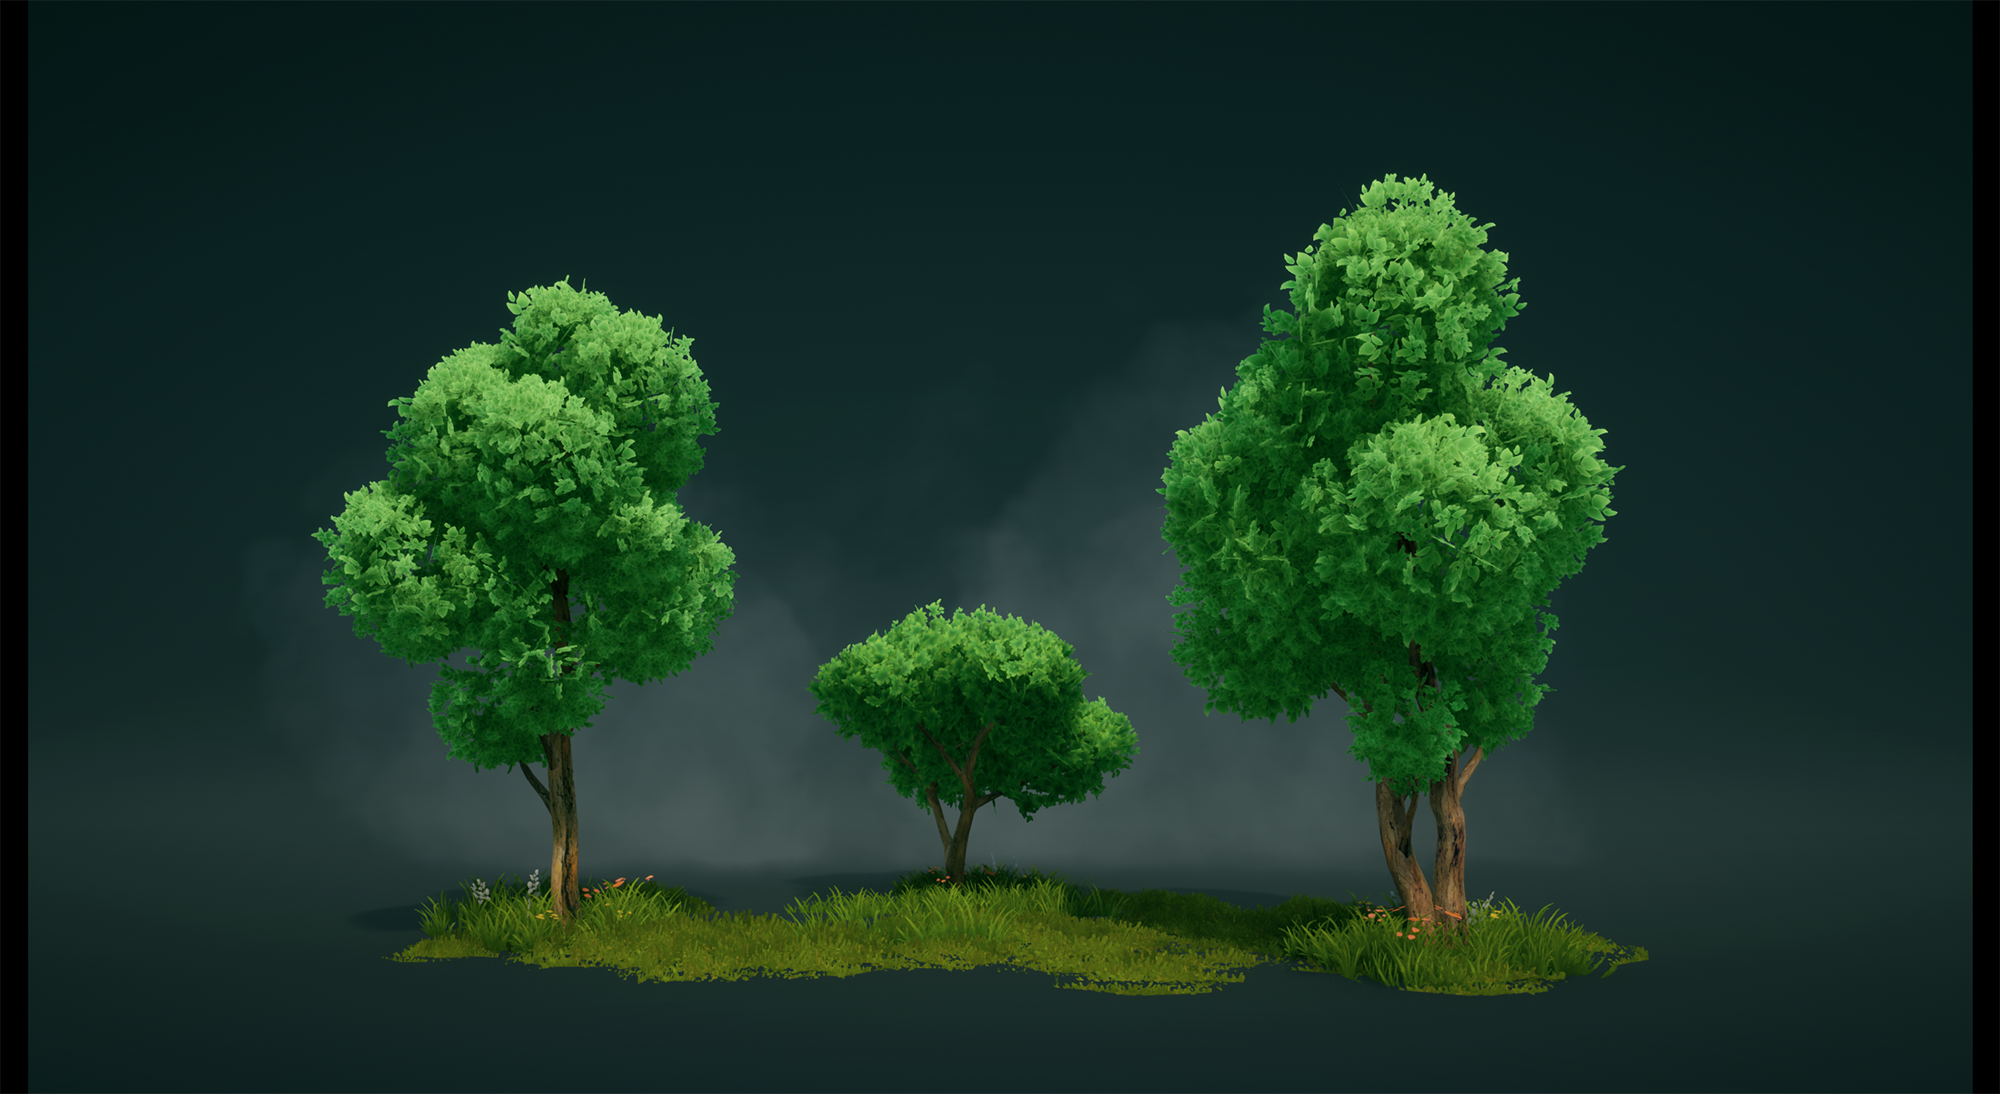
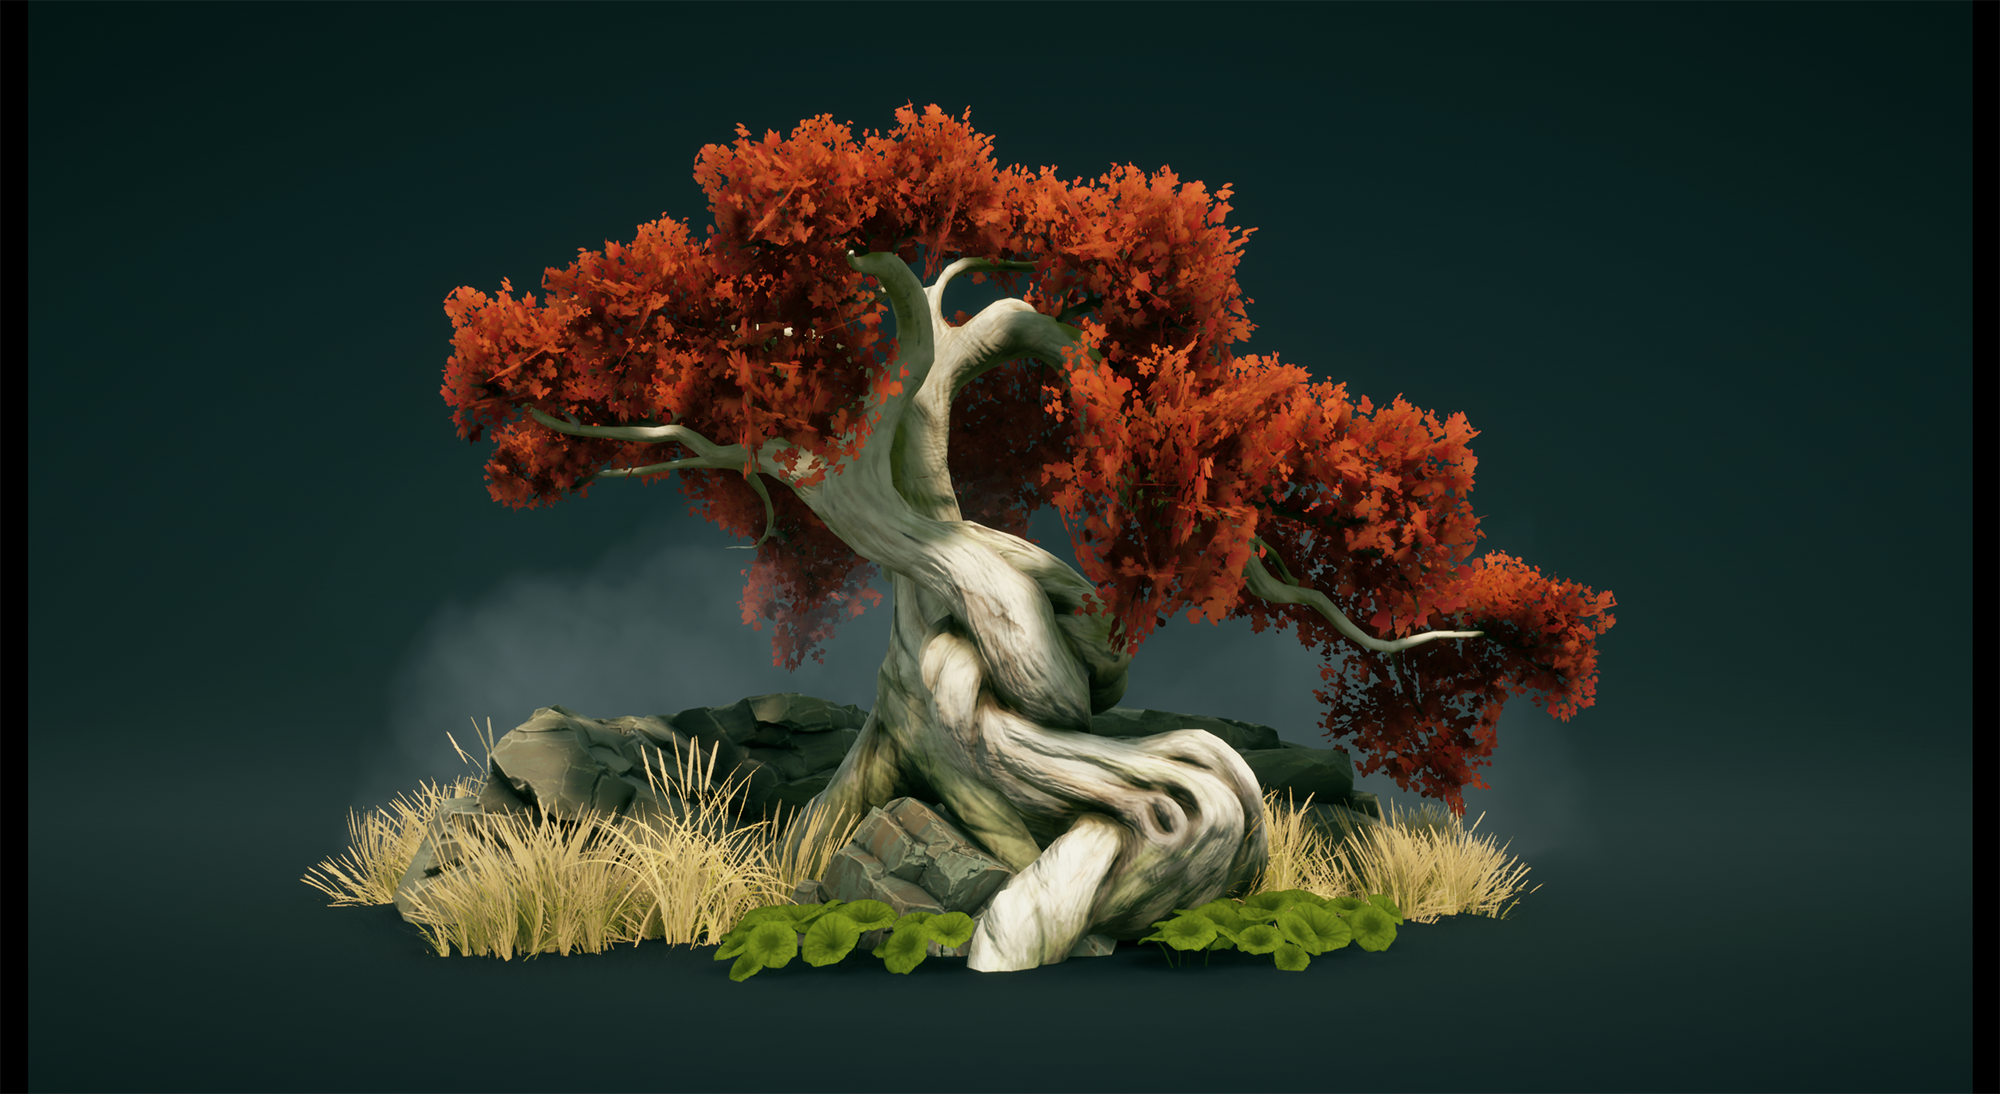
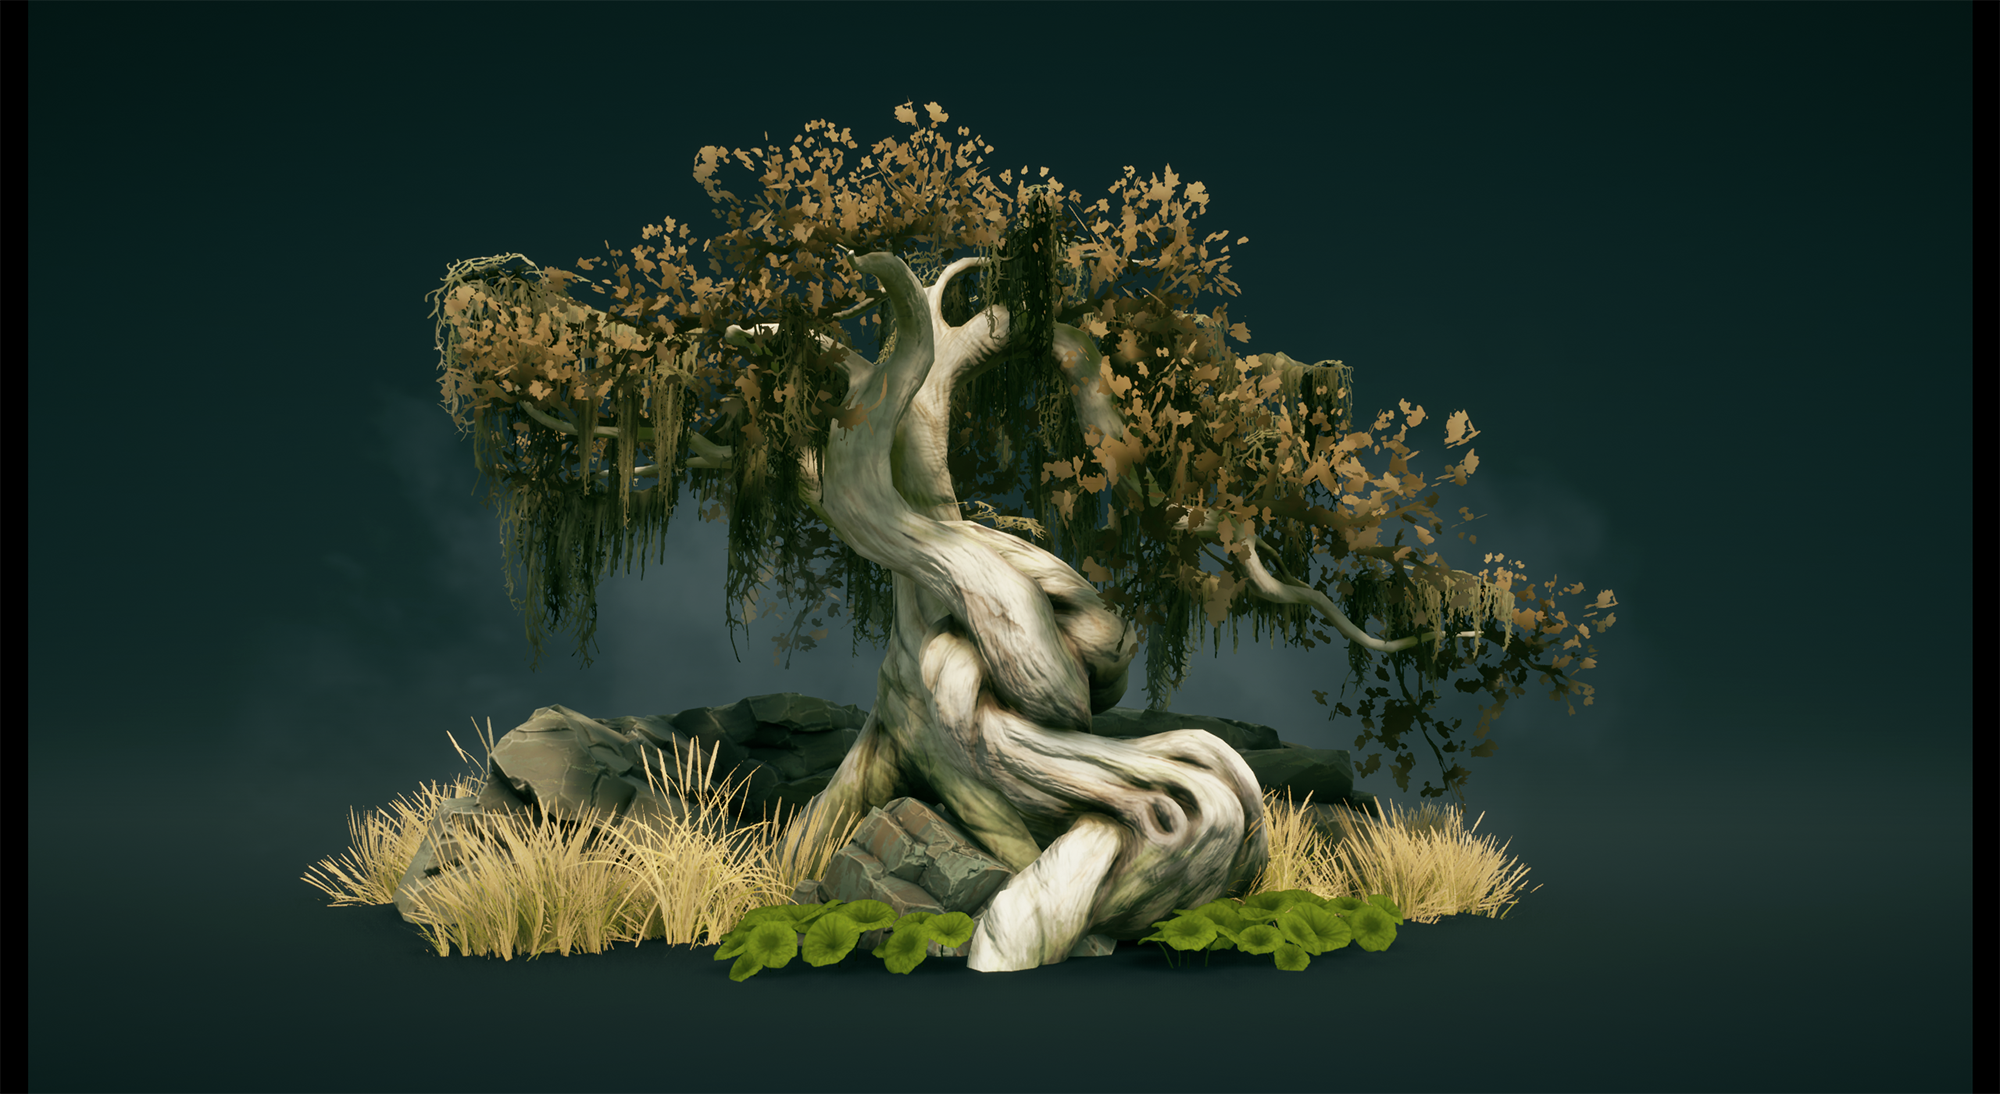
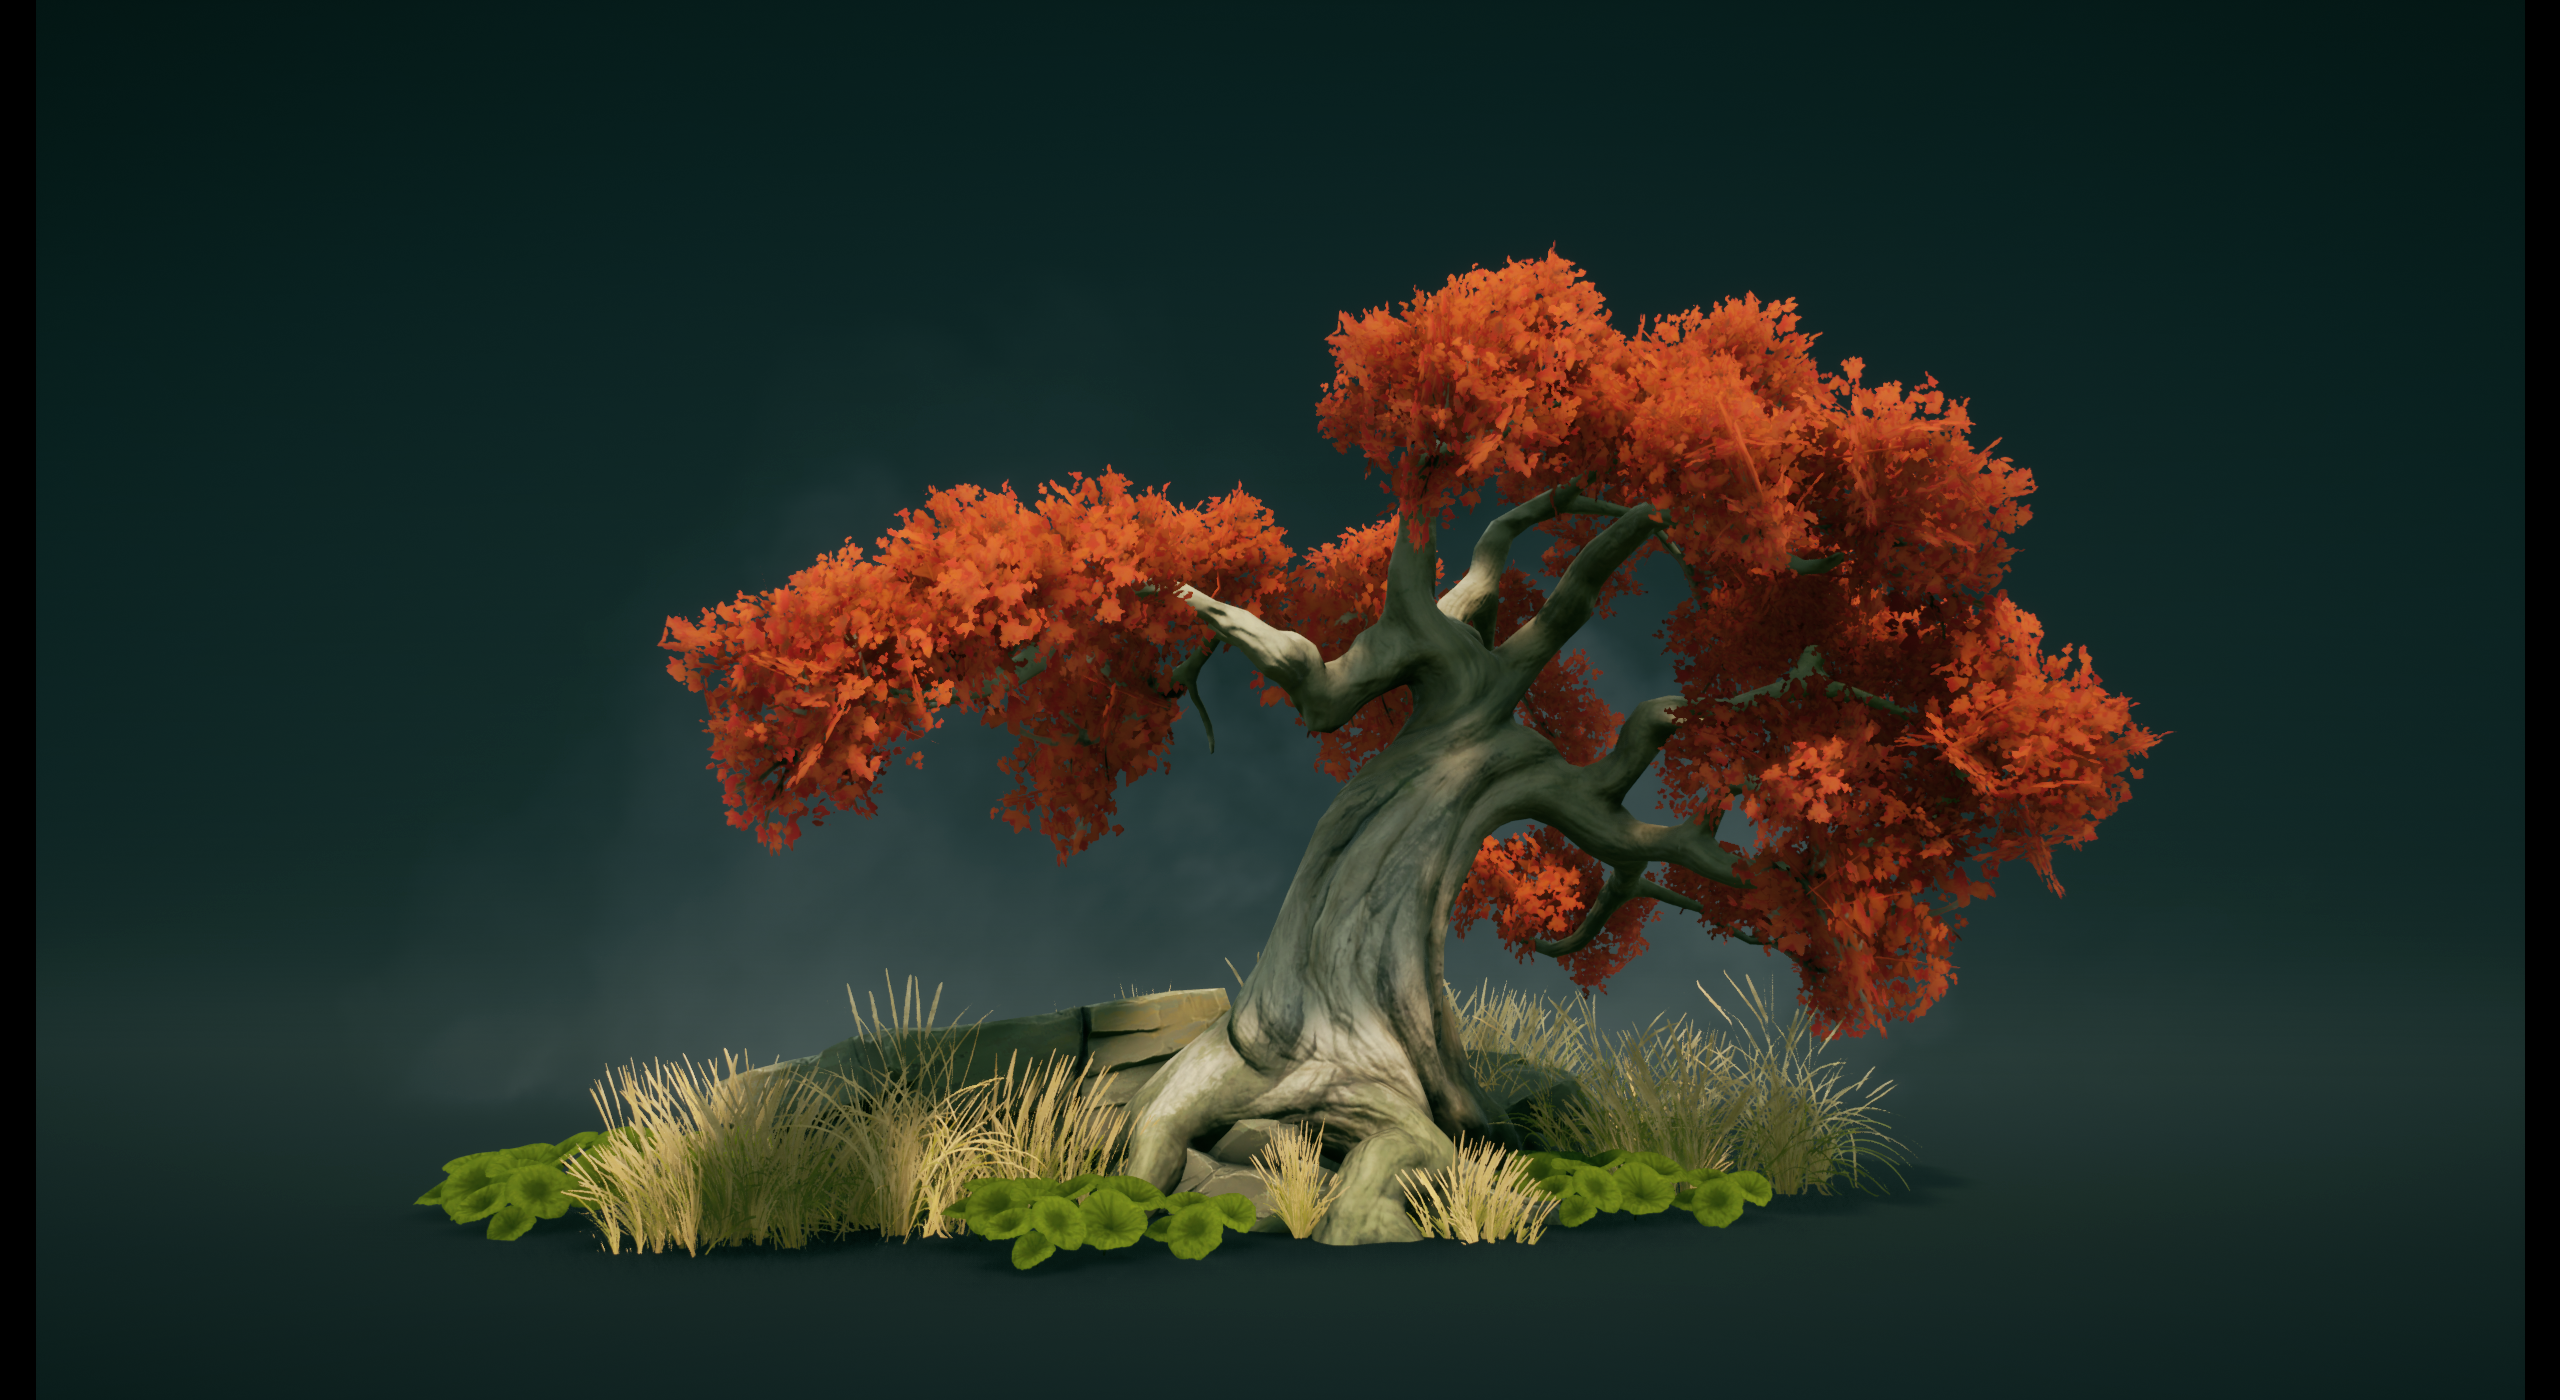
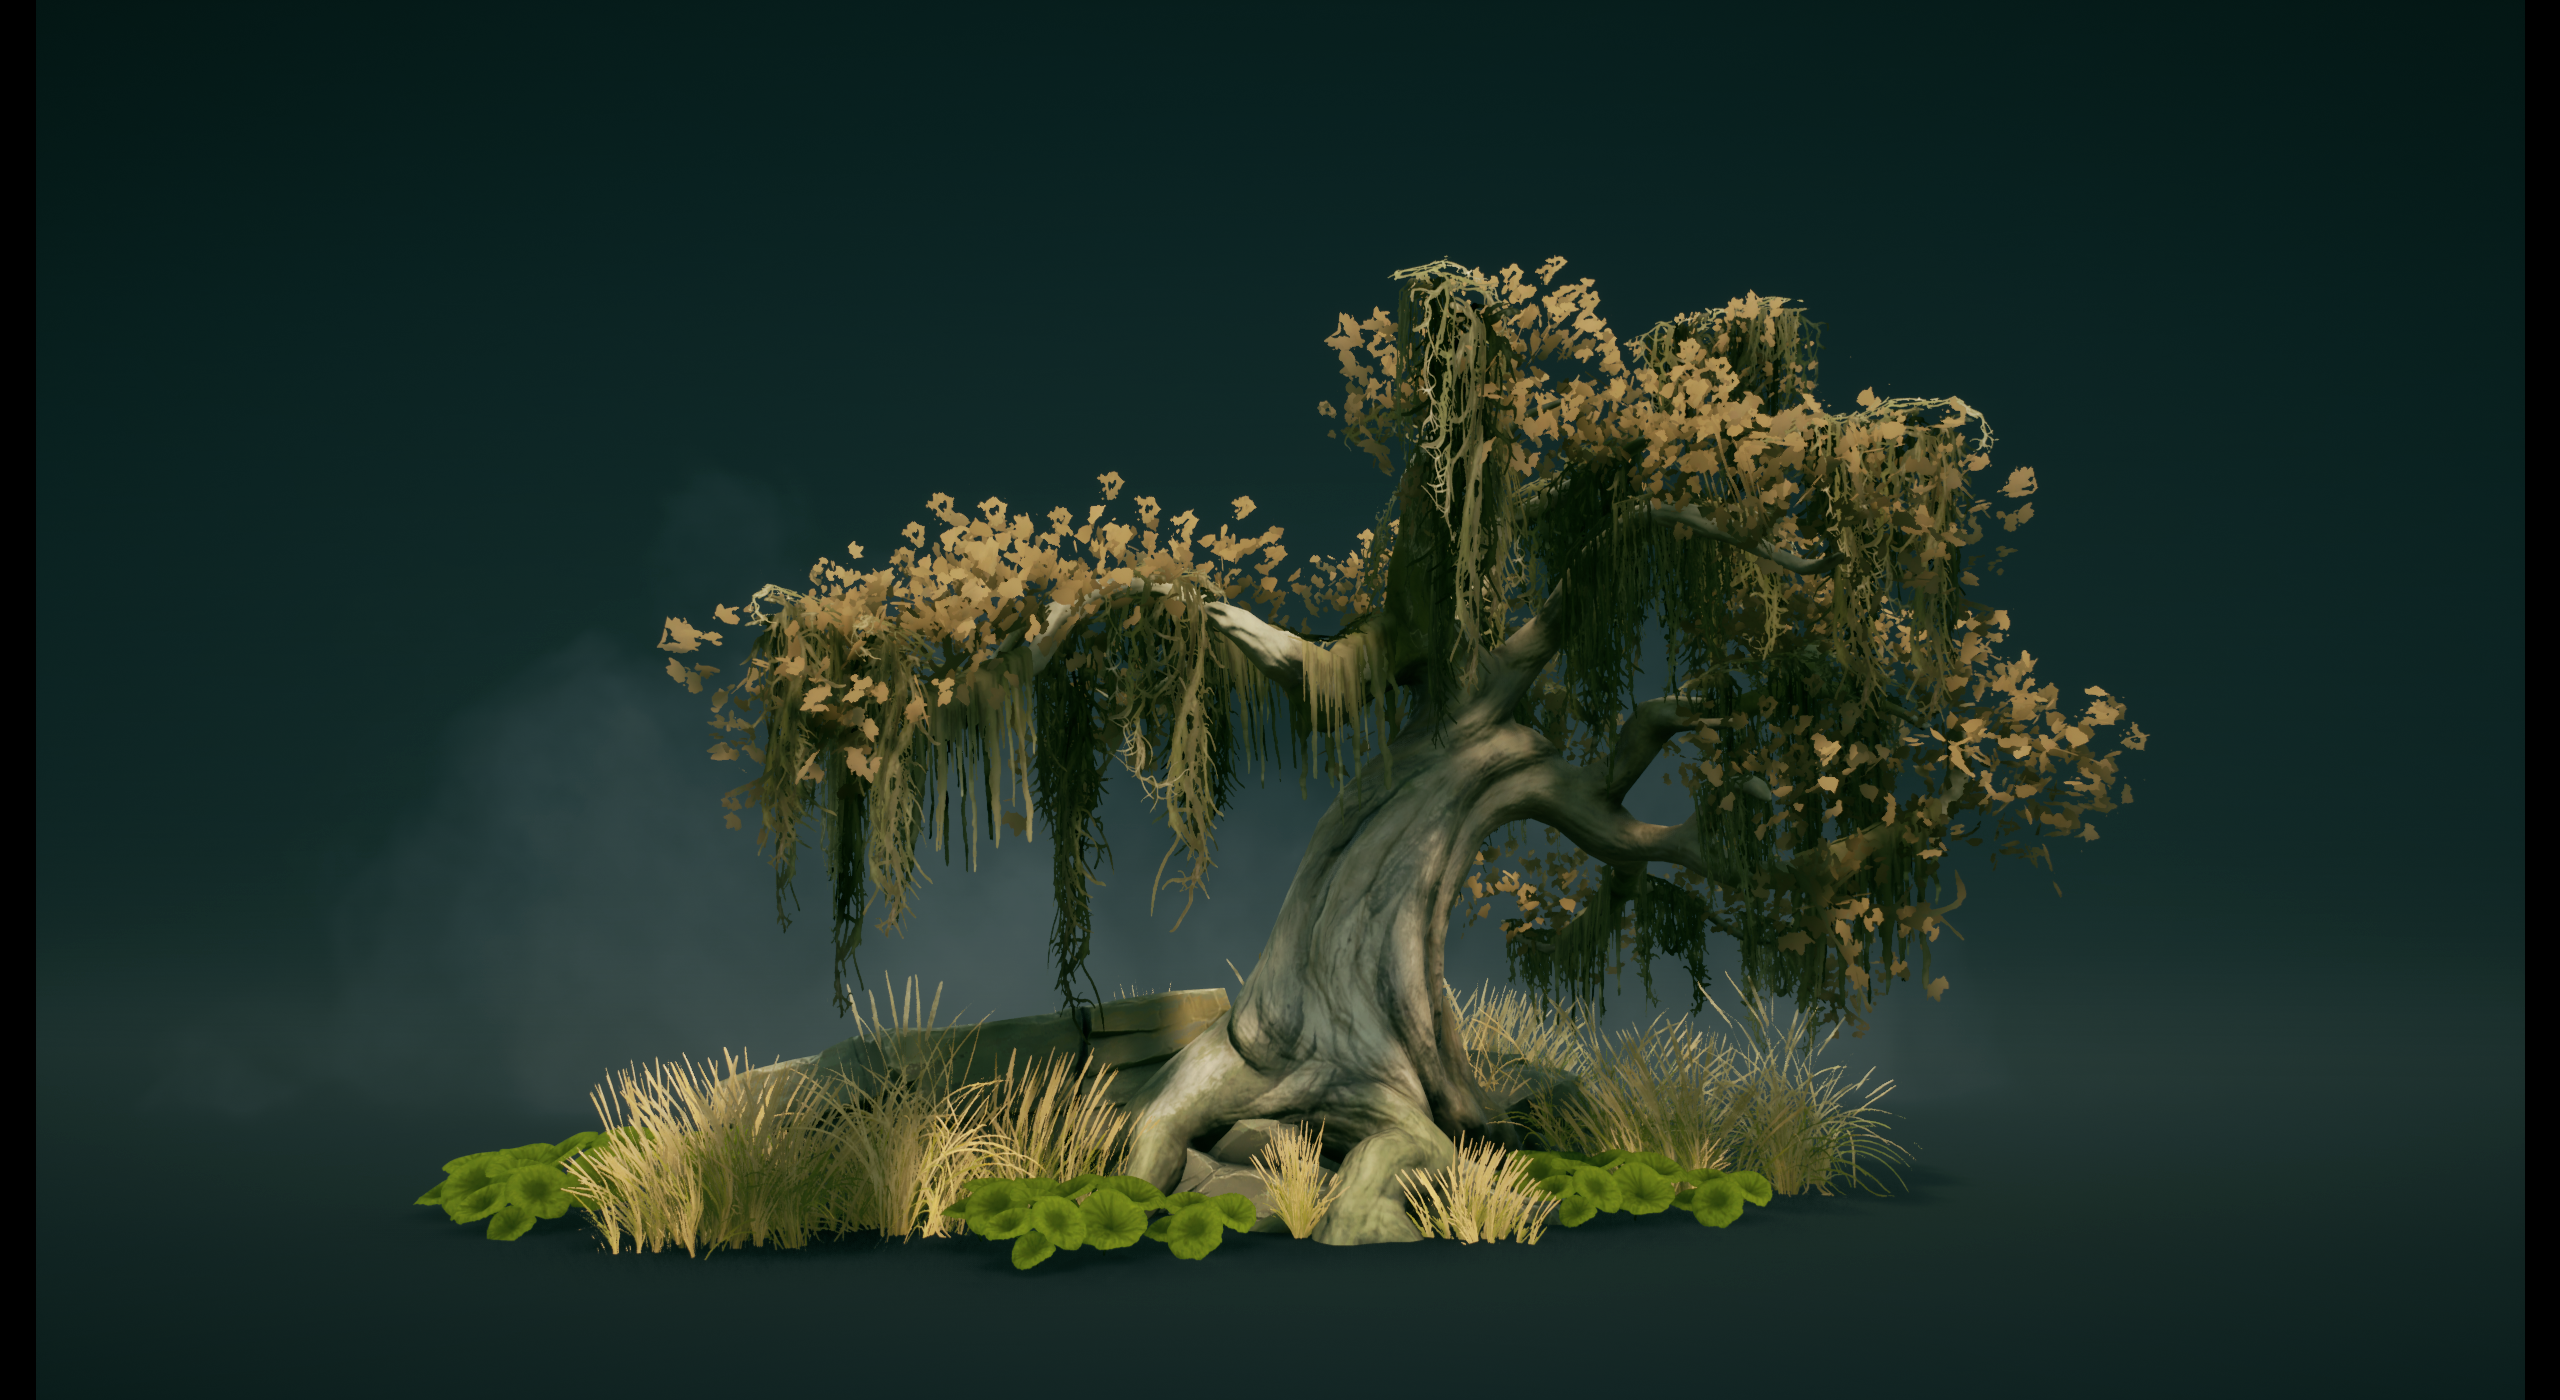
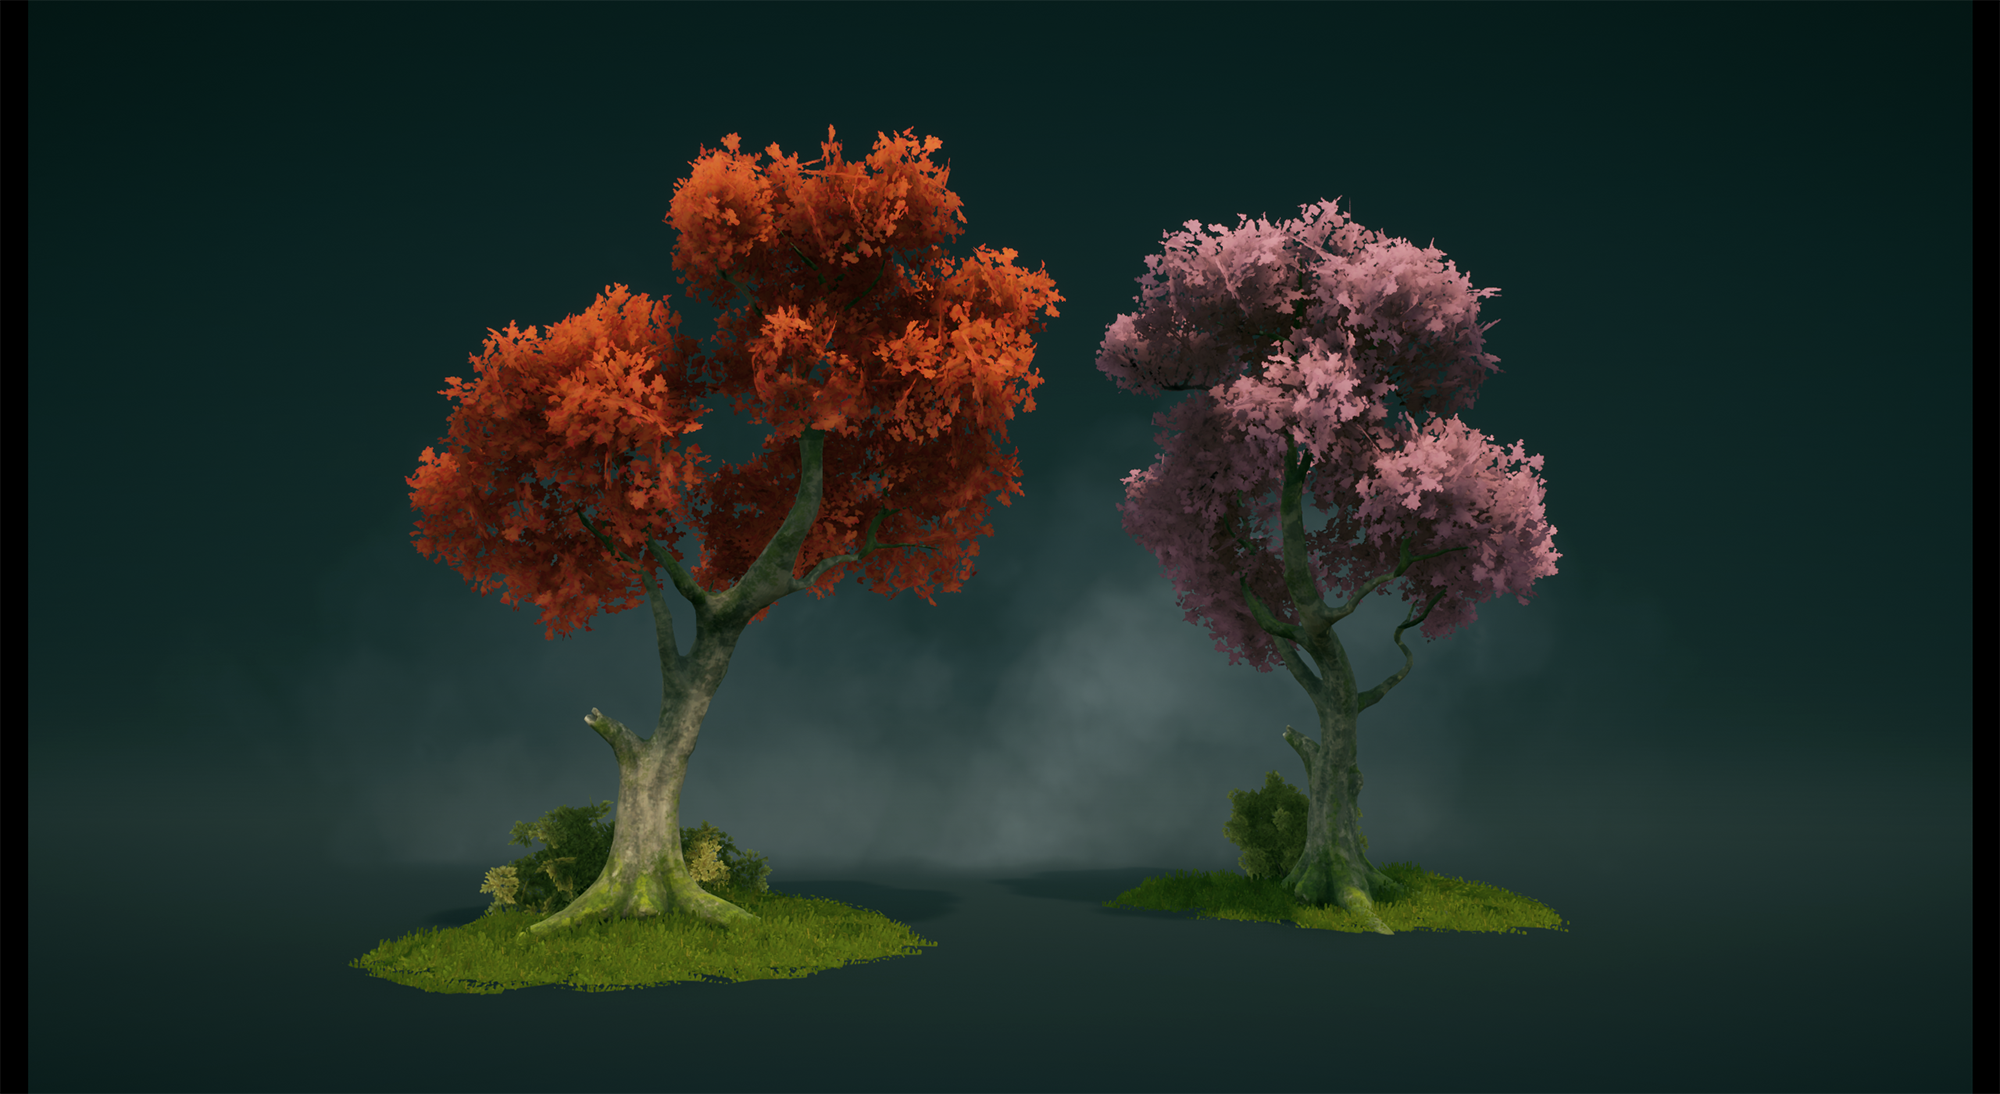
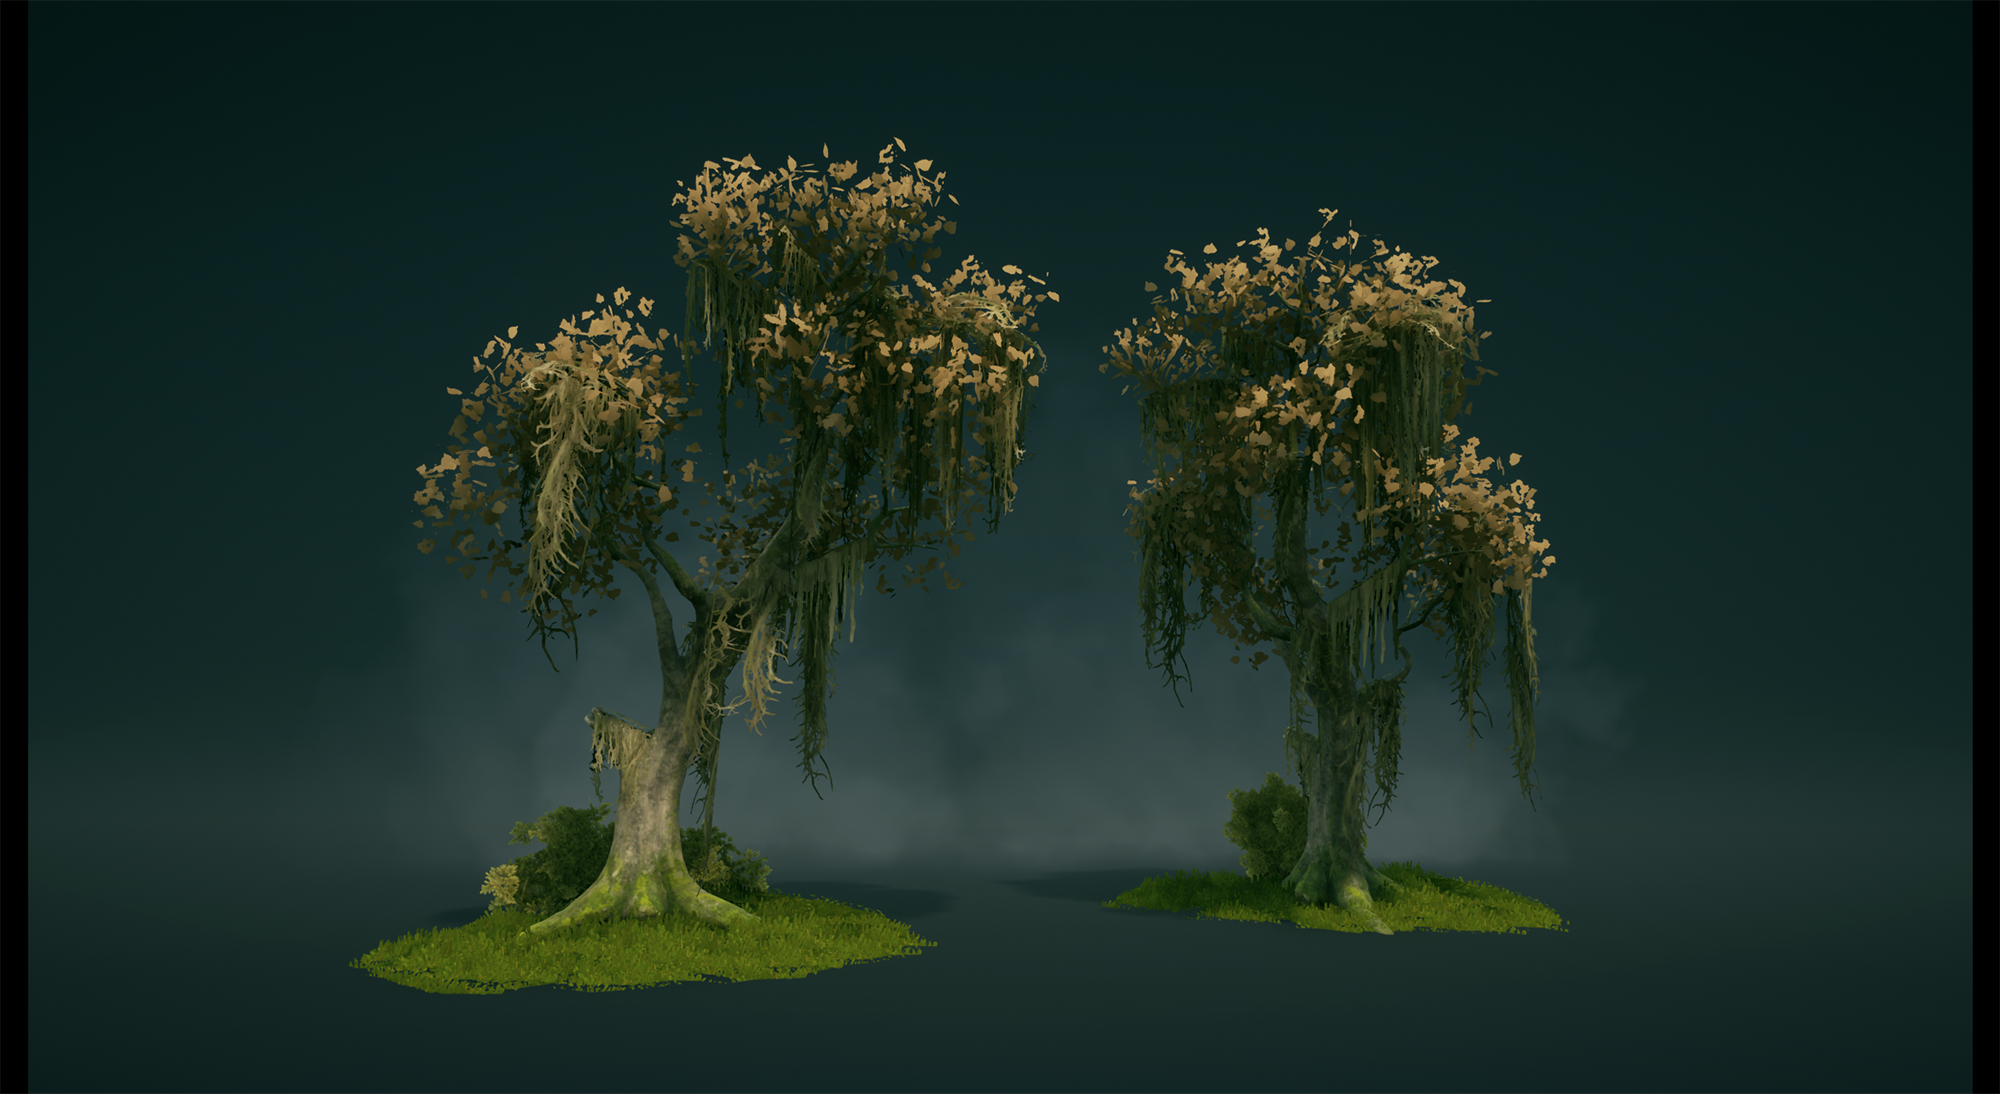
Foliage
In one of our previous entries, we showed the process of creating vegetation:
Creating stylized art inspired by Ghibli using Unreal Engine 4
Some of the assets that we had previously made required optimization, so we tweaked some of the textures and reduced the poly count. In the end, we managed to optimize objects so they did not lose their appearance and this significantly improved the overall performance, which was crucial for the game.
Foliage textures were mainly created in Photoshop, due to the fact that we rarely needed to use normal maps. The overall goal was to remain flat and painterly look.
A very small number of the objects had high poly meshes created with delicate normal maps to avoid completely unnecessary detail in this type of stylization.
Most trees use tiled bark textures. Thanks to the instances of the materials inside UE4, we were able to obtain various colors of bushes, tree leaves, and grasses.
Due to the levels generation, we could not use the standard foliage tool in UE4. Therefore, we needed to create some tools ourselves, which allowed us to quickly place assets on scene and control draw calls. Here is a link to the article where we tell more about it.
Speed up level art by using Splines and Blueprints
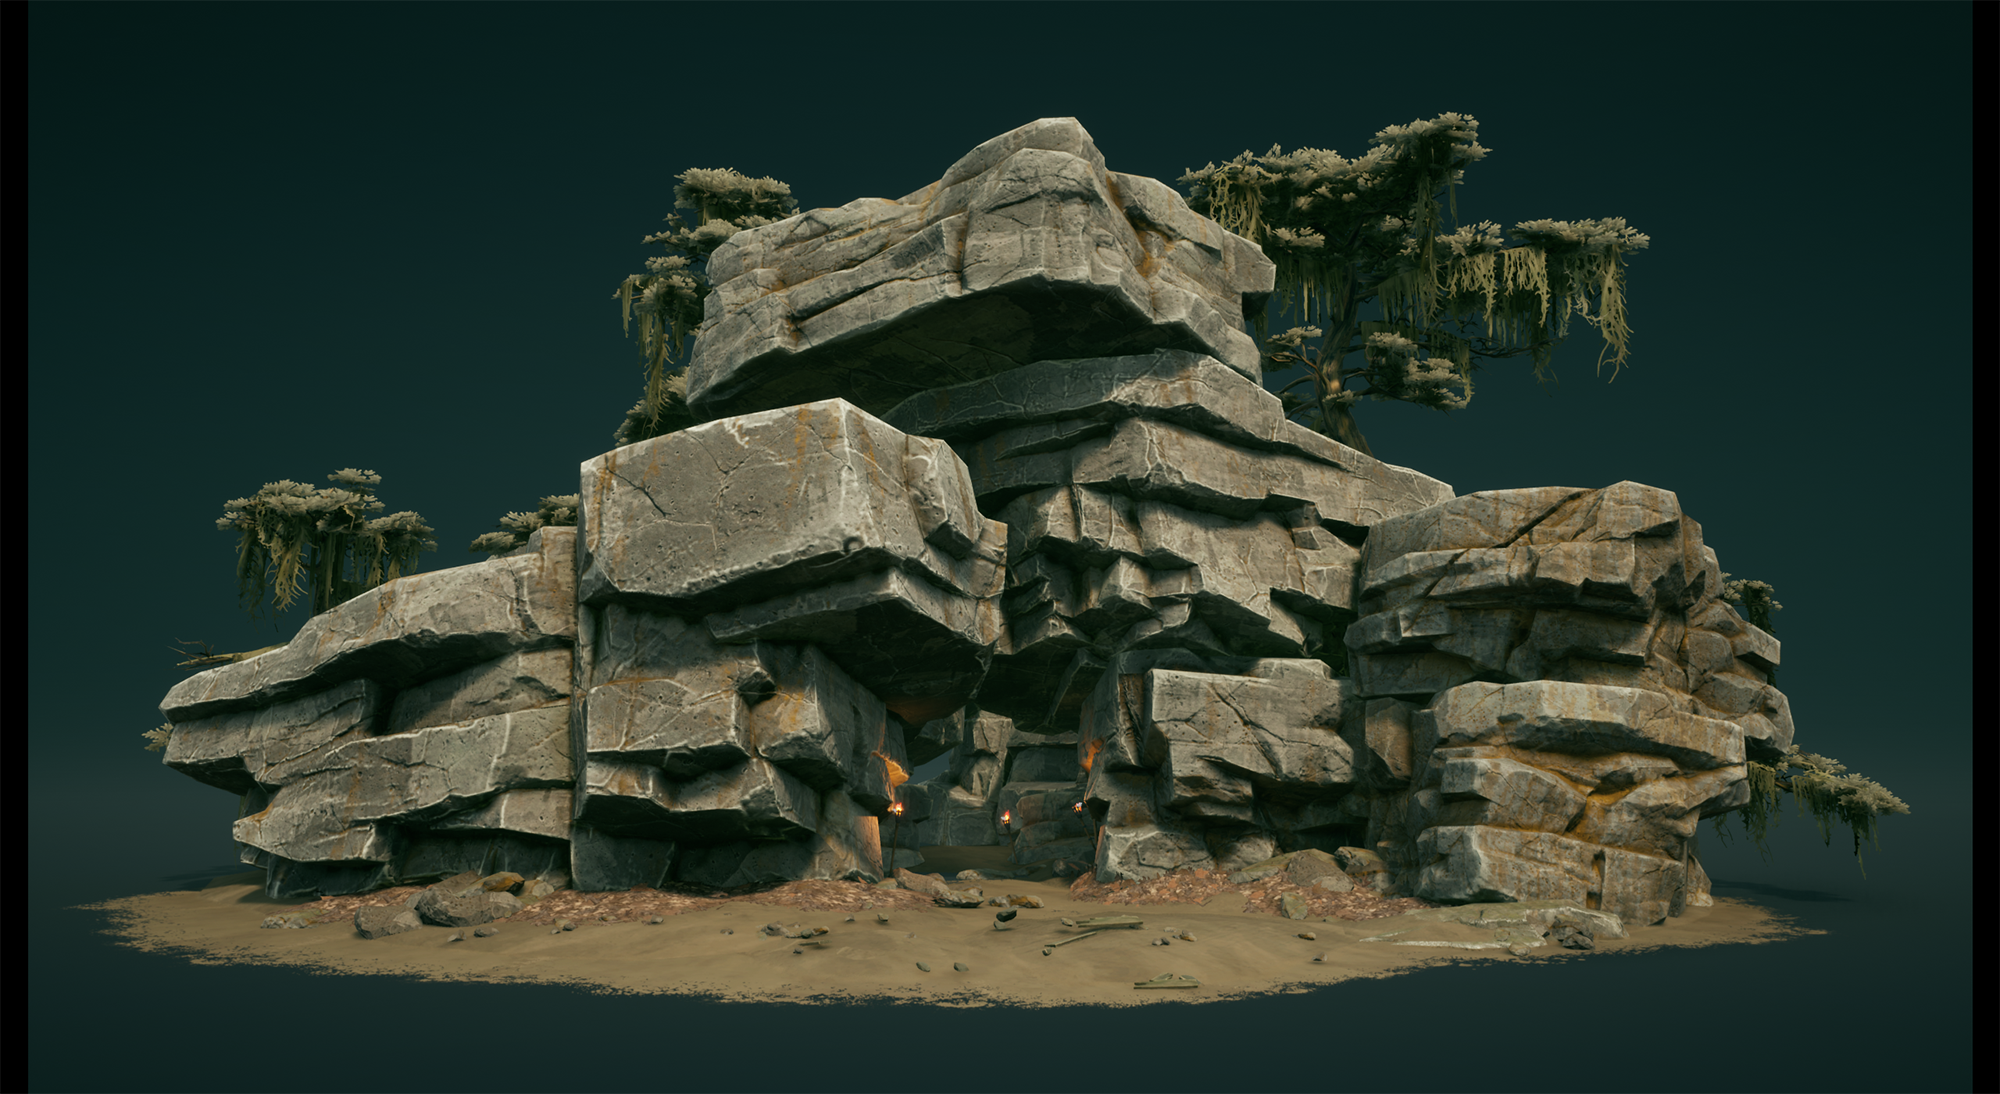
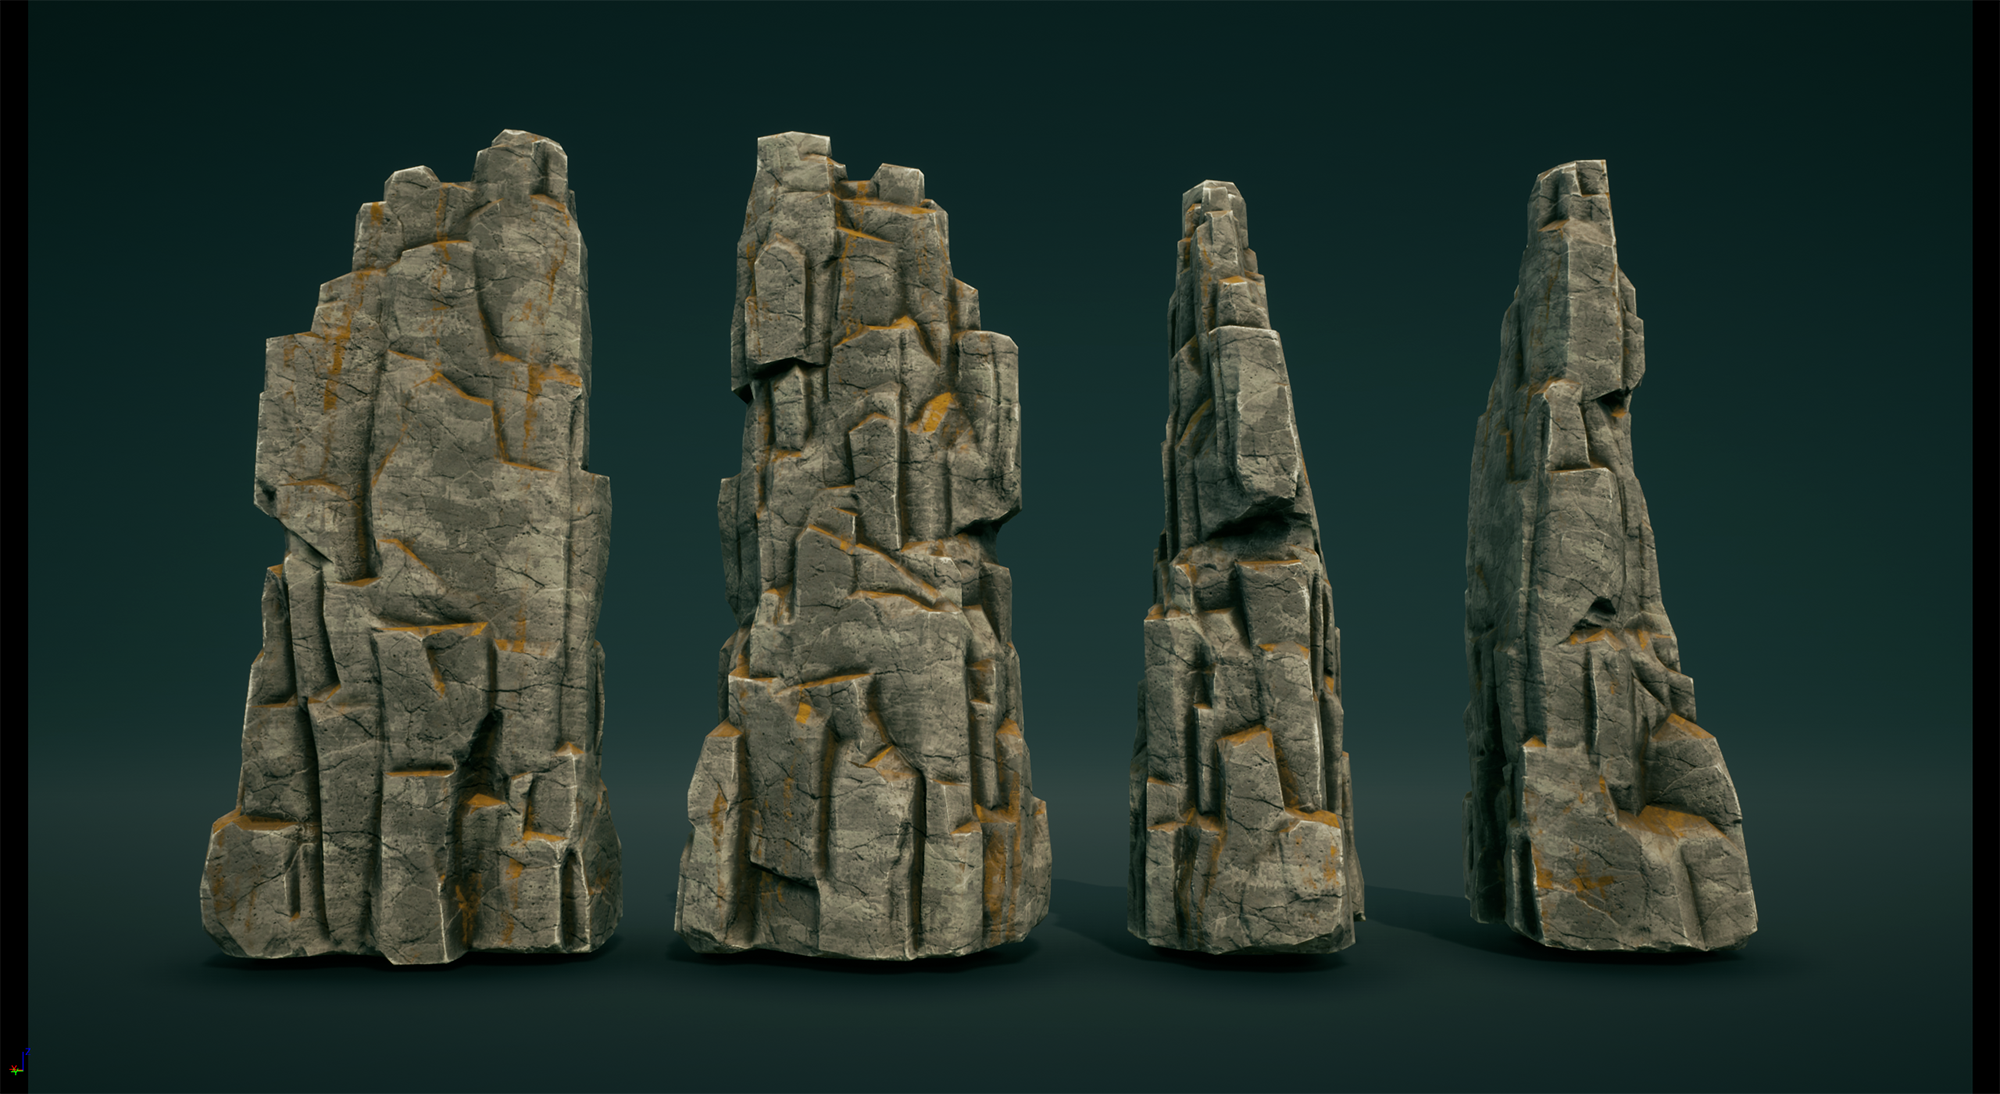
Rocks
When we were creating rocks the tutorial by Daniel Castillo was very useful once again. https://levelupdigital.gumroad.com/l/levelup_rocks https://www.artstation.com/danicastillo83 It was helpful in the large formations creating process, and the overall direction of how they are supposed to look.
Additionally, the tutorial helped us create base textures. In the end, the rocks use a very simple material. It uses one base color texture for all rocks. Edges, stains, and dirt were added through the mask texture. Dirt and moss are applied to the rocks, using a simple function so that we automatically get the dirt and moss in the right place when we rotate them.


Summary and future
Rogue Spirit was a very big challenge for us, from which we could learn a lot.
Naturally, the project became monotonous over time, and we don’t have the same enthusiasm to be as creative as at the very beginning. It is easy to lose a fresh perspective and depart from the basic assumptions. It is also difficult to notice problems that build up over time, especially if the team is small and there are many tasks to be done. That is why it is so crucial for the project to devote time to writing the assumptions at the beginning, establishing the framework which will later be the basis for the evaluation of the work performed. Thanks to this, we can save a huge amount of time and maintain the consistency of the project from beginning to end. Rogue Spirit was also a great lesson for us on how we should estimate project time in the future. We threw ourselves into work forgetting to find time to analyze the work done so far and make corrections by looking at the entire project through the prism of assumptions.
Here You can check artists who worked on Rogue Spirit development:
https://www.artstation.com/perishock
https://www.artstation.com/dsmka
https://www.artstation.com/umterski
https://www.artstation.com/mariuszkrzywicki