
Speed up level art by using Splines and Blueprints

Creating levels is time-consuming but with UE4 you can create a lot of tools that will speed up the process.
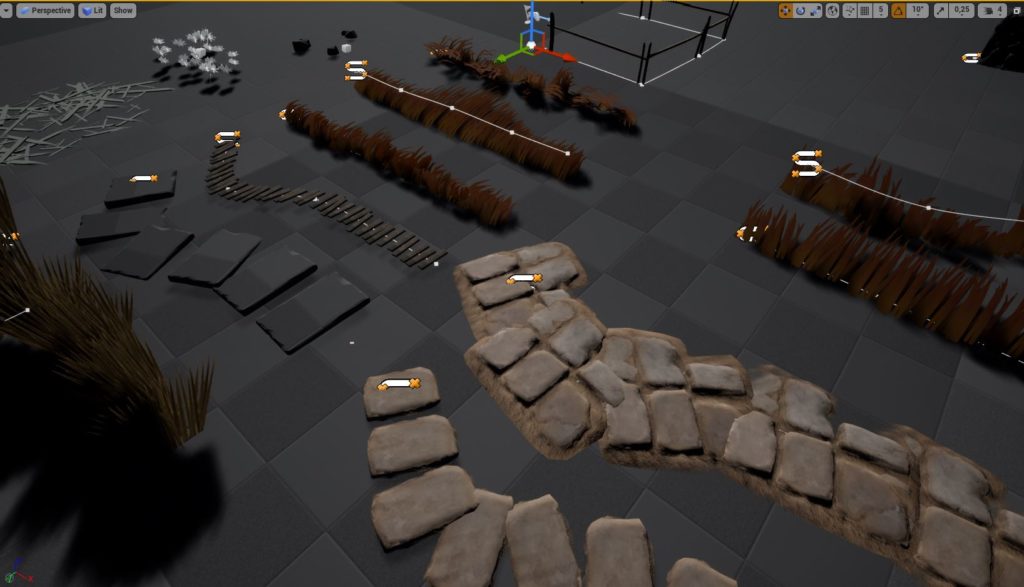
Random ground mesh placing
Placing small props on levels takes time.
Pipeline
Pipeline is simple:
- Select mesh you want to populate,
- Chose if it’s sphere-based or box based,
- Select size,
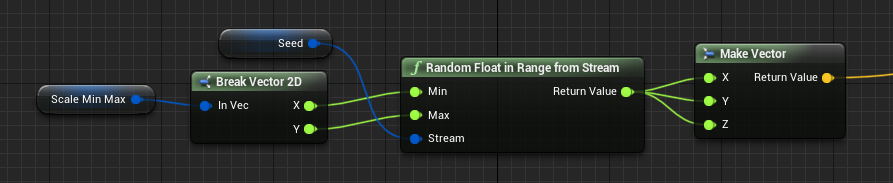
- Select random rotation, random offset, random scale,
- If you don’t want to put them on something just add the actor to ignored actors,
Draw Debugs
This can be done better in C++ and component visualization but let’s face it: we are a small team and we don’t want to spend to much time on editor stuff.
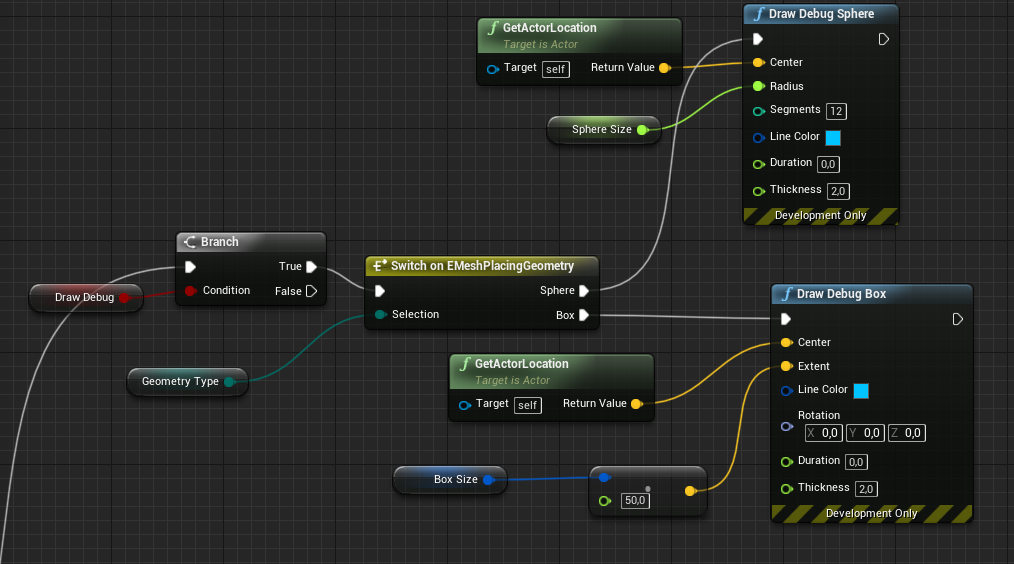
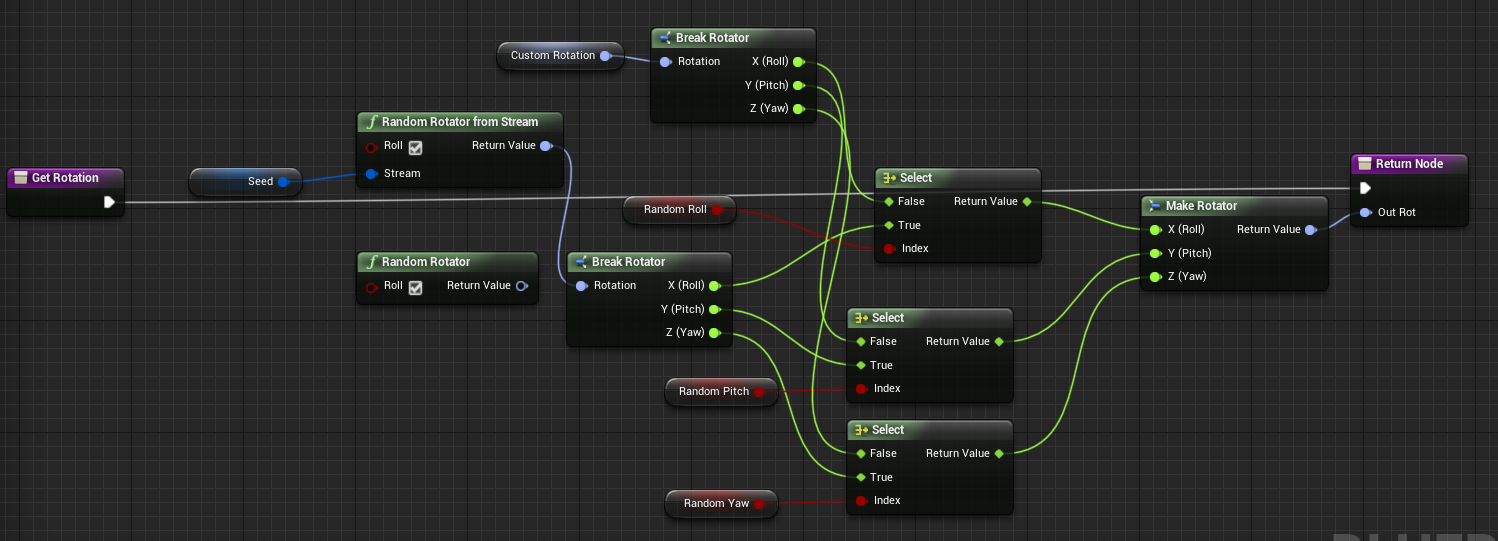
Deciding on rotations

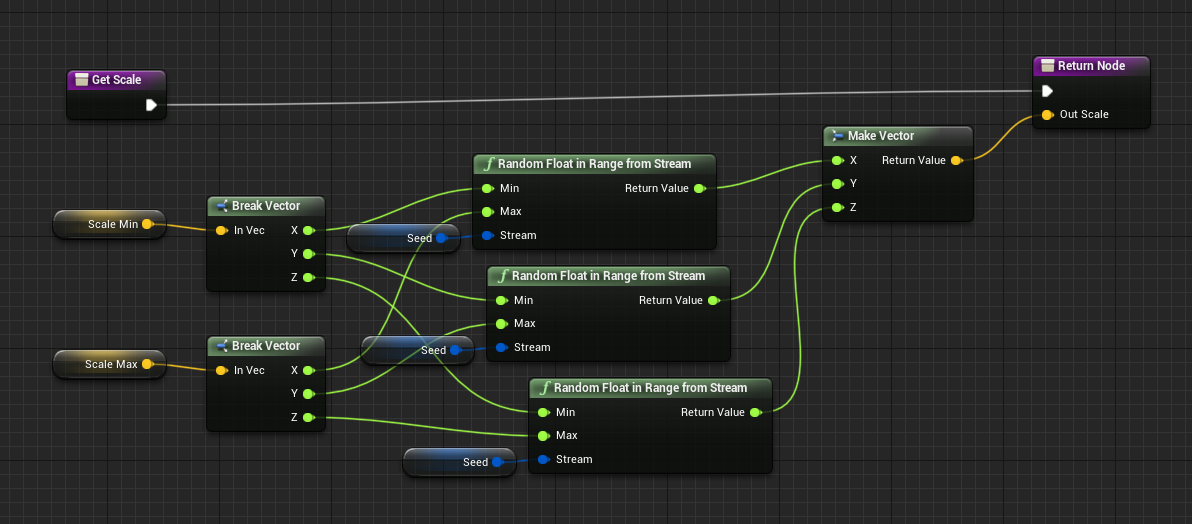
Deciding on scale
Deciding on Location
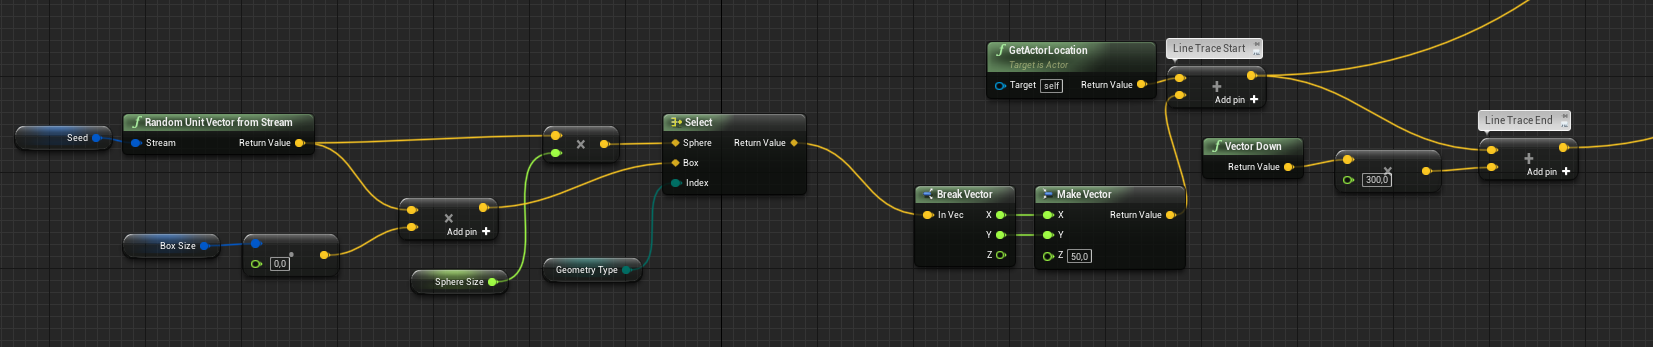
Trace to get ground location

It’s a really simple Blueprint which can speed up laying some small props on the ground.
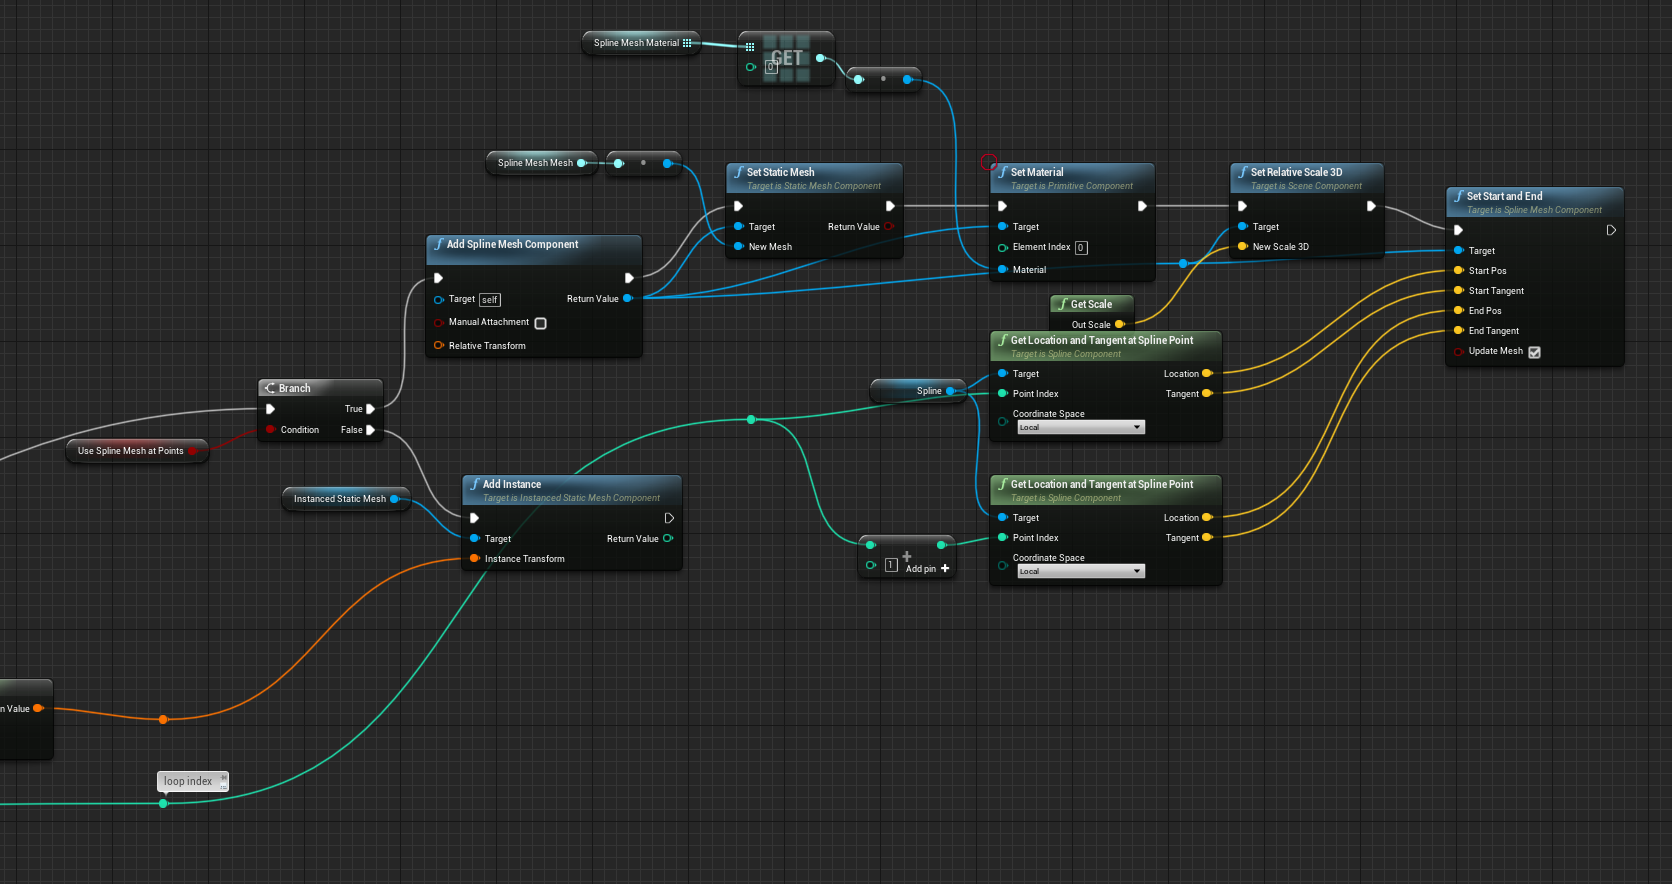
Using Splines for placing meshes
Splines can be powerful when dealing with meshes. Remember that construction script can be costly here and you should cache your computed version without calling construction script again.
Pipeline
Here the pipeline is more complicated as it has a ton of options.
- Decide if it’s Distance based or Spline Points based. Spline points-based can be helpful sometimes when you want to “merge” the same mesh without using UE4 group actors. It’s faster as it’s using Instanced Static Mesh,
- Decide on random things like scale, rotation, offsets,
- Decide if should trace ground,
Type: On Spline Points

Type: Distance / Duration
This one looks more complicated as everything done in Blueprints. C++ version is much simpler.
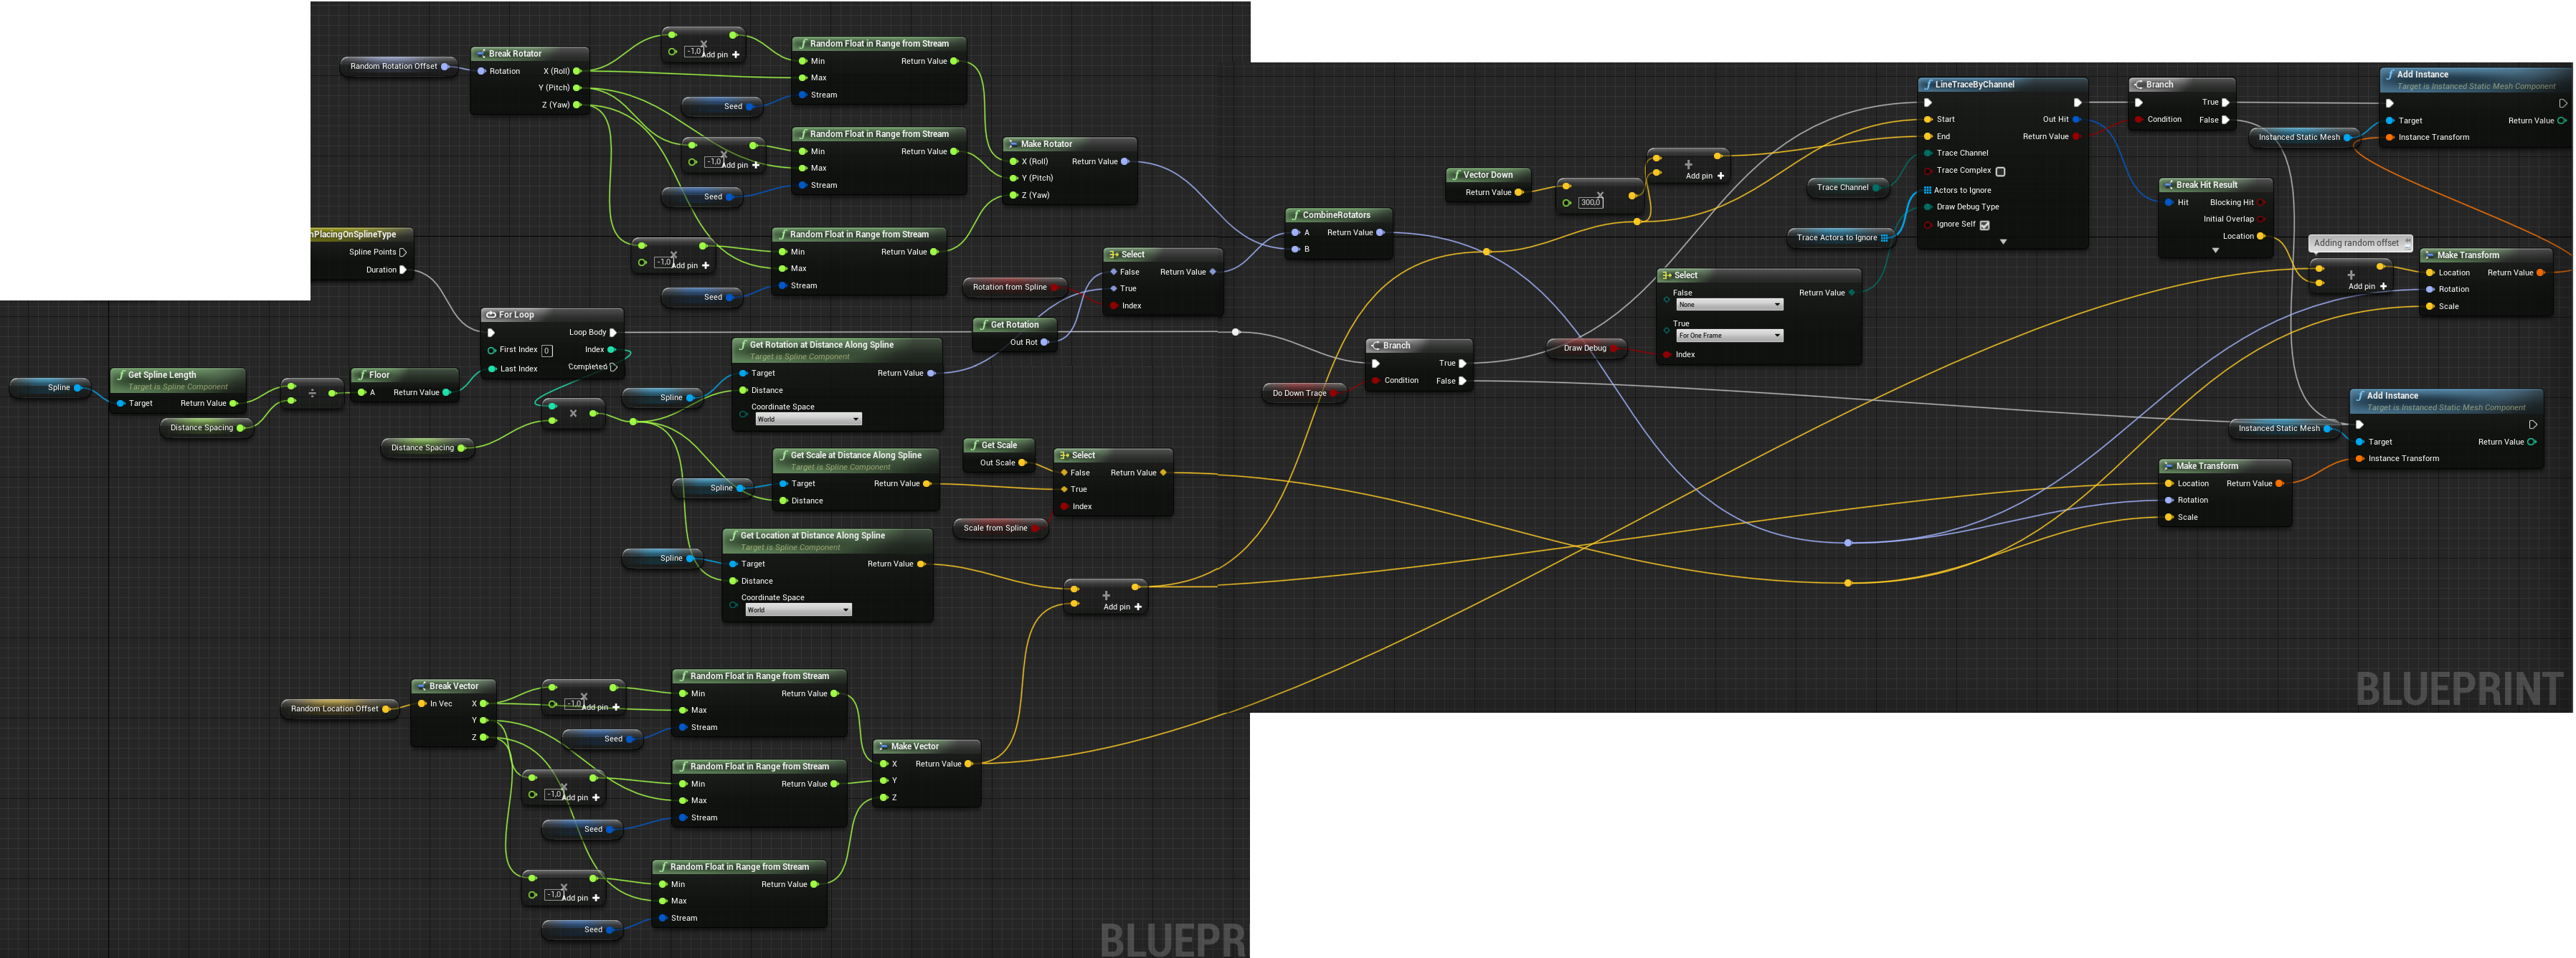
What this is doing is :
- Iterating spline by its length,
- Deciding if use spline rotation and scale,
- Doing down trace if needed,
- Adding offsets,
Again this is based on Instanced Static Mesh.
Moving on Spline – Rat
We are always thinking about how we can add more life to our levels. One of them has moving rats. There is a couple of ways of doing this:
- By implementing AI behavior which will be CPU costly,
- By using Distance Fields Niagara particle which will be GPU costly,
- By using Splines which lead to manual placing them on levels,
We decided to use Splines for this, as performance is critical for us.
Pipeline
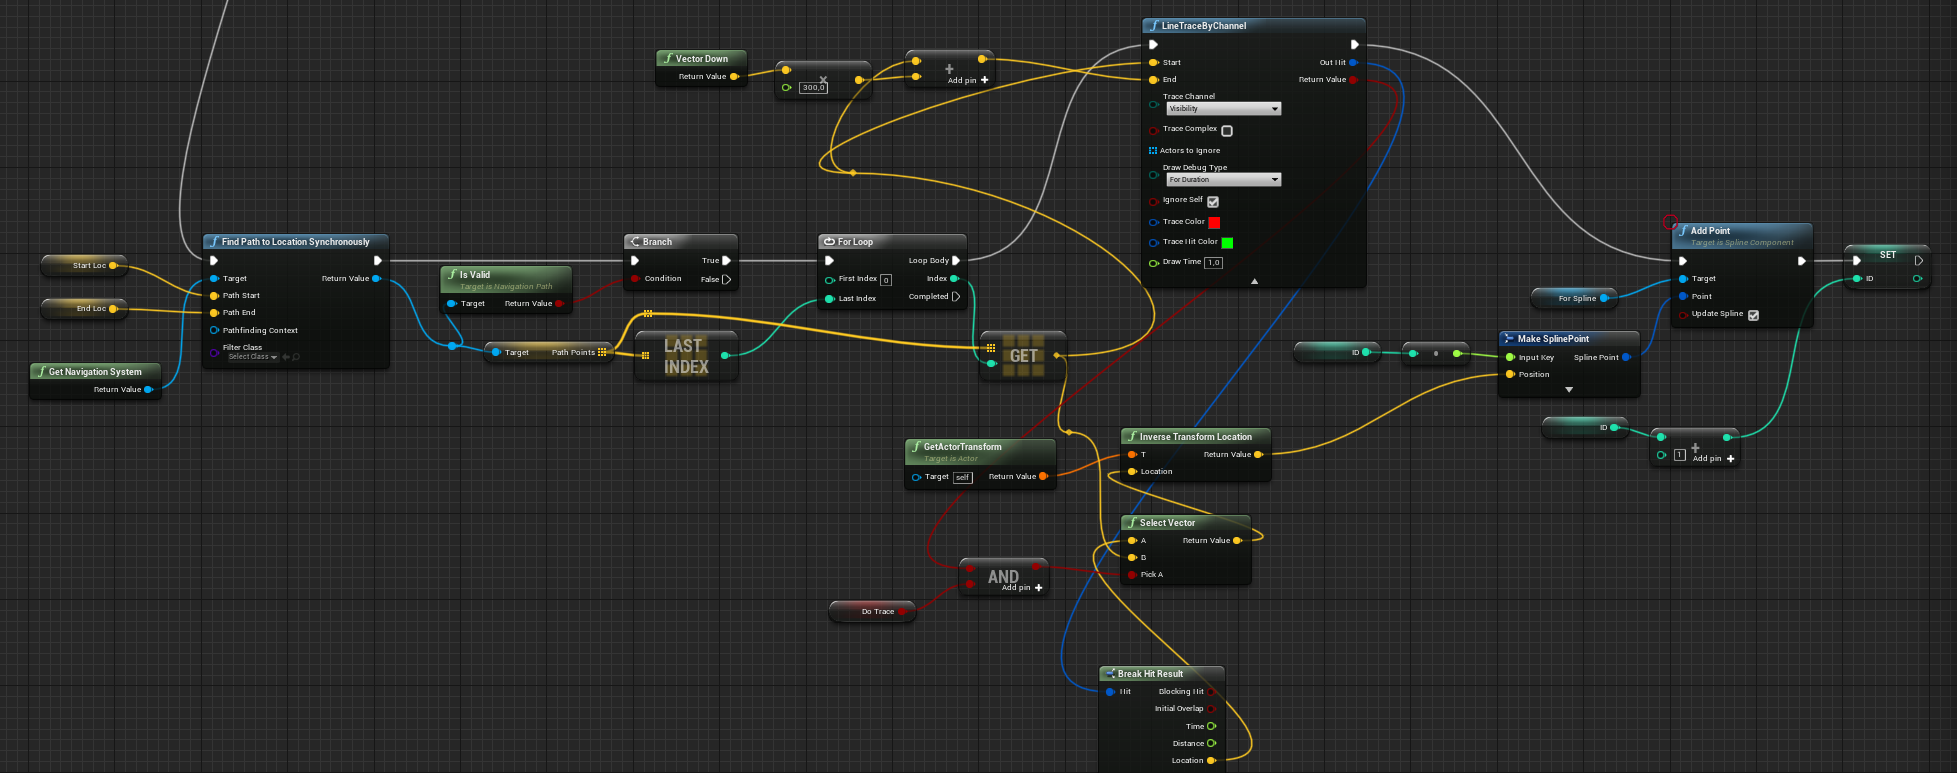
The pipeline is using semi generation with some helpers:
- Move points on your level,
- Click generate: this will create spline for you using a navigation system,
- Modify points which aren’t good enough,
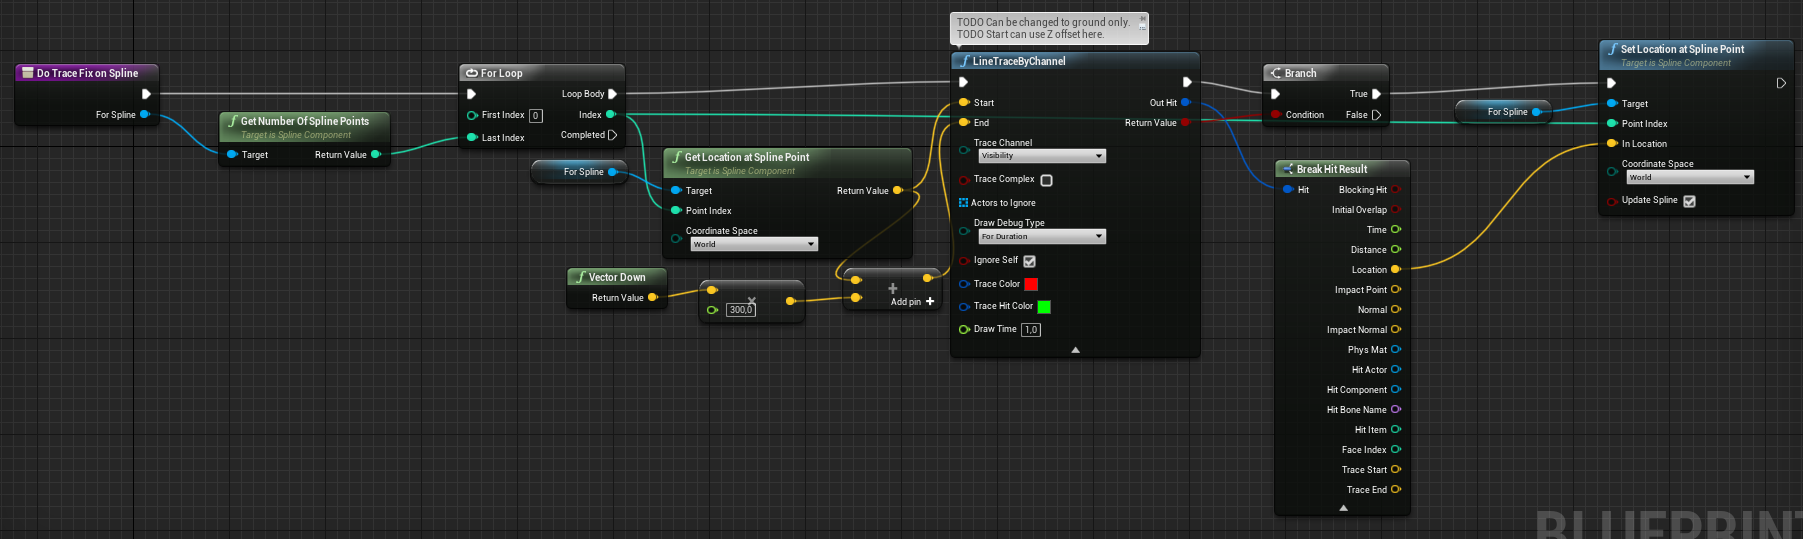
- Do trace fix to make points lying on the ground,
Tracing down
Generating Spline on Navigation Mesh
This part is simple in C++ but looks more complex in Blueprints.
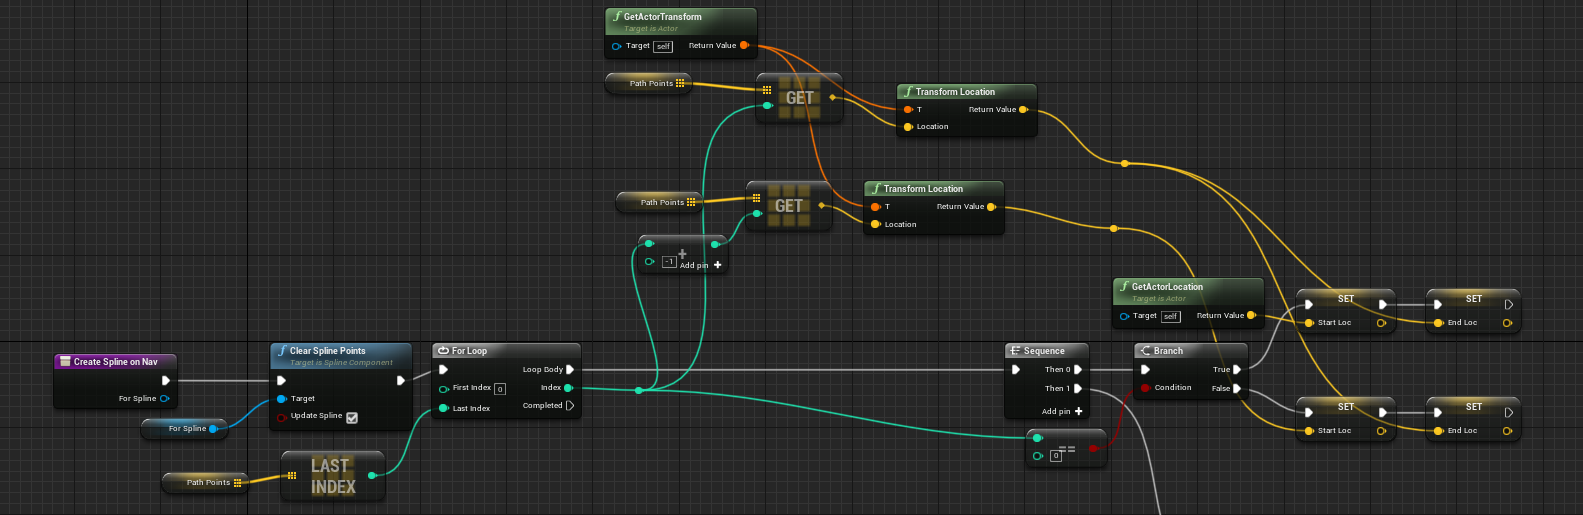
Basically we are getting path from navigation from one point to another. We are adding Spline Points along path points. Simple as that.
Summary
We are constantly thinking about how to speed up our pipelines and will be sharing more in the future.
One Response
[…] Source: Speed up level art by using Splines and Blueprints – Kids With Sticks […]